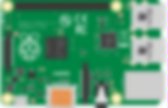
Raspberry Pi. Rasberry Pi. Raspberry pi. Raspberry Pi. Other people's Raspberry Pi pearltrees. Raspberry Pi Tutorials. Raspberry-pi. Pi2Go. Raspberry PI. Raspberry Pi. Raspberry. Raspberry. Proyectos Raspberry Pi. Raspberry Pi. VNC (Virtual Network Computing) - Raspberry Pi Documentation. Raspberry Pi — Teach, Learn, and Make with Raspberry Pi. How to Upgrade to a Raspberry Pi 3. You’ve just received a brand new Raspberry Pi 3 – the latest, most powerful version of the popular mini-computer that has taken the “maker” world by storm.
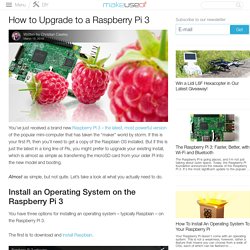
If this is your first Pi, then you’ll need to get a copy of the Raspbian OS installed. But if this is just the latest in a long line of Pis, you might prefer to upgrade your existing install, which is almost as simple as transferring the microSD card from your older Pi into the new model and booting. Almost as simple, but not quite. Let’s take a look at what you actually need to do. Hour of Code. The 3 best starter projects for your Raspberry Pi 3. Raspberry Pi Robots - Basic Motor Control - Episode 1. Raspberry Pi Robots - Obstacle Avoidance - Episode 2. Raspberry Pi Robots - Line Following - Episode 3. Scratch Examples for the Raspberry Pi - GoPiGo. Write your First Robot Program in Scratch. Raspberry Pi Scratch Robot. I found an application for the Raspberry in my classroom!
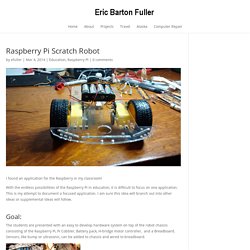
With the endless possibilities of the Raspberry Pi in education, it is difficult to focus on one application. This is my attempt to document a focused application. I am sure this idea will branch out into other ideas or supplemental ideas will follow. Goal: The students are presented with an easy to develop hardware system on top of the robot chassis consisting of the Raspberry Pi, Pi Cobbler, Battery pack, H-bridge motor controller, and a Breadboard. Configuration globale de MyPiDrone et MyPiDrone2 - [MyPiDrone Project] Kev&Phil : QUAD Copter Raspberry PI2/PI3 & Navio+/NAVIO2 controler. Voici les descriptions de nos deux projets :
![Configuration globale de MyPiDrone et MyPiDrone2 - [MyPiDrone Project] Kev&Phil : QUAD Copter Raspberry PI2/PI3 & Navio+/NAVIO2 controler](http://cdn.pearltrees.com/s/pic/th/configuration-mypidrone2-183404236)
Starting with the Raspberry Pi (part 1) Introduction I always wanted to be able to control my electronics and multimedia with a simple and flexible system that could be easily installed and configured.
After working with both PICs and Arduino, I have found the ultimate solution: the Raspberry Pi. Along with PICs and Arduino, Raspberry Pi has in common the low cost and the possibility to be configured as you like, but it is what distinguishes it to fascinate: the Raspberry Pi is a real computer, supporting a real operating system, with all the features to make it extremely easy and fun to work with complex electronic projects.
The real strength of this boards is that we can easily interface electronics with high-level applications, such as a web server. For example, you can develop a website in which you plan garden irrigation, manage the lights of home or read the load voltage. The HummingBoard Is a More Powerful, Upgradeable Raspberry Pi. Celebrate Pi Day With These 9 High-Tech Raspberry Pi Hacks. Google and Raspberry Pi join forces to create Coder. Over the last few years, interest in coding (especially for the web) has led to a blossoming of resources that help average people learn how to program from scratch.
Google has decided to join the fun with a new tool called Coder — along with the help of the low-cost Raspberry Pi PC. With Coder, users can develop their own apps for the web and then host them on a miniature server located directly on the Raspberry Pi. The overall cost for the DIY programming project, using Google’s recommended materials, is under $50 — and all of the educational materials are free.
After procuring a Raspberry Pi, eager students simply download information onto an SD card, plug it into the tiny computer, connect to a shared Wi-Fi and access Coder through Chrome. The whole process, according to the developers, takes just 10 minutes. Raspberry juice and Mathematics. Did you ever consider that Rasperry Pi and Mathematica could work together?
I recently wrote an article on the site electroYou about this topic, and I was asked to propose it to the Meccanismo Complesso community . I hope that this article will spark interest for all those who are interested in the world of modeling or even for those who are approaching to the world of Raspberry Pi for the first time.
In this article I will explain what hardware you need, how to download this software, how to install and how to use it. If you are interested, you can download and install the latest release of Mathematica from Wolfram Foundation’s website (it is free), on your Raspberry Pi. It is a non-limited version, with all 5000 and beyond Mathematica functions working without expire and with special features designed specifically for the Raspberry Pi. Raspberry Pi. Table of Contents: The Raspberry Pi is a credit-card-sized computer that plugs into your TV and a keyboard.
It is a capable little computer which can be used in electronics projects, and for many of the things that your desktop PC does, like spreadsheets, word processing, browsing the internet, and playing games. Amazon Dash Button Lamp Control - All. Material List: 1.Raspberry Pi-I would recommend using the new Raspberry Pi 2 or you could use the B/B+.You will also need the basics for it such as a mouse,keyboard, power supply, and display. 2.Amazon Dash Button-Any product button will do, just make sure to not set it up when you get it. 3.PowerSwitch Tail II-This is used by the Raspberry Pi to turn on and off any AC electronic device. 4.SD Card-You will need to install a fresh copy of Raspbian onto it.
Make sure that it is 4GB or more. Control your home appliances from the web – using a Raspberry pi. Prologue I recently moved in a new apartment in which the living room lights could be controlled with a remote.
Having already played with IR signals in order to incorporate remote control to some of my projects I knew that I would probably be able to emulate the signals sent by the original remote and thus operate the lights of my living room from a web based application. Raspberry Pi Bluetooth LE Controller for WS2812B (NeoPixels) - All. Bluetooth Low Energy (aka BLE/Bluetooth 4.0/Bluetooth Smart) is the most recent incarnation of Bluetooth technology developed by the Bluetooth SIG (the organization that maintains the specification).
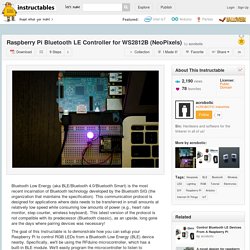
This communication protocol is designed for applications where data needs to be transferred in small amounts at relatively low speed while consuming low amounts of power (e.g., heart rate monitor, step counter, wireless keyboard). This latest version of the protocol is not compatible with its predecessor (Bluetooth classic), as an upside, long gone are the days where pairing devices was necessary! The goal of this Instructable is to demonstrate how you can setup your Raspberry Pi to control RGB LEDs from a Bluetooth Low Energy (BLE) device nearby. Specifically, we'll be using the RFduino microcontroller, which has a built-in BLE module. We'll easily program the microcontroller to listen to messages sent by the Pi and control the LED color accordingly. Let's get started! Using a camera with Scratch on the Raspberry Pi. I needed camera control with Scratch on the Raspberry Pi for a primary school aerial photography project. I added a new python extension for Simon’s ScratchGPIO that allows either the Raspberry Pi camera or a regular USB webcam to be used with Scratch.
Follow Simon’s instructions for installing over on his site. Add your camera – if you’re using the Raspberry Pi camera, follow their instructions here. If it’s a USB camera then just plug it in. Building a Raspberry Pi Robot and Controlling it with Scratch. Happy New Year everyone! Things have been a bit quiet on this blog due to the Christmas rush, and the fact that we’ve been spending time on product development (more on that in a future post). But here at last is the 3rd and final post in our series on the Raspberry Pi robot we […] Welcome to the second part of our series of posts, describing the workshop we ran at the recent Digimakers event at @Bristol. How to Turn a Raspberry Pi into a Low-Power Network Storage Device. Mix together one Raspberry Pi and a sprinkle of cheap external hard drives and you have the recipe for an ultra-low-power and always-on network storage device. Read on as we show you how to set up your own Pi-based NAS.
Why Do I Want to Do This? The benefit of having an always-on network storage device is that it’s extremely convenient to have your data (or backup destination) always accessible to the computers both inside and outside your network. The downside, in most instances, is that you’re consuming a fair amount of power for the convenience. Our office server, for example, runs 24/7 and consumes almost $200 worth of power a year.
Raspberry Pi Projects - Projects to Make with Raspberry Pi. The 3 best starter projects for your Raspberry Pi 3. WTware for Raspberry Pi 2 — thin client operating system. Monitor Your Home With the Raspberry Pi B+ Make Your Own Wireless Printer With A Raspberry Pi. Wireless technology is perhaps the best improvement to home printing for years. Fewer cables, flexibility about where you can put your printer – it’s win-win. Unless you have an older printer. While it might be easy enough to buy a new printer for under $50, you might have spent enough on your last one, and be unable to justify the outlay. Additionally, your old printer might have a special function, or manage duplexing in a particularly satisfying way, to bother replacing it.
The solution, then, is to make it wireless. Benefits Of Wireless Printing If you haven’t already enjoyed the benefits of wireless printing, then this project is definitely the place to start. With a wireless printer you can move your printing into a separate room (perhaps even your shed) and collect your print jobs when they’re complete.
Wireless printing really is about making printing flexible rather than “locking” it to the desk. Top 10 Raspberry Pi Myths and Truths. Raspberry pi News, Videos, Reviews and Gossip - Lifehacker. Everyone wants a slice of Raspberry Pi. It's 9am on a lovely autumn morning at Cern, the European Organisation for Nuclear Research, just outside Geneva. The sun shines on to an open vista of fields and mountains, glistens off nearby lakes. It's an ideal day for cycling, walking, picnicking; almost anything other than messing around with computers in the dark. I am standing in the dark, watching people mess around with computers. Scruffy young men take cables out of plastic carrier bags and plug them into the back of television screens.
They connect up keyboards, slot in SD cards, bung long leads into USB jacks. Still, it's not Cern that we're checking out. You will notice that near every terminal sits a small green circuit board. The Raspberry Pi is a robust, cheap (about £25), low-powered programmable computer. So let's see, shall we? Mickal, who's six, is as charming an advert for the RPi as you will ever meet.
Nancy, seven, is also enjoying herself. Nearby, Thomas, seven, is having a go too. What else? Raspberry Pi NOOBS Setup. To get started with Raspberry Pi, you need an operating system. NOOBS (New Out Of Box Software) is an easy operating system install manager for the Raspberry Pi. Buy preinstalled SD card SD cards with NOOBS preinstalled are available from many of our distributors and independent retailers, such as Pimoroni, Adafruit and The Pi Hut.
For older models of Raspberry Pi, you’ll need a full-size SD card; for the Pi Zero, A+, B+, Pi 2 and Pi 3 you’ll need a micro SD card. Raspberry Pi 3 - How to Configure Wi-Fi and Bluetooth. Now that Raspberry Pi 3 has been released with wireless capabilities including Wi-Fi and Bluetooth, I thought I’d write a quick guide in order to get up and running. This guide includes setting up the Wi-Fi via the graphical user interface (GUI) and command line (CLI), connecting a Bluetooth keyboard, and connecting a Bluetooth speaker to play audio. The following examples will also work with Raspberry B+ and Raspberry Pi 2 using universal serial bus (USB) dongles. Setting up Wi-Fi via the Graphical Interface This process is probably the most effective method of connecting to your Wi-Fi and also the quickest. First of all, before we get started, please make sure you are running the latest Raspberry Pi operating system; if you’re not sure, then you can head to the Downloads section on the Raspberry Pi website.
Follow these steps: 1. Raspberry Pi - Teach, Learn, and Make with Raspberry Pi. Raspberry Pi Projects.