

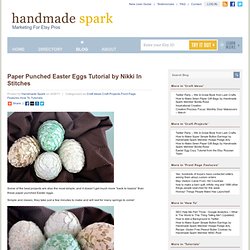
Paper Punched Easter Eggs Tutorial by Nikki In Stitches. Some of the best projects are also the most simple, and it doesn’t get much more “back to basics” than these paper punched Easter eggs.
Thanksgiving Wreath - Easy Thanksgiving Crafts at WomansDay.com. At this time of year, it’s easy to feel like a chicken (or, uh, turkey) with her head cut off.
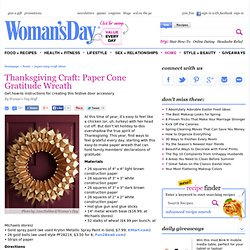
But don’t let holiday to-dos overshadow the true spirit of Thanksgiving. This year, find ways to feel grateful every day, starting with this easy-to-make paper wreath that can hold family members’ declarations of gratitude. Materials • 26 squares of 4" x 4" light brown construction paper • 26 squares of 3" x 3" white construction paper • 26 squares of 3" x 3" dark brown construction paper • 26 squares of 2" x 2" white construction paper • Hot-glue gun and glue sticks • 14" metal wreath base ($16.99; at Michaels stores) • 52 stalks of wheat ($4.99 per bunch; at Michaels stores) • Gold spray paint (we used Krylon Metallic Spray Paint in Gold, $7.99; KMart.com) • 26 gold balls (we used style PF28214, $3.50 for 6; Fun2Bead.com)• Strips of paper Directions 1. 2. 3. 4. 5. 6. 7. Crayon Hearts - Martha Stewart Crafts - StumbleUpon. Craftaholics Anonymous - StumbleUpon.
How make tiny candles using old bottle caps!
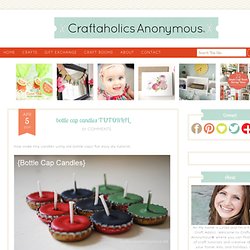
Fun easy diy tutorial. these tiny candles are a really fun to make and come together quickly. AND you can up-cycle several materials in the process, which makes this a fabulous Earth Day craft :) {Earth Day is April 22} to make these colorful tiny candles, i used several materials that usually end up in a land fill: bottle caps, broken crayons, and empty soup cans. the only thing i bought to make them was the pre-waxed wicks which cost me $1.50 for a set of 12. these make a great kid craft {with supervision, of course!}
How to Make Bottle Cap Candlessupplies: bottle caps, crayons {or wax}, pre-waxed wicks, soup cans, wax paper {optional}, small cooking pan, scissors, and water remove paper from crayons. you can also use candle wax if you wanted. put crayons in clean, empty soup cans. take your pre-waxed wicks and… {every}nothing wonderful: Tutorial: Repurposed Envelopes (From Magazines to... - StumbleUpon. Note: If you like this idea, be sure to check out how to make paper ruffles to add to your envelopes!
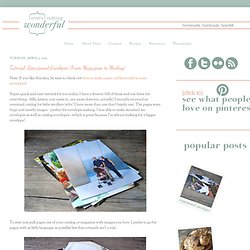
Super quick and easy tutorial for you today. I have a drawer full of these and use them for everything - bills, letters, you name it...my mom does too, actually! I recently received an oversized catalog for baby strollers (why? I have more than one that I barely use). The pages were huge and mostly images - perfect for envelope making.
To start just pull pages out of your catalog or magazine with images you love. Other supplies you'll need: Pencil Glue - glue stick or craft glue - whichever you prefer Old envelope or envelope template. If this is a project you see yourself recreating in the future or with other papers you could invest in an envelope template kit, or you can print templates (you'll need to print at 100% on a larger format printer) from Designer's Toolbox on a heavy stock (mount to board for a longer lasting template). Next, cut out along the lines. Weaving a wicker basket; the most comprehensive basket tutorial on the... - StumbleUpon.
&jones design company - StumbleUpon. Welcome to flower week – five days of simple and delightful flower projects.

I could probably do three weeks of flowers because there are so many different ways to create them, but I’ve limited it to five of my current favorites. Before we get started, let me make a few disclaimers: 1. I find inspiration for projects all over the place {online, in shops, in magazines}, then figure out how to re-create them on my own. Each of these projects are my adaptation of something I’ve seen elsewhere. 2. 3. Okay, so let’s begin. Cinnamon Stick Candles {fall ideas} I couldn’t resist linking up to Kate’s craft party so this afternoon I quickly made a centerpiece for the dining room table.
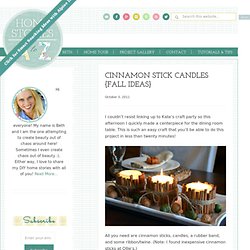
This is such an easy craft that you’ll be able to do this project in less than twenty minutes! All you need are cinnamon sticks, candles, a rubber band, and some ribbon/twine. (Note: I found inexpensive cinnamon sticks at Ollie’s.) Place your rubber band around your candle and then place your sticks under the rubber band.
To add interest, I varied the height and also varied whether the line on the cinnamon sticks faced outwards or toward the candle. Once the entire candle is covered in sticks, wrap twine or ribbon around the rubber band in order to conceal it. Here you can see the entire casual fall tablescape. I placed a little fun pumpkin on each setting with a hand stamped leaf that I had created for a different project last fall. These candles will transition beautifully into winter with just the addition of some holly berries. Design*Sponge - StumbleUpon.
I don’t know what it’s like in your neighborhood, but when I step outside here in Oakland, I sense it right away: Fall is in the air!

I’m lucky enough to have a few turning trees on my street, so I don’t miss out entirely on the brilliant autumn colors I remember from growing up in NH. Speaking of brilliant autumn colors, I’m thrilled to share this stunning maple leaf rose bouquet DIY from a fellow Kate — clay, fiber and paper artist Kate Hust. Kate first learned how to make these a few years ago from a retired art teacher in her community, and now they’ve become an annual tradition when fall rolls around.