
Setting up a Raspberry Pi as a dashboard server with Dashing. Why the heck did I do this?
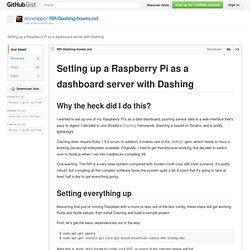
I wanted to set up one of my Raspberry Pi's as a data dashboard, pushing sensor data to a web interface that's easy to digest. I decided to use Shopify's Dashing framework. Dashing is based on Sinatra, and is pretty lightweight. Dashing does require Ruby 1.9.3 to run. In addition, it makes use of the execjs gem, which needs to have a working Javascript interpreter available. One warning: The RPi is a very slow system compared with modern multi-core x86-style systems. Setting everything up Assuming that you're running Raspbian with a more-or-less out-of-the-box config, these steps will get working Ruby and Node setups, then install Dashing and build a sample project. First, let's get the basic dependencies out of the way: $ sudo apt-get update $ sudo apt-get install git-core git build-essential libssl-dev zlib1g-dev After this is done, don't forget to config your GIT, or some of the patches below will fail.
Time to install node (based on this gist) Raspberry Pi web server - Home. A Collection of Interesting Ideas...: Raspberry Pi temperature logging using DS18B20 and Google Docs. The Raspberry Pi does not, unfortunately, have an ADC (Analog-to-Digital converter) and this excludes most off the shelf temperature sensors as they return an analog signal.
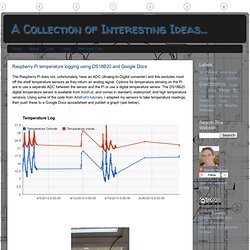
Options for temperature sensing on the Pi are to use a separate ADC between the sensor and the Pi or use a digital temperature sensor. The DS18B20 digital temperature sensor is available from Adafruit, and comes in standard, waterproof, and high temperature versions. Using some of the code from Adafruit's tutorials, I adapted my sensors to take temperature readings, then push these to a Google Docs spreadsheet and publish a graph (see below). Temperature Inside Hardware The hardware requirements are very basic. The sensors are fairly unique in that they can be wired in parallel, and as many sensors as desired can be added to the system. The wiring diagram is - And in reality - To check that the sensor it working, open a terminal then enter the following. You should see an output of two lines of text. Python Code. Arduino - HomePage. Experiences with the Raspberry Pi micro computer.
Xian has done a great job on this LEGO rover.
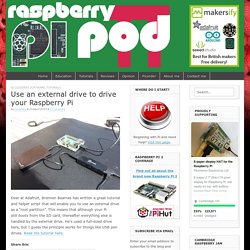
It utilises Lego Power Functions and the Raspberry Pi and can be controlled via a web browser. He explains his build, with block diagrams and details on wiring and explains his use of the Navio board for controlling things. Nice job, Xian. Read about it here. The guys at Canadian company Roboteurs are currently running a Kickstarter campaign to fund their new stepper motor driver board – the SlushEngine. Controls up to 4 bi-polar stepper motorsMax 7A / motor9-35 V DC operating range1-128 microstepping capabilitiesIntegrated motion engine in stepper driver4 limit switch inputs4 general purpose industrial inputs4 general purpose industrial outputs (3A / 24V)8 additional logic level I/OThermistor temperature sensingUEXT expansion connectorRaspberry Pi fused power source The board is currently available to Earlybirds at $190 (Canadian Dollars) plus delivery, which works out at approximately £125 delivered.
An ARM GNU/Linux box for $25. Take a byte! Pimoroni Shop - Raspberry Pi, Arduino, Adafruit, and other accessories for makers, hackers, kids, educators, and learners. Pi Supply - Home of the Raspberry Pi Power Supply Switch.