

- StumbleUpon. RIT Dye Tutorial. It happens to me every year.
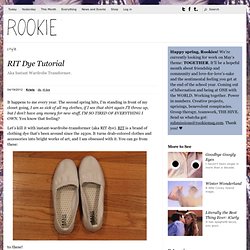
The second spring hits, I’m standing in front of my closet going, I am so sick of all my clothes, if I see that shirt again I’ll throw up, but I don’t have any money for new stuff, I’M SO TIRED OF EVERYTHING I OWN. You know that feeling? Let’s kill it with instant-wardrobe-transformer (aka RIT dye). RIT is a brand of clothing dye that’s been around since the 1930s. It turns drab-colored clothes and accessories into bright works of art, and I am obsessed with it. To these! And it’s not even hard. Now, there are other kinds of clothing dye out there, but I chose RIT because it’s got simple instructions on the back of the package, it costs about $3 per box, and you can find it almost everywhere in the U.S. Tutorial Tuesday: Leather Foldover Clutch Purse. If you want a foldover leather clutch you could buy this unlined one for $150.
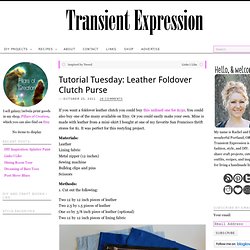
You could also buy one of the many available on Etsy. Or you could easily make your own. Mine is made with leather from a mini-skirt I bought at one of my favorite San Francisco thrift stores for $1. It was perfect for this restyling project. Materials: Leather Lining fabric Metal zipper (12 inches) Sewing machine Bulldog clips and pins Scissors Methods: 1. Make This - Stab Bound&Journal - Luxe DIY. Make a hand bound journal with elaborate side stitching for yourself or as a gift.
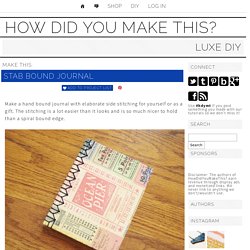
The stitching is a lot easier than it looks and is so much nicer to hold than a spiral bound edge. Supplies and Equipment – sharp utility knife and cutting surface BE VERY CAREFUL WITH THE SHARP BLADE – rulers – drill with 1/16th inch bit OR a small paper punch BE VERY CAREFUL WITH POWER TOOLS – fancy cover paper – I used Cavallini Vintage Tickets Wrapping Paper – 20″ x 28″ – 1 sheet of 8.5×11 for endpapers (this can be fancy or the same paper as your pages) – 10 sheets of 8.5×11 paper for pages – 3 yards of embroidery floss – mat board – I used Crescent No. 33 White & Cream Smooth Mat Board.
Arrow bracelet - #2 Friendship Bracelet Tutorial. After you've done a few successful strip bracelets (pattern 1), you're ready to do the arrow one (chevron, #2).
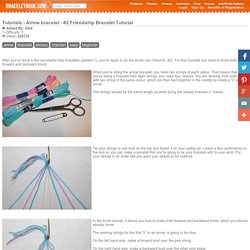
For this bracelet you need to know both forward and backward knots. When you're doing the arrow bracelet, you need two strings of each colour. That means that when you're doing a bracelet from eight strings, you need four colours. You are working from both sides with two string of the same colour, which are then tied together in the middle to create a 'V' or an arrow. The Hunt. Friendship Bracelets.
Macraméd friendship bracelets were all the rage when I was growing up in the eighties.
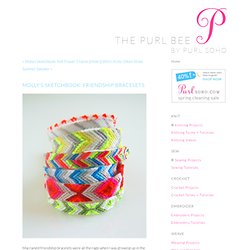
All the girls at my school would obsessively make them for one another in a dizzying variety of colors, widths, and patterns. It's amazing, thinking back, that such young girls could make such beautifully intricate accessories. I, of course, tried my hand at making them as well. I would ride my bike down to the five-and-dime store and pick out the most sophisticated color combinations of embroidery floss I could find, but when it came to the actual macramé I never got beyond plain stripes. There was nothing wrong with plain stripes, except that the other girls seemed so much more advanced with their diamonds and chevrons. Fast forward 20 years: Purl Soho started carrying DMC Cotton Embroidery Floss in every conceivable color (including fluorescents! Making friendship bracelets is a surprisingly easy craft, and best of all, in the end you'll have a bunch of cute summer bracelets to give to your pals. Geeky DIY Women Shoes.
DIY your own Killer Comic Book High Heels by “My Polite Indignation Knows No Bounds” will cost you around £15 and you will spend around Eight hours per shoe.

Requirements: Vinyl Shoes Mod Podge (Buy from Amazon US | UK ) Comics (Buy from Amazon US | UK ) Buy Mod Podge to glue the comic from Amazon US | UK. {Valentines day} pixel-y popup card. I‘ve been scratching my head trying to come up with a card for my hubby {AKA the non-romantic type}.
I finally decided to make this pixely popup heart card! They are really minimal (which I love) and take about 20 minutes to make (that includes the card, insert and envelope). You can even make some pixely confetti to put inside the card (if you are a big kid like me!). Full instructions and printable templates below! (BTW I remember seeing something similar in a popup book years ago. How to 1. (If you have a cutting machine then see note at end of post!) Cut along the black lines and score the grey lines. 3. 5. 7. 31 Insanely Easy And Clever DIY Projects. DIY Découpage Floral Bag - Honestly WTF.
When H&M asked us to DIY a boho-inspired item for their summer issue, découpage was the first thing that came to mind.
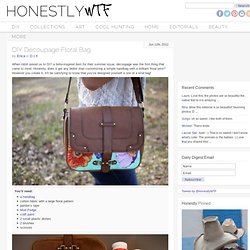
Honestly, does it get any better than customizing a simple handbag with a brilliant floral print? However you create it, it’ll be satisfying to know that you’ve designed yourself a one of a kind bag! You’ll need:a handbagcotton fabric with a large floral patternpainter’s tapeMod Podgecraft paint2 small plastic dishes2 brushesscissors Start by taping off the edges and hardware of the handbag. Squeeze a dollop of colored craft paint into a small disposable container. Allow the first layer to dry completely. While the paint dries, carefully cut out a handful of flowers from the fabric.
Arrange them onto the painted section of the bag. Remove the painter’s tape when the Mod Podge has dried clear and your floral handbag is complete!