
Arduino Basics: 433 MHz RF module with Arduino Tutorial 1. If you are looking for a way to communicate between Arduinos, but don't have much cash at your disposal, then look no further.

These RF modules are not only affordable, but easy to use. They are much easier to set up than an XBee, plus you can use them without the need of a special shield. Before you rush out and buy a ton of these modules, make sure that you are not breaking any radio transmission laws in your country. Do your research, and buy them only if you are allowed to use them in your area. There are a few [OPTIONAL] libraries that can be used to help you and your particular project. Also if you are looking for an easy way to record the signals and play them back without a computer - then jump to this tutorial.
RFXduino: Wireless Ethernet/Internet over nRF24L01+ modules for Arduinos! - Embedded Coolness.com. Créer son réseau de senseurs et mini-devices WiFi avec Arduino et RN-171-XV WiFly / HackSpark, l'électronique facile ! Cette entrée a été publiée le 12 mars 2014 par Jonathan de HackSpark.
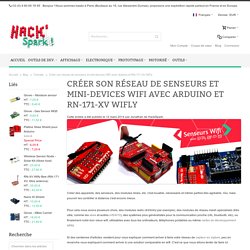
Créer des appareils, des senseurs, des modules relais, etc. c'est louable, nécessaire et même parfois très agréable. Oui, mais pouvoir les contrôler à distance c'est encore mieux. Pour cela nous avons plusieurs choix, des modules radio (433mhz par exemple), des modules de réseau mesh spécialisés (très utile, comme les xbee et autres nrf24l10), des systèmes plus généralistes pour la communication proche (nfc, bluetooth, etc), ou finalement notre bon vieux wifi, utilisables avec tous les ordinateurs, téléphones portables ou même cartes de développement ARM. First Impression on the ESP8266 Serial-to-WiFi Module « RAYSHOBBY.NET. Continuing from my previous blog post about Hi-Link HLK-RM04 module, I have finally received the ESP8266 Serial-to-WiFi module that I’ve been waiting for.
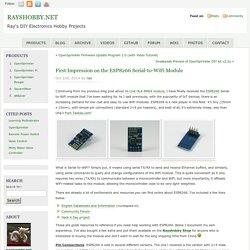
New Chip Alert: The ESP8266 WiFi Module (It’s $5) First Impression on HLK-RM04 Serial-to-WiFi Module « RAYSHOBBY.NET. As the Internet-of-Things (IoT) are becoming more and more popular, there is an increasing demand for low-cost and easy-to-use WiFi modules.
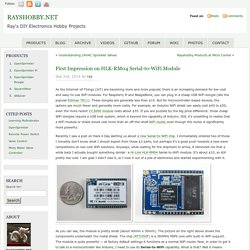
For Raspberry Pi and BeagleBone, you can plug in a cheap USB WiFi dongle (like the popular Edimax 7811). These dongles are generally less than $10. But for microcontroller-based devices, the options are much fewer and generally more costly. First Impression on the ESP8266 Serial-to-WiFi Module « RAYSHOBBY.NET. ArduDroid: Simple Bluetooth control for Arduino and Android - TechBitar. Ets Loletto Louis et fils - Fabriquant, installateur depuis 1975 de menuiseries bois, PVC et alu, fermetures du bâtiment, agencements à Haubourdin dans le nord (59) Distance sensing with ultrasonic sensor and Arduino - Tautvidas Sipavičius. I’ve always wanted to play around with Arduino Ultrasound sensor, but the idea of spending 30$ + shipping on a device that I may not use always sounded not that great.
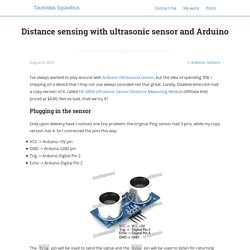
Luckily, Dealextreme.com had a copy version of it, called HC-SR04 Ultrasonic Sensor Distance Measuring Module (Affiliate link) priced at $4.60. Not so bad, shall we try it? Plugging in the sensor Only upon delivery have I noticed one tiny problem: the original Ping sensor had 3 pins, while my copy version has 4. Arduino Bluetooth connection with JY-MCU and SoftwareSerial. My previous post covers the basics of setting up a Bluetooth connection between an Arduino Uno and an Android phone using the JY-MCU Bluetooth module.
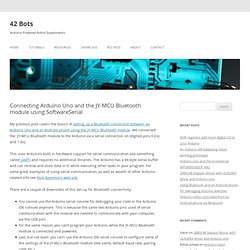
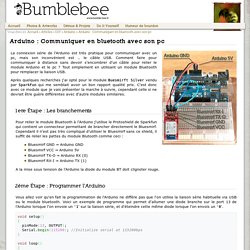
We connected the JY-MCU Bluetooth module to the Arduino via a serial connection on (digital) pins 0 (rx) and 1 (tx). This uses Arduino’s built in hardware support for serial communication (via something called UART) and requires no additional libraries. The Arduino has a 64 byte serial buffer and can receive and store data in it, while executing other tasks in your program. Bumblebee - Arduino : Communiquer en bluetooth avec son pc. La connexion série de l'Arduino est très pratique pour communiquer avec un pc, mais son inconvénient est .. le câble USB.
Jubito. Automated Control of an Android Device with Python - Dustin Ingram. Intro As mentioned in my previous article, Device Screenshots with the Android Debug Bridge, I’m currently working on an application which required the ability to get a live screenshot of my physical Android device.
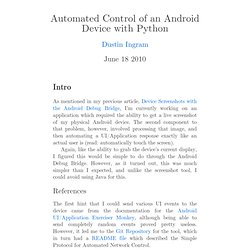
The second component to that problem, however, involved processing that image, and then automating a UI/Application response exactly like an actual user is (read: automatically touch the screen). Again, like the ability to grab the device’s current display, I figured this would be simple to do through the Android Debug Bridge. However, as it turned out, this was much simpler than I expected, and unlike the screenshot tool, I could avoid using Java for this. References The first hint that I could send various UI events to the device came from the documentation for the Android UI/Application Exerciser Monkey, although being able to send completely random events proved pretty useless. Using the Network Control Protocol. Control your Arduino Projects from Android with Annikken Andee.
If you’re hacking Arduino and the phone in your pocket is an Android, then check out Annikken Andee.
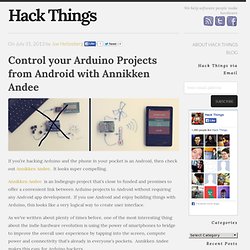
It looks super compelling. Annikken Andee is an Indiegogo project that’s close to funded and promises to offer a convenient link between Arduino projects to Android without requiring any Android app development. If you use Android and enjoy building things with Arduino, this looks like a very logical way to create user interface. As we’ve written about plenty of times before, one of the most interesting thing about the indie hardware revolution is using the power of smartphones to bridge to improve the overall user experience by tapping into the screen, compute power and connectivity that’s already in everyone’s pockets.
Python. Arduino and Python Talking to Arduino over a serial interface is pretty trivial in Python.
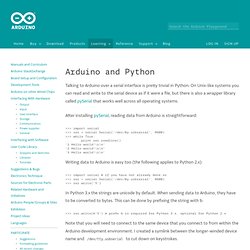
On Unix-like systems you can read and write to the serial device as if it were a file, but there is also a wrapper library called pySerial that works well across all operating systems. After installing pySerial, reading data from Arduino is straightforward: >>> import serial >>> ser = serial.Serial('/dev/tty.usbserial', 9600) >>> while True: ... print ser.readline() '1 Hello world! Python. Souliss%20User%20and%20Custom%20Interfaces. Android tutorial part 2 : Control Arduino from Android. 2. Send Message to OLED Display This is the continuous from above. This part will send data from android to OLED display connected to Arduino. Complete the above steps before continuing below. Hardware set for this part. Pin Layout.
Codebendercc/WebSerial. Read an Arduino via REST and upload value to Thingspeak. Arduino RestServer Library [restful architecture] « Julio Terra. This simple library was designed to enable your Arduino to respond to RESTful resource requests via Ethernet or Serial connections. Unlike most existing RESTful libraries for the Arduino, RestServer enables you to describe your own resources and to define how the Arduino should respond to each resource request rather than automatically map resources to pin numbers on the Arduino. The intent of this design approach is to embed knowledge about the resources available on a given Arduino locally on the device itself.
This local knowledge enables the Arduino to inform client devices about the resources are available, along with relevant information about the resources such as resource range and types of requests supported. Here is a flowchart that describes how the RestServer library works: Arduino Ethernet Shield Simple REST API Example. Arduino Data Web Server. /* Arduino Data Web Server Performs actions on Arduino and/or returns data from Arduino to a webbrowser request URL: - To turn on LED on pin 8, use web browser to visit your Arduino via: - To turn it off send: - To read analog0 value, send: IMPORTANT: Commands are case sensitive, but I wrote this as simple as possible so it can be easily adapted to your needs.
Have fun! Created Sept 17, 2010 by Hari Wiguna, g33k.blogspot.com*/ #include <SPI.h>#include <Ethernet.h>#include <string.h> // MAC address can be anything that is unique within your network.// IP is the address the Arduino Ethernet Card would respond to. Server server(80); // Port 80 is http. //-- Commands and parameters (sent by browser) --char cmd[15]; // Nothing magical about 15, increase these if you need longer commands/parameterschar param1[15];char param2[15]; void setup(){ Ethernet.begin(mac, ip); server.begin(); Serial.begin(57600); SetupSamplePorts();}
Glo Control – Android App & Arduino Controller. SupportedHardwarePlatform - souliss - Supported Hardware Platform - Distributed Framework for Home Automation and Internet of Things. Souliss is mostly written in C and can be ported easily to any microcontroller and compiler, although is released to be compiled directly with the Arduino IDE and then support AVR (ATmega) platforms. You can run Souliss over different boards with support for many transceiver and get a network in few steps. The following list board, transceiver and I/O board that are directly supported in Souliss, for those are available examples to run it in minutes:
SoulissApp. SoulissApp let you to be in touch with your home devices and Things directly from Android smartphone. It is part of the open-source Souliss project. Using SoulissApp you can have control of: - Light LED Strip and standard bulb,- Motorized windows and HVAC,- Read enviroments data (temperature, humidity and others). Generally whatever appliance runs behind a supported microcontroller, like your Arduino, can be a Souliss enabled device. You'll need a deployed Souliss installation in order to use this app profitably, get code and instruction on project website www.souliss.net. Android et arduino. De Wikidebrouillard. Android et arduino. BoardBT. (redirected from Main.ArduinoBoardBluetooth) This page is temporarily OFFLINE Overview The Arduino BT is a microcontroller board originally was based on the ATmega168, but now is supplied with the 328 (datasheet) and the Bluegiga WT11 bluetooth module (details and datasheet [pdf]).
It supports wireless serial communication over bluetooth (but is not compatible with Bluetooth headsets or other audio devices). It has 14 digital input/output pins (of which 6 can be used as PWM outputs and one can be used to reset the WT11 module), 6 analog inputs, a 16 MHz crystal oscillator, screw terminals for power, an ICSP header, and a reset button. Amarino - "Android meets Arduino" - Home. Communication Android-Arduino en Bluetooth. Les nouveaux smartphones tournant sous Android ( le système de google ) sont Open source, permettant à tout ceux qui le souhaitent de créer leur propre application.
Bien entendu, certains se sont attaqués à l’oeuvre afin de créer une application permettant de se connecter en Bluetooth au Arduino et d’exploiter les fonctions offertes par le téléphone. On peut par exemple contrôler des moteurs grâce au gyroscope, utiliser l’écran tactile , la boussole , l’état du téléphone et plus encore ! C’est très simple. Tutorial: Send SMS from your Arduino using an old Motorola cell phone. Connect an Arduino to a $7 Bluetooth Serial Module. Envoyer des SMS avec Arduino » Gr4nth.
Je cherche à donner à mon serveur la possibilité d’envoyer des SMS via une carte Arduino, les solutions ne manquent pas. Par exemple on peut utiliser l’API d’un service WEB existant. Mais dans ce cas on n’utilise que l’ADSL et si celle-ci vient à lâcher … pas moyen d’envoyer de SMS.
PAW : Réception de SMS et appel d'une API en HTTP. Après avoir vu dans le dernier article concernant le serveur PAW à installer sur un Smartphone Android comment on pouvait faire pour permettre de recevoir des SMS et de les utiliser comme déclencheur d’actions, nous aborderons aujourd’hui le moyen de transmettre ces ordres reçus par SMS en HTTP à une API. L’API peut être celle d’un service sur Internet ou bien encore cette d’une box domotique.