
Arduino IR Receiver - Part 2. Nunchuck Kit - Digistump. The Nunchuck Shield Kit allows you to build a Digispark shield which connects a Nintendo Wii Nunchuck controller to the Digispark development board.
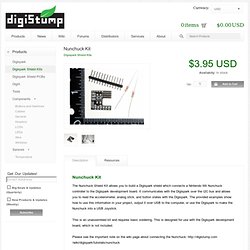
It communicates with the Digispark over the I2C bus and allows you to read the accelerometer, analog stick, and button states with the Digispark. The provided examples show how to use this information in your project, output it over USB to the computer, or use the Digispark to make the Nunchuck into a USB Joystick. This is an unassembled kit and requires basic soldering. This is designed for use with the Digispark development board, which is not included.
Please see the important note on the wiki page about connecting the Nunchuck: Arduino Tutorials « t r o n i x s t u f f. Serial MIDI. How to use it: All Platforms The SM is basically a traffic cop, you know the type that would direct traffic in an intersection with white gloves ...
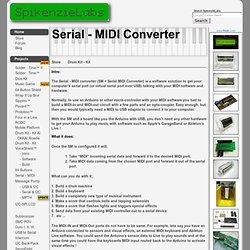
Launch the SM and follow along with these steps. Step 1. Choose a serial port. This is the serial port that will be used for both serial TX and RX. Step 2. This is the source of MIDI data that will be sent out of the serial port. Step 3. Arduino ATtiny workshop. Project: Programmable Arduino Sound Device Schematic: Kit: 1 Attiny85 or ATtiny451 Speaker1 Battery holder1 3V Lithium coin cell battery1 Photoresistor1 22 K Ohm Resistor (red-red-orange) to go with photoresistor Consumables: wood, nails, wire, solder, etc.
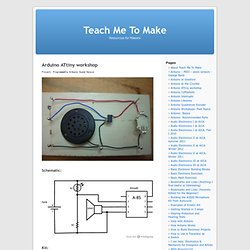
Tools hammer, wire cutters, wire strippers, needle nose pliers, soldering iron, etc. Communication with Tiny's. When you use the Arduino with the Arduino IDE, you are used to use Serial.print and the serial monitor, when you want to get some debug information.
Something like this: void setup() { Serial.begin(9600); } void loop() { Serial.println("Testing.. "); } If you are using one of the tiny's things are a bit different, but you also get more options. Getting Started with the ATtiny85 Chip in Ubuntu Linux. Those of you that read this blog know that my talents (and education) skews to the mechanical side of “hacking” or “making.”
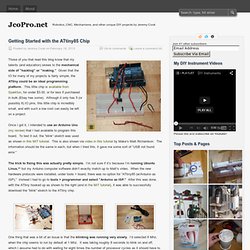
Given that the IO for many of my projects is fairly simple, the ATtiny could be an ideal programming platform. This little chip is available from Sparkfun, for under $3.00, or for less if purchased in bulk (Ebay has some). Although it only has 5 (or possibly 6) IO pins, this little chip is incredibly small, and with such a low cost can easily be left on a project. Arduino ATtiny workshop. Programming Attiny2313 with Arduino Uno. Using Arduino with ATTiny's. I really like the Arduino IDE.
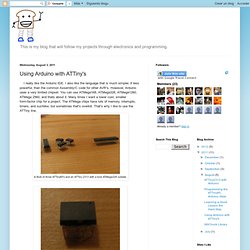
I also like the language that is much simpler, if less powerful, than the common Assembly/C code for other AVR's. However, Arduino uses a very limited chipset. You can use ATMega168, ATMega328, ATMega1260, ATMega 2560, and thats about it. Many times I want a lower cost, smaller form-factor chip for a project. The ATMega chips have lots of memory, interrupts, timers, and suchlike, but sometimes that's overkill.
You have already realized that you can't use the ATTiny chips in Arduino. So first, download this core file: attiny45_85.zip (I got it here. Now, navigate to that folder. Hmmm... no hardware folder. » ATtiny45/85 Servo Library Cunning Turtle. Recently I worked on a project where I wanted to control a servo using an ATtiny85.
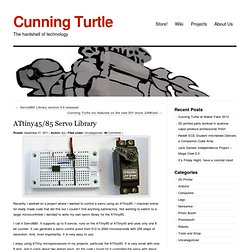
I checked online for ready made code that did this but I couldn’t find anything satisfactory. Not wanting to switch to a larger microcontroller I decided to write my own servo library for the ATtiny85. I call it Servo8Bit. It supports up to 5 servos, runs on the ATtiny85 or ATtiny45 and uses only one 8 bit counter. It can generate a servo control pulse from 512 to 2560 microseconds with 256 steps of resolution. Programming ATtiny with the Arduino IDE.
The assignment for this week is to read a microcontroller datasheet and to program your Hello Button + LED board from week 7 to do something, in as many different programming languages as possible.
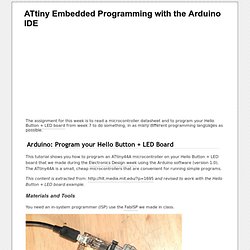
Arduino: Program your Hello Button + LED Board This tutorial shows you how to program an ATtiny44A microcontroller on your Hello Button + LED board that we made during the Electronics Design week using the Arduino software (version 1.0). The ATtiny44A is a small, cheap microcontrollers that are convenient for running simple programs. This content is extracted from: and revised to work with the Hello Button + LED board example.
Materials and Tools You need an in-system programmer (ISP) use the FabISP we made in class. ATmega and ATtiny Basic Hardware. Introduction The AVR is similar to every other microcontroller in that is has a clock, I/O ports, a power supply or two, and needs to be physically mounted to something to keep the circuit from falling apart.
These topics will be briefly covered here for those who are not familiar with them. Power Supply. Arduino IDE and ATtiny45 - Elettronica Arduino Esperimenti. ****Upgraded 01-03-2010 ***** Now it works also in Arduino 0018 IDE attention to the new position of cores ******** ****Upgraded ***** found an error on the schematic, corrected ******* not for newbies ****** you MUST have experience with AVR chips and a good relationship with soldering iron ****** Few weeks ago out of curiosity (and by the way the need to have a simple way to program ATTiny45 for simple tasks) I started to look into adding ATtiny45 as processor into Arduino IDE.
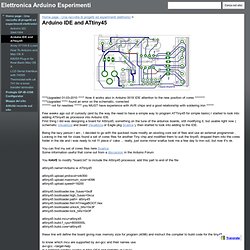
First thing I did was designing a board for Attiny45, something on the tune of the arduinos boards, still modifying it, but usable right now ( schematic Visualizza and board Visualizza or Eagle pkg Scarica ), then started to look into adding to the IDE. Being the lazy person I am , I decided to go with the quickest route modify an existing core set of files and use an external programmer . You can find my set of cores files here Scarica.