
Uploading a mesh model. Prerequisites Before you can upload mesh objects, you must: Have payment information on file.

You can add payment information by visiting the Billing Information section of your Second Life account page.Complete the Mesh IP Tutorial (if you're using the Aditi beta grid, click here instead), which verifies your knowledge of intellectual property rules. Be sure you own the rights or have permission from the rights owner before uploading your mesh content. Violations of intellectual property rights can result in the suspension or termination of your Second Life account and may even cause the permanent revocation of your ability to upload mesh objects! You may check your mesh upload status at any time by visiting your account page on the Second Life website. Cost to upload There is a Linden dollar fee to upload a model; the fee depends on the model's complexity. GETTING STARTED: Uploading your first model.
Avatar Databank - Upper Body Data. PST to EST Converter - Convert Pacific Time to Eastern Time. Free textures, Photoshop brushes. Avatar UV Texture "Templates" for use in Linden Lab's Second Life - Tutorial © Robin Wood 2009. <p class="noScript">I notice you have Javascript turned off.
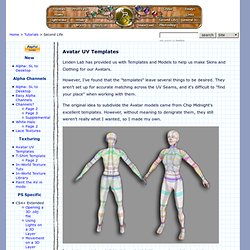
Unless you did that to print, the page is more fun if you turn it on. Thanks! </p> Linden Lab has provided us with Templates and Models to help us make Skins and Clothing for our Avatars. However, I've found that the "templates" leave several things to be desired. The original idea to subdivide the Avatar models came from Chip Midnight's excellent templates. I took the models, subdivided them in LightWave, and used the tools there to make Vector UV Maps for all the parts. Then I added some things in Adobe Illustrator to get maps that are much easier for me to work with. These have the non-subdivided polygons in different colors for each map, so you can tell at a glance which portion of the map you are working on. Most importantly, I think, I've kept the original maps as Vector Smart Objects, which you can use if you have Adobe CS2 or better. I have provided several ways to download these files, in several different formats.
Blender 3D: Noob to Pro. How to Create Folds & Wrinkles in SL Clothing. How to Create Wrinkles in Clothing In order for clothing to look natural in Second Life, you must have some folds or wrinkles in it.
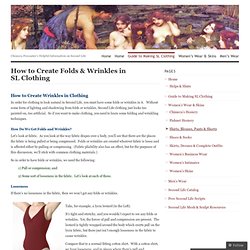
Without some form of lighting and shadowing from folds or wrinkles, Second Life clothing just looks too painted-on, too artificial. So if you want to make clothing, you need to learn some folding and wrinkling techniques. How Do We Get Folds and Wrinkles? Let’s look at fabric. So in order to have folds or wrinkles, we need the following: 1) Pull or compression; and 2) Some sort of looseness in the fabric. Looseness If there’s no looseness in the fabric, then we won’t get any folds or wrinkles.
Take, for example, a lycra leotard (to the Left). It’s tight and stretchy, and you wouldn’t expect to see any folds or wrinkles. Compare that to a normal fitting cotton shirt. Pull We know that need have to compression or pull on the fabric to get folds. Let’s look specifically at pull. Well, one type of pull is gravity. Clothing Templates For SL. This guide is a quick introduction providing an overview of the basics when starting to make clothes and starting your fashion store in Second Life.
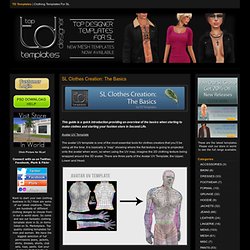
Avatar UV Template The avatar UV template is one of the most essential tools for clothes creators that you’ll be using all the time. It is basically a “map” showing where the flat texture is going to projected onto the avatar when worn, so when using the UV map, imagine the 2D clothing texture being wrapped around the 3D avatar. There are three parts of the Avatar UV Template, the Upper, Lower and Head. Build Tools. How to build objects This page presents a short "crash course" on building in the Second Life® virtual world.
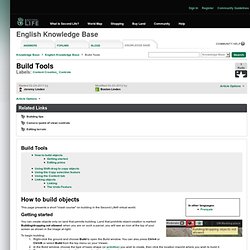
Getting started You can create objects only on land that permits building. Land that prohibits object creation is marked Building/dropping not allowed: when you are on such a parcel, you will see an icon at the top of your screen as shown in the image at right. To begin building: Right-click the ground and choose Build to open the Build window.
Editing prims Use the Build window to move, resize, rotate and otherwise manipulate inworld objects. The video tutorial below discusses working with the building grid, which is useful for precision in building. Turning on the gridAdjusting grid incrementsAdjusting grid snap-to incrementsAltering grid lengthSnapping objects to the grid Moving Right-click an object and select Edit. Rotating Resizing If the Stretch Both Sides option is checked, the object's opposite corner moves in the opposite direction. Entering specific values Advanced edits Linking.