
Easy Wireless Configuration for Raspberry Pi (wicd) : The Unwritten Words. There are a few ways to get wireless working on your RPi, but as far as I can work out, this is the easiest.
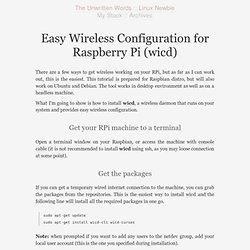
This tutorial is prepared for Raspbian distro, but will also work on Ubuntu and Debian. The tool works in desktop environment as well as on a headless machine. What I’m going to show is how to install wicd, a wireless daemon that runs on your system and provides easy wireless configuration. Get your RPi machine to a terminal Open a terminal window on your Raspbian, or access the machine with console cable (it is not recommended to install wicd using ssh, as you may loose connection at some point).
Get the packages If you can get a temporary wired internet connection to the machine, you can grab the packages from the repositories. Wi-fi on Raspberry Pi, a simple guide - RaspyFi. Since the Raspberry Pi comes only with a wired network, it could be useful for lot of us to get it wi-fi ready.
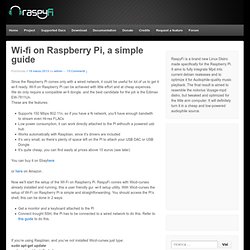
Wi-fi on Raspberry Pi can be achieved with little effort and at cheap expences. We do only require a compatible wi-fi dongle, and the best candidate for the job is the Edimax EW-7811Un. These are the features: Supports 150 Mbps 802.11n, so if you have a N network, you’ll have enough bandwith to stream even Hi-res FLACsLow power consumption, it can work directly attached to the Pi withouth a powered usb hubWorks automatically with Raspbian, since it’s drivers are includedIt’s very small, so there’s plenty of space left on the Pi to attach your USB DAC or USB DongleIt’s quite cheap, you can find easily at prices above 10 euros (see later) You can buy it on Ebayhere <a target="_self" href=" style="text-decoration:none;border:0;padding:0;margin:0;" src=" or here on Amazon .
Now we’ll start the setup of the WI-Fi on Raspberry Pi. Sorry for Italian language, (not being nationalist!!) ติดตั้ง Driver Wireless lan TP-Link TL-WN723N ให้กับ RPi. Driver Wireless lan TP-Link TL-WN723N Credit : [ rtl8188eu drivers for 3.10.25+ (includes driver 8188eu.ko, firmware file rtl8188eufw.bin and README) CODE: SELECT ALL 3.10.25+ #616 - 8188eu-20131223.tar.gz Link to driver files - use date code from list above to download rquired driver CODE: SELECT ALL NOTE: If updating firmware revisions, say from 3.10.23+ to 3.10.24+, and they use the same driver, in this case 8188eu-20131209.tar.gz, you will still need to reinstall the driver on the newer version of Linux, even though the driver has not changed as it will be loaded from a different director by the new Linux revision and you need to install it in the new directory.
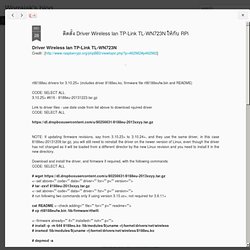
Download and install the driver, and firmware if required, with the following commands CODE: SELECT ALL cat README <--check adding="" file="" for="" p="" readme=""># cp rtl8188eufw.bin /lib/firmware/rtlwifi. Raspberry Pi’s New Wifi Manager Friend WICD. I know of no better way than getting WiFi to connect automatically than using the wonderful wicd-curses package.
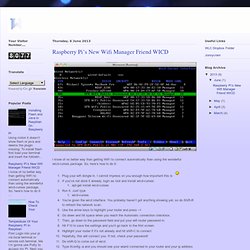
So, here’s how to do it: Plug your wifi dongle in. I cannot impress on you enough how important this is If you’ve not done it already, login as root and install wicd-curses: apt-get install wicd-curses Run it. Just type wicd-curses You’re given the wicd interface. You probably haven’t got anything showing yet, so do Shift-R to refresh the network scan. The beauty of doing it like this rather than via the command line is that wicd runs as a daemon when your Pi starts up and will automatically connect to the network without you doing anything else. How to configure an IP address on Raspberry Pi. The default Raspbian system for Raspberry Pi is set up to get an IP address automatically from the network via DHCP, whether for wired Ethernet or wireless WiFi (via a USB wireless dongle).
Raspbian can support both IPv4 and IPv6. IPv4 is ready for use by default, while IPv6 must be enabled manually. If you want to set up an IP address for wired or wireless networks on a Raspbian system, there are several ways to do it, either in the text (manual) mode or via GUI tools. In this tutorial, I will explain several ways to configure an IP address on Raspbian-powered Raspberry Pi. IPv4 will be used in this tutorial. Wifi-Config: Configure an Automatic DHCP Ip Address on WiFi Network If you want to connect Raspberry Pi to a WiFi access point, you can use a USB wireless network dongle. To get an IP address for a USB WiFi dongle, follow the instructions below. After plugging in your USB WiFi dongle, power up Raspberry Pi.