
Home · grbl/grbl Wiki. 1. Running Grbl Controller on Raspberry Pi. (Thanks to bobt on the Shapeoko forum for providing the basis for these steps) Assuming you have the Raspberry Pi running in the GUI, open a command window (LXTerminal) and perform the following commands.
Bob suggests a 8GB card, but this works on a 4GB fine – I started with about 40% SD card space in-use using the df command and ended up at about 60% use after I got it running. He is running the older 256MB, I am running the newer 512MB pi: NOTE: All these steps in sequence may take close to two hours to complete due to the slow processor on the Pi. sudo apt-get update (required for AlaMode)sudo apt-get install xrdpsudo apt-get install arduino (required for AlaMode) [For normal Pi, this step is optional, but good to have. Make sure that you have your Grbl/Arduino plugged into the pi prior to running the last command: .
Pick /dev/tty/USB0 as your port and click Open. If you wish, you can connect to your Raspberry Pi via RDP from a Windows PC (or Mac): then run as usual. Make Your Own GRBL CNC Pendant : Soldering. Grbl Controller 3.0. Downloads: Souce Code: Record Issues Found: Grbl Controller is software that is designed to send GCode to CNC machines, such as 3D milling machines.
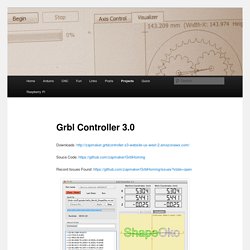
It isn’t super smart, it just needs to give the user a nice way to get commands down to whatever controller they are using. Version 3.0 is has been optimized for the Arduino to control Grbl shields. Grbl Controller is written using the Qt cross-platform libraries. Qt is pretty cool because you can create a nice GUI application for Windows, Mac and Linux. Why am I writing about this? I found a project on github called GrblHoming aka Grbl Controller, which was originally developed by Kosme, which showed promise for running native C++ on Linux, however it needed some attention. I forked the project and started tweaking it to compile and run under Linux. For information on how to build it on all three platforms, check out this multi-page “manual”.
Winder/Universal-G-Code-Sender. Precision by DefaultShapeoko. 3307_0 - NEMA-23 Bipolar 76mm Stepper. Product Description At 12.5 Kg-cm of holding torque, this is a powerful gearless stepper motor.
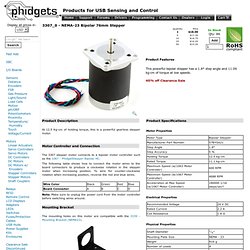
Motor Controller and Connection The 3307 stepper motor connects to a bipolar motor controller such as the 1067 - PhidgetStepper Bipolar HC. The following table shows how to connect the motor wires to the board connectors to produce a clockwise rotation in the stepper motor when increasing position. To wire for counter-clockwise rotation when increasing position, reverse the red and blue wires. Powercord Labs. You’ll have to forgive the odd aspect ratio, but I decided that this photo was too much fun the way it is.
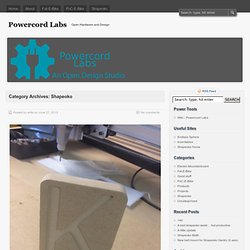
This is the first (mostly) successful cutout from the new Shapeoko build. I burnt out a couple of stepper motors and upgraded the Z axis to a high power nema 23 motor. This photo shows the worst of the issues. Mostly it’s just a combination of the bit walking combined with some play/backlash in the system. Educational, yes? A bad shapeoko week… but productive. This week started with my trying my hand at making some items for a play my wife is working on. After about an hour of cutting, things seemed ok, so I left it to run while I got a couple other things done. The Z motor actually melted my shop vac hose a bit, and the X was rather warm. After that, I took a stab at the Z axis. While waiting for the parts, I added limit switches. I haven’t run into noise on it yet, but I’ve read that a .01uf cap across the input will filter noise. Shapeoko Math. Desktop CNC Mill Kits - Shapeoko. Product Details IMPORTANT NOTE REGARDING SHIPPING: Mechanical Kits have a 1 week lead time, Full Kits have an estimated lead time of 4-5 weeks Shapeoko 2 is a simple, low cost, open source CNC milling machine kit that can be built over a weekend.
Assembly is required before you can use it. This is version 2 of the fastest selling CNC machine in the history of the world. The machine has been under development for the last five years. Note: There is also further information about the machine, kits, and detailed kit contents and other things on this blog post. The community has also put together build instructions Updated features: Larger work area Dual motors on the Y axis, standard Dual Maker Slide on the X gantry improves stiffness Completely redesigned Z axis makes changing bits easier and improves stiffness Open front and back for larger materials.
Mechanical Kit – $299 Full Kit – $649 – $685. Assembly step 15 - ShapeOko. It is outside the scope of the general build instructions to give step by step tutorial on how to use CAD/CAM packages.
We will cover a specific set of opensource packages in succeeding sections (16, 17 and 18) with further discussion in a separate page and additional options in the sidebar. For now, we want to verify that your machine is assembled correctly and is operating as expected. Grbl is a free, open source, high performance CNC milling controller written in optimized C that will run on an Arduino. (source: GRBL wiki) While many DIY CNC machines rely on LinuxCNC (aka EMC2) or Mach3 these approaches require you to dedicate a PC to controlling your CNC machine.