Finding parts. All Circuits. Watch Battery Silver oxide Reference Chart. Dangerous Prototypes · A new open source hardware project every month. Digital Camera Interface. Iñaki Navarro Oiza Report ::: Code ::: Slides Introduction The aim of this project is the development and construction of an interface between a CMOS camera and a computer.
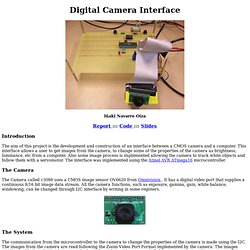
This interface allows a user to get images from the camera, to change some of the properties of the camera as brightness, luminance, etc from a computer. Also some image process is implemented allowing the camera to track white objects and follow them with a servomotor. The Camera The Camera called c3088 uses a CMOS image sensor OV6620 from Omnivision . The System The communication from the microcontroller to the camera to change the properties of the camera is made using the I2C.
Some image process is made to detect the center of a white object. Some pictures taken with the camera Normal Images Panoramic Image More information More information about electronics and robotics can be found in and in. Blog: HOW TO - Getting Started with Arduino. I’ve compiled a brief tutorial on getting started with Arduino for the absolute beginner.

I’ll cover where to learn, what to buy, and where to go for help. Why should you crafters be interested in Arduino? The Arduino platform, more-so than any other way of incorporating electronics into your projects, is geared towards do-it-yourselfers. It’s open source (both on a hardware and software level), so the community plays a large role in its development and improvement. Crafting is a community endeavor; individuals share tips, tricks, techniques, skills, and materials all the time.
Where to learn First and foremost is the Arduino website. What to buy – the absolute basics for learning the platform The board: I recommend the USB Arduino board, pre-assembled, for first-timers. Photo: Sparkfun Some LEDs (light-emmiting diodes): most of the basic tutorials involve lights. Photo: Wikepedia Wire: You’ll need some 22 gauge solid (not stranded) hook-up wire to connect your board to your components. Arduino. The Arduino project gets a core memory accessory. A pair of mathematicians have created an electronics project that nostalgic computer buffs will likely recognise straight away: a magnetic-core memory shield for the Arduino electronics prototyping platform.
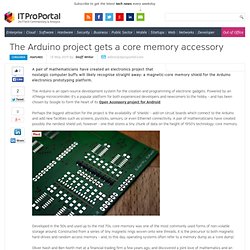
The Arduino is an open-source development system for the creation and programming of electronic gadgets. Powered by an ATMega microcontroller, it's a popular platform for both experienced developers and newcomers to the hobby - and has been chosen by Google to form the heart of its Open Accessory project for Android. Perhaps the biggest attraction for the project is the availability of 'shields' - add-on circuit boards which connect to the Arduino and add new facilities such as screens, joysticks, sensors, or even Ethernet connectivity. A pair of mathematicians have created possibly the nerdiest shield yet, however - one that stores a tiny chunk of data on the height of 1950's technology: core memory. "No, that's a joke. "It's a tempting project," Nash mused.
Electronics Lab - Home. Evil Mad Scientist Laboratories - Resources for getting started. This is a short list of resources for getting started with AVR microcontrollers.
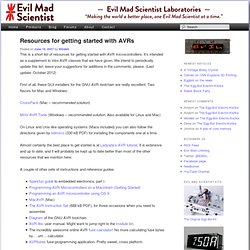
It’s intended as a supplement to intro AVR classes that we have given. We intend to periodically update this list; leave your suggestions for additions in the comments, please. (Last update: October 2012) First of all, these GUI installers for the GNU AVR toolchain are really excellent: Two flavors for Mac and Windows: CrossPack (Mac – recommended solution) MHV AVR Tools (Windows – recommended solution. On Linux and Unix-like operating systems (Macs included) you can also follow the directions given by bdmicro (330 kB PDF) for installing the components one at a time. Almost certainly the best place to get started is at Ladyada’s AVR tutorial. A couple of other sets of instructions and reference guides: Some notes on hardware: A few interesting examples of AVR source code: TV-B-Gone, the open-source version.Gobs of other good examples at Ladyada.netProcyon AVRlib by Pascal Stang.