

DIY Tree of Life DIY Projects. DIY Simple Handbag DIY Projects. DIY: V-neck into Gathered Cowl Collar. Supplies: 1/2 yard of fabric or scarf.

This is an easy DIY to turn a plain v-neck into an interesting cowl collar. You can use a scarf, fabric, anything that will fit around the neckline. Boho Maxi Dress. This dress is an incredibly easy make.

By now you may have realized that I'm all about the simple projects. I'm far from being a master seamstress, I just work with what I know and try to learn as I go. I've never actually owned a maxi dress before, but now I might be hooked. Purse three-dimensional, more able to hold things. [A group] ... _ from milk balls young girl's photo-sharing - heap Sugar. Making a french sennit tutorial. Cut eight pieces of cord 12 ft long and one 6 ft long.
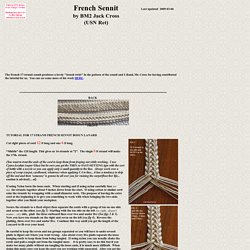
“Middle” the 12ft length. This gives us 16 strands at 72”. The single 6 ft strand will make the 17th. strand. (You want to treat the ends of the cord to keep them from fraying out while working. I use CyanoAcrylate (super Glue) but be sure you get the THIN or FAST-SETTING type with the sort of bottle with a nozzle so you can apply only a small quantity to the line. If using Nylon burn the loose ends. Secure the strands to a fixed object then separate the cords with a group of ten on one side and seven on the other. Be careful to keep the seven and ten groups separated or you will have to undo several plaits to figure out where you went wrong. (If you’re in the Military, active or reserve, be sure the lanyard is large enough to put on and take off without disturbing your cover!
Our Busy Little Bunch: Mini Clutch Tutorial. These mini clutches were a big hit at my daughter's birthday party, and my daughters have found lots of uses for theirs.
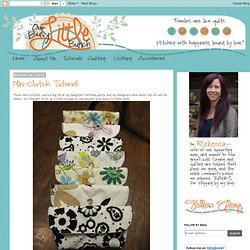
So I thought I'd do up a little tutorial in case anyone else wants to make some. First, cut out your pieces: From the outer fabric, lining, and batting - cut one main piece 8.5" x 10" From the outer fabric, lining, and batting - cut one flap piece 8" x 3.5" Prepare your flap piece: First, find something round and use it to cut the bottom edges of the flap pieces in a curve. If you'd like to use an elastic loop and button closure, center the elastic on the outer flap fabric and place between the outer fabric and lining, right sides together. Sew all three layers together with a 1/4" seam allowance. Clip curves, turn right-side out and press. Prepare your main pieces: Layer the outer fabric on a piece of batting and fold in half, with outer fabric right-sides together. DIY: Interesting Easy Craft Ideas. Interesting Craft Ideas With Lace.
Home > DIY > Interesting Craft Ideas With Lace By Fashion Diva on March 10, 2013.

20 Interesting DIY Fashion Ideas. Hello Ladies!
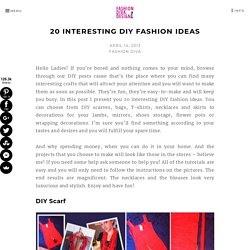
If you’re bored and nothing comes to your mind, browse through our DIY posts cause that’s the place where you can find many interesting crafts that will attract your attention and you will want to make them as soon as possible. They’re fun, they’re easy-to-make and will keep you busy. In this post I present you 20 interesting DIY fashion ideas. You can choose from DIY scarves, bags, T-shirts, necklaces and skirts to decorations for your lambs, mirrors, shoes storage, flower pots or wrapping decorations. DIY Best Of: Handmade Gifts. Grace’s shopping-free gift guide really resonated with me, and I felt a surge of excitement at the prospect of actually following through on making all my gifts this year.
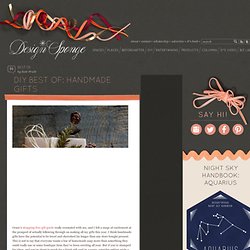
I think handmade gifts have the potential to be loved and cherished far longer than any store-bought present. This is not to say that everyone wants a bar of homemade soap more than something they could really use or some boutique item they’ve been coveting all year. But if you’re stumped for ideas, and you’re about to reach for a blank gift card in a panic, consider setting aside a little time one weekend this month and making something instead.
There are some amazingly simple projects in this roundup that would make great gifts; hopefully, something will strike your fancy. Christine Chitnis: Pretty Pots. This might be my favorite craft so far, and I got the idea after seeing one too many beautifully patterned pots that were just out of my price range!
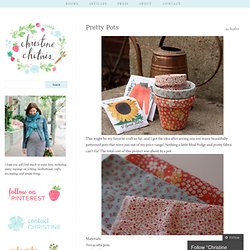
Nothing a little Mod Podge and pretty fabric can’t fix! The total cost of this project was about $3 a pot. Materials:Terracotta potsMod PodgeBrushFabric This works better in description form, rather than step-by-step: Start by cutting a length of fabric that will wrap once around your pot. Leave extra room for folding it over on the top and bottom. I would avoid using these pots outside, because if they get wet, the glue will most likely wash off!
Dried flowers and herbs. Although we’ve yet to exhume our sandals and tank tops from their winter resting place, we do see spring rearing its head . . . at last!
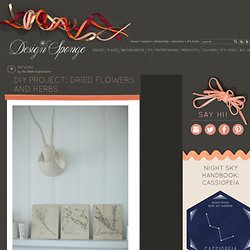
After an especially long season of bare trees and cold days, we thought it might be nice to preserve some of spring’s bounty to hold us through the harsh, dark months that come around next year, so we started working on projects to dry and save flowers. We started with things in our own backyards (well, Amy’s backyard, as she’s the only one who actually has one!) , so our selection was limited, but we hope that as the sun shines on, we will be able to add to our collection — nine in all, for a nice 3 x 3 wall collage. Accessories. Recyclart (Recyclart) on Pinterest. Miss Fancy Pants: Fancy This: Party Favors. Craft, DIY, Art, and Beauty: DIY Earring Storage Tree. My good friend Adrianna recently demanded that we get together to do her hair and a crafty project.
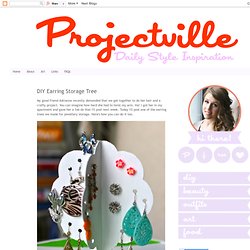
You can imagine how hard she had to twist my arm. Ha! I got her in my apartment and gave her a fab do that I'll post next week. Today I'll post one of the earring trees we made for jewellery storage. Here's how you can do it too.