
Simple Ideas That Are Borderline Crafty (35 Pics) Laundry Basket Dresser. The free content provicded by this website is made possible by the following current sponsors.
Thank you! Hanging File Boxes Repurposed from Cardboard Crates. I have a ton had a ton of these cardboard crates from my food storage in my basement (I threw a bunch away because I couldn't figure out what to do with them).

Then I was unloading a case of green beans and thought, "there has got to be something useful I can make with these. " These fabulous and very cute hanging file boxes were the finished product. I LOVE THEM (and am so wishing I hadn't thrown away at least a dozen and a half of these a few months ago). Here's what you need to make these: 2 cardboard crates per 1 hanging file box (make sure they are the same size or if you are going to make a matching set them make sure you are using all the same sizes of boxes.
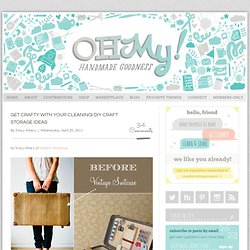
These are not all created equal so pay close attention.) You want one to be able to fit inside the other like this (it should be able to stick out at an angle). The bottoms should fit together perfectly then pull the inside box out at an angle (how much really depends on you. Get Crafty With Your Cleaning! DIY Craft Storage Ideas. By Stacy Altiery of InkSpot Workshop Idea: Down and Out Chic With each year that passes by my collection of arts and crafts supplies seems to grow all on its own.
Add in my also expanding collection of supplies that I use for InkSpot Workshop and I’m forever on a quest it seems to get all of these loose items situated into one handy place, without looking too cluttered here in my workshop. I was happy that Jessika wanted us to talk about spring cleaning so I thought I’d share a recent popular post from my blog on this topic.
Retailers like The Container Store and Organize.com are a few of my favorite places to go and hide for a few hours. I did a little Googling and found some cute and unique ways to store your do-dads with everyday, run of the mill items. Idea: Budget Wise Home All Above Ideas: Better Homes and Gardens Idea: DIY. Home Office Organizing Tips and DIY Projects. I finally found that part time job I’d been searching for, and this past Friday I started my first day of work as an office assistant.
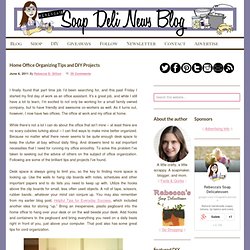
It’s a great job, and while I still have a lot to learn, I’m excited to not only be working for a small family owned company, but to have friendly and awesome co-workers as well. As it turns out, however, I now have two offices. The office at work and my office at home. While there’s not a lot I can do about the office that isn’t mine – at least there are no scary cubicles lurking about – I can find ways to make mine better organized.
Because no matter what there never seems to be quite enough desk space to keep the clutter at bay without daily filing. Spoon Hooks. A few weeks ago a friend and I saw hooks made out of silverware flattened, bent and nailed to a piece of wood.
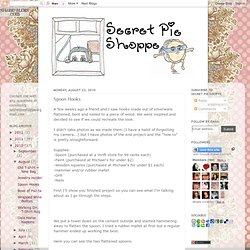
We were inspired and decided to see if we could recreate the look. I didn't take photos as we made them (I have a habit of forgetting my camera...) but I have photos of the end project and the "how to" is pretty straightforward. Supplies: -Spoon (purchased at a thrift store for 99 cents each) -Paint (purchased at Michael's for under $2) -Wooden squares (purchased at Michael's for under $1 each) -Hammer and/or rubber mallet -Drill -Nails First I'll show you finished project so you can see what I'm talking about as I go through the steps.
We put a towel down on the cement outside and started hammering away to flatten the spoon. Here you can see the two flattened spoons. Then the spoon handle was put over a bar on K's chain-linked fence and was pounded down (this time with the rubber mallet) until it looked like a hook. P.S. Another take on my {$3 Frame Makeover} and Great Gift Idea!
Ok...sooo do you remember this: Well... for our Super Saturday...we wanted to make these dry-erase calendars...but wanted a simpler way of doing the grids instead of drawing them on with a permanent marker.
Funky Quilted Binder Cover. 1/2 yard of a large scale print 2 fat quarters for pockets 1 fat quarter for binding 1 charm pack 1/2 yard backing fabric 1 leftover piece of lightweight batting 1 1/2 yard ric rac (I used Arcadia by Sanae for Moda) Photo pages, scrapbook pages or journal paper for binder From your large scale print, batting, and backing, cut a piece 3 inches taller and wider than your binder.
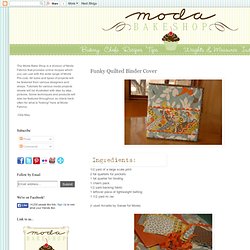
It will shrink up a bit when quilted. (My binder measures 11 1/2 x 24. From the charm pack, cut strips 1 1/2 inch wide x 5 inches. Sew your first two 1 1/2 x 5 inch pieces together as shown in the photo. Continue to add 1 1/2 strips until your braid piece is longer than the width of your large scale print piece. Trim the uneven edges as shown. Cut both ends of your braid piece straight, leaving them a little longer than needed. Sew the ric rac on the long sides, 1/4 inch from the edge. Press, turning raw edges under. Pin the bottom edge of the braid piece 2 inches from the bottom edge of the large scale print. Wall-Mounted Mini Organizer. Playing with Pegboard. It's not yet painted or even fully framed, but it was too tempting to start placing tools on my new pegboard.
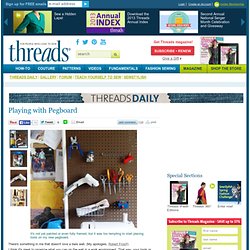
A pegged cap fixes a jar to pegboard. Fill it with buttons, beads, or any other small notions you please. This double, foam-coated hook was intended for a power drill. I prefer to keep a steamer handy. MarthaStewart.com There's something in me that doesn't love a bare wall.