
Create a 3D Vortex in Adobe Illustrator.
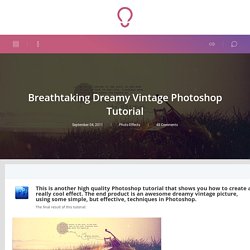
How to Draw a Character Turnaround. Color pencil tutorial. zentangle inspired art, color blending. Part One. Color Pencil Technique. Breathtaking Dreamy Vintage Photoshop Tutorial - iCanBeCREATIVE. The final result of this tutorial: The first you open the original picture below: Press Ctrl + B (Color Balance) and set numbers as below: Your picture will look like this: Use Selective Color: The result: After that, you press Shift + Ctrl + N to make a new layer and fill the layer with the color: #14317A Change blend mode to Exclusion, opacity: 50% This is the result: Use the gradient as below: Change blend mode to Screen, opacity: 40% Use Brightness/ Contrast.
Photoshop Old Photo Effect for image. Picture before changes: After: Open original image in Photoshop.

Go to Filter > Blur > Surface Blur. Choose Image > Adjustments > Gradient Map. Photoshop Old Photo Effect for image. We design brand experiences - Edenspiekermann. How to draw tanglepattern Folds. Mousegraphics. Greek extr greek extra virgin and organic olive oils 100% greek extra virgin and organic olive oils The briefing: "We want labels for extra virgin and organic olive oils.
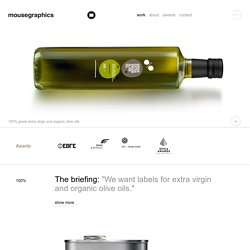
" The target consumer: Consumers with respect for pure products in foreign markets (U.S.A., Canada, Japan). The design: to convey the contemporary significance and ultimate value of an age old product of the greek land, to foreign audiences and cultures, was our primary task and concern. Show more 100% bottle 750ml & tin 5l 100% bottle 750ml, extra virgin & organic 100% brochure, front cover. Packaging of the World. Font of the day: Gagalin. Here at Creative Bloq, we're big fans of typography and we're constantly on the hunt for new and exciting typefaces – especially free fonts.
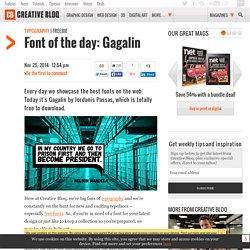
So, if you're in need of a font for your latest design or just like to keep a collection so you're prepared, we may be able to help out. Every day, we're running 'Font of the day', where we'll be posting the best free and paid-for fonts the web has to offer. Subscription offer Gagalin by Iordanis Passas Working on a comic strip? You can download Gagalin for free over on Free Typography. Bansktblog – Golden Ratio in logo designs. Golden Ratio in logo designs.
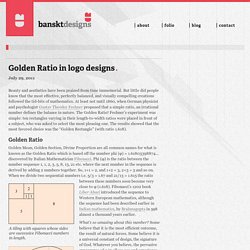
Beauty and aesthetics have been praised from time immemorial. But little did people know that the most effective, perfectly balanced, and visually compelling creations followed the tid-bits of mathematics. At least not until 1860, when German physicist and psychologist Gustav Theodor Fechner proposed that a simple ratio, an irrational number defines the balance in nature. The Golden Ratio! Fechner’s experiment was simple: ten rectangles varying in their length-to-width ratios were placed in front of a subject, who was asked to select the most pleasing one. Golden Ratio Golden Mean, Golden Section, Divine Proportion are all common names for what is known as the Golden Ratio which is based off the number phi (φ) = 1.61803398874… discovered by Italian Mathematician Fibonacci.
The ratio between these numbers soon become very close to φ (1.618). Smashing Magazine – For Professional Web Designers and Developers. Discover the making of John Lewis's heartwarming animated Christmas ad, The Bear & The Hare. John Lewis's Christmas ad, The Bear & The Hare, mixes stop-motion and 2D animation that has been widely praised across both traditional and social media.

Alonside the spot (below), its creators have released a making-of-video (above) that provides a wonderful insight into how the spot was created under directors Elliot Dear and Yves Geleyn. Alongside the spot itself, the team also created an illustrated ebook and paper book, plus an interactive iPad app. The ad was produced by London-based Blinkink and New York/LA-based Hornet Inc, who's provided us with some extra information on how it was created. But before that, here's the spot itself. Grafic Notes / Σημειώσεις Γραφιστικής: Design amazing mosaic effects. This tutorial shows how to create a cool look using Illustrator’s Symbols and Global Colors.

But what if you want total control over your mosaics’ appearance, and the ability to update it at the click of a button? It’s not as tricky as it sounds. This tutorial will guide you through the process of creating a more stylized mosaic that uses smaller, vector shapes rather than images to make up the final piece. To start off, you’ll be using Photoshop’s Mosaic filter to create your own image-based swatch library. You’ll then harness Illustrator’s powerful Global Color and Symbol features, and discover just how simple it is to update your artwork on the fly.
Time to complete 2.5 hours Download Files for this tutorial are downloadable from here. Step: 1 In Photoshop, create a new RGB landscape canvas at 300dpi, measuring 3,500-x-2,500 pixels. Step: 3Now go to Mode > Indexed Color, set the number of colours to 50 and hit OK. Computer Arts. Abduzeedo Design Inspiration. Stinkdigital - Home.