
DIY Portable Outdoor Fire Pit. We all are impressed by fire pits that we can find in stores.

Although they are usually quite expensive. In case you one of those people who likes such fire pits but don’t want to spend a lot of money on one of them, you should make one by yourself. Project 1: Rock + Bowl + Flame ( 31 DIY Projects for Busy Gals) 31 minute project You'll need: Sakrete Quickset Concrete a bunch of rocks (perhaps dug up from your yard) a plastic bowl a large canned good chafing dish gel fuel pack PAM cooking spray newspaper plastic tub for mixing concrete stick to stir concrete You are going to create one of these (which, FYI, Restoration Hardware doesn't sale anymore, hence why we are making our own)

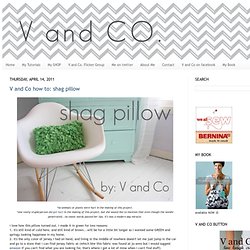
V and Co how to: shag pillow. *no animals or plants were hurt in the making of this project.

*one really stupid person did get hurt in the making of this project, but she would like to mention that even though the needle penetrated...no swear words passed her lips. it's was a modern day miracle. i love how this pillow turned out. i made it in green for two reasons: 1. it's still kind of cold here, and still kind of brown...will be for a little bit longer so i wanted some GREEN and springy looking happiness in my home. 2. it's the only color of jersey i had on hand, and living in the middle of nowhere doesn't let me just jump in the car and go to a store that i can find jersey fabric at (which btw this fabric was found at jo-anns but i would suggest amazon if you can't find what you are looking for, that's where i get a lot of mine when i can't find stuff) now lets get started: cutting: *cut from jersey fabric 19 strips at 1 1/2" each.
*from each of the 19 strips cut 15: 4" length rectangles. Gardendrama.wordpress2.jpg (JPEG Image, 299×400 pixels) Sewing 101: making a pouf. Add a burst of color to your room with this crafty pouf!

At 17” wide and 10” deep, it’s large enough to serve as floor seating or a foot stool. (And if you have pets, I have a feeling they may want to make this their new favorite spot!) This project is a little challenging to sew, but it’s not too difficult, so if you’re comfortable with the basics of sewing, give it a try. Light Up the Night. I'm one of those people that loves Christmas lights year-round.

That might put me in the corny category, but I think even Christmas lights can look sophisticated thanks to these ideas. [spotted here: 1, 2, 3] Wine Bottle Lamps. Wine Bottle Lamps More coming soon! Wine bottle lamps are $20 for 1, $19 each for 2, $18 each for 3, $17 each for 4, $16 each for 5, $15 each for 6 or more.
Plus shipping. Frosted wine bottle lamp with black design and ribbon bow. Frosted wine bottle lamp with purple and teal paisley design and purple ribbon bow. Light Switch Cover. Have you been working on sprucing up a room?

I have. Our little nursery is always a work in progress. I have added things here and there and it’s becoming more and more cozy. And here’s the latest addition. A Light Switch Cover. Buy a new cover or remove the one that’s on your light switch right now. Pull the fabric tight and fold the edges around to the back. Then add ribbon/buttons/embellishments to the front with hot glue. Re-attach to the wall and……wow! Part 9: Fabric Wall Hangings. We have a big space above our entertainment center.

And a fairly tall ceiling. So I came up with a solution to fill up all of that plain ‘ol wall. (No paint allowed……oh, the life of a renter.) Part 24 – Painted Canvases. Looking for the Be Creative giveaway?

Scroll down or click here. Okay, back to the toddler room again. I decided that the little fella of the room needed some of his favorite things incorporated into the decor. . Cars. So, I placed some painted canvases right above his crib. And he has already spoken……his favorite one is the firetruck. The blocked artwork goes nicely with that bold tumbler quilt. And the group of canvases come out at different levels from the wall……giving it dimension. Nice and simple way to spruce up an open space. Ready to make your own? Part 25 : 3D Butterfly Wall Display. Once again, more toddler room decor.

Home Decor: Painting an Old Dresser (from the thrift store) First of all, did you see the winner of the Silhouette CAMEO here?

Also, have you entered the Hellmann’s/BlogHer giveaway here? An easy $100 to spend on anything you’d like over at cooking.com. Fantastic! Okay, onto other things. I know I have mentioned this before (maybe 100 times or so….haha!) So, all of that to say that I will have several home decor posts coming up. The first thing up? The DIY Modern Outdoor Succulent Planter #2. Do-it-Yourself DIY String Wedding Lanterns Yarn Chandeliers - StumbleUpon. Jessica of Wednesday Inc shows us how to make those gorgeous twine chandeliers from the inspiration shoot she shared with us this morning. Using balloons, glue and twine, you can also make these lanterns for your wedding – and then bring it home and use it as your very own mid century lampshade.
What you will need are: balloons, glue, yarn, tray for glue, corn starch 1/2 cup of Corn starch, 1/4 cup of Warm water, clear fast drying spray paint, hanging lamp cord or fishing line (depending on your desired final product), and a lighting kit if you’re looking for a fully functional lantern. Jessica recommends using a sharpie to mark on the inflated balloon how much room you need to leave for the lighting cord. She also recommends coating the balloon with vaseline prior to wrapping the yarn coated with glue so it doesn’t stick on the balloon once it’s dry.