
TinyPNG – Compress PNG images while preserving transparency. Discover — Art & Design Inspiration at ColRD.com. Color Hunter. Tutorial: Create an Out of Bound Photo in Photoshop. 1.Start with a suitable picture to do your out-of-the-bound.Here i am using a picture of a rose i took with my LG Viewty Mobile Phone. 2.Use the Polygonal lasso tool and trace out the rose tip as seen in the picture.Zoom in and try to be as precise as you can. 3.Now Select that layer.Cntrl+T to bring up the transform controls.Right Click to choose warp and distort the control points to bend the photo a bit. 4.Now select Image>Hue/Saturation.Bring down all the color saturation levels to -100 except that of Red.
How to create Neon Illustration Happy New Year 2012 in Photoshop CS5. How to create Neon Illustration Happy New Year 2012 in Photoshop CS5 December 9th, 2011 by admin Posted in Adobe Photoshop, Designing, Text Effects In this tutorial, we are going to design a simple New Year illustration with neon digits in Photoshop CS5. I hope you enjoy this tutorial and that it inspires you to create your own illustration for New Year! Layered PSD file included. Let’s get started! Final Image Preview. Captivating and Amazing Out of Bounds Photo Effects. PHOTOGRAPHY PROJECT: How to Use a Scanner to Capture Beautiful Floral Images. Help!!
I'm down here. In the dungeon. Save me!!! By tom dinning on in Photography Guides To some, the use of a scanner to make photographs, especially flowers, may seems a bit sacrilegious. The ability for the scanner to provide a soft and flattering light, a depth of field that is quite surprising and a simple descriptiveness for the subject will allow the beauty of the flower to shine through. Here’s my method for getting the job done. I use a standard A4 scanner; nothing flash. Before you start, clean the glass. Arrange the flower on the bed. Instead of using the scanner lid, which would flatten everything, I have constructed a box from artists black matt board with the black inside. Place the box over the bed and scan away. I find the images will need minimal post-processing.
How to Isolate an Image on White - Photoshop Tutorial [In-Depth] Matching skin tones. In another thread, Bandit asked for a technique to match skin tones from one photo to another. (This is useful if you have to combine two different photos taken in different lighting conditions into one.) I learned this technique in Ben Willmore’s Photoshop Mastery class this past summer. It is also described in his book: Adobe Photoshop 7.0 Studio Techniques, p. 259. This technique assumes that you’ve already adjusted the shadows/highlights in your image using either levels or curves. You’ll need two photos: Photo1 – the photo with the skin tones you want to use Photo2 – the photo with the skin tones that need to be corrected. Tiltshiftmaker.com - Transform your photos into tilt-shift style miniatures.
Design a Dramatic Captain America Symbol. How to Reduce Digital Noise in a Photograph. How to Remove An Image From The Background in Photoshop CS5. Realistic View Tears on Face. Welcome to PhotoshopStar.com!
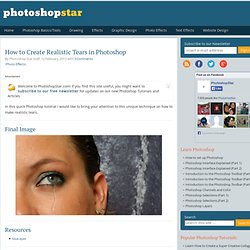
If you find this site useful, you might want to subscribe to our free newsletter for updates on our new Photoshop Tutorials and Articles. In this quick Photoshop tutorial I would like to bring your attention to this unique technique on how to make realistic tears. Final Image Resources blue eyes Step 1 Open up the picture and reduce the size to 600 x 328 pixels with Image > Image Size. Step 2 Change the layer mode to Screen for the current layer and go to Layer > Layer Style > Blending Options. Step 3 Looks good, but not so realistic right now. Step 4 Apply the Blur Tool to the current layer. How To Repair Scratches, Tears, and Spots on an Old Photograph. Surprisingly Easy Rainbow Light Painting Effect. Surprisingly Easy Rainbow Light Painting EffectReviewed by Denny Tang on Sep 10Rating: Preview of Final Results Rainbow Light Painting Photoshop Tutorial Step 1 Start off by opening any photo into Photoshop.
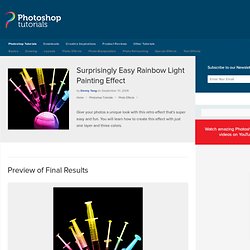
This effect works best with isolated objects on black backgrounds such as the image below. Step 2.