
Photo Tile Coasters {Using Resin} Last Christmas I almost had a breakdown...

We had just moved in to our home the month before, but I didn't want to let that prevent us from having the holliest jolliest Christmas. How To Mix Chalkboard Paint in Any Color. We love using chalkboards as backdrops for displays and parties (like this one here!).

So we were super excited to learn that you can create your own custom colors-and it's really easy! We first learned how from Martha Stewart whose tutorial you can read here. DIY Sharpie Tie Die. I love this Sharpie tie die DIY from The Art Girl Jackie blog!
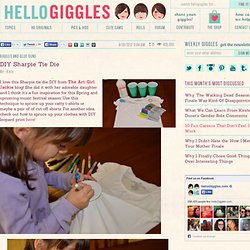
She did it with her adorable daughter and I think it’s a fun inspiration for this Spring and upcoming music festival season. Use this technique to spruce up your ratty t-shirts or maybe a pair of of cut off shorts. For another idea, check out how to spruce up your clothes with DIY leopard print here! What You Need: Pre-washed white or light colored t-shirtRubbing AlcoholLiquid dropper or medicine dropperSmall plastic cup(s)Rubber bandsVariety of colored Sharpies Do It! Choose a spot to start and put your cup in right side up and secure a rubber band around the cup rim holding the shirt tightly in place.Pick your colors and create a small design in the center of the stretched circle.
Photos and DIY via The Art Girl Jackie. DIY Planter Box Centerpiece. Hey friends!

After finishing my mirrors in the dining room, my table started to look naked! So… I dressed her up today. Wooden Piggy Bank, Photo, Glass. Easily Dunn. So I got this shirt in the 6th grade. And I keep on keeping it because I like the stripes or something…and maybe the colors. But I can’t wear it because a) it’s too short and b) it’s too thick to layer with anything. And in the middle of last week’s closet-purging, in a blinding stroke of genius, I decided to make it a cardigan. But the fastest, kind of laziest way possible. use a ruler and cut a line down the center of the front of the shirt. ok. you’re almost done. hem the edges with your hem tape, using the instructions that came with it. pick a button. then sew it on one of the sides where a normal button should theoretically go. it’s just for show so it looks like a legit cardigan. you’re not going to dilly-dally with making a button hole or anything because that’s just out of the realm of my patience.
Mad in crafts: DIY Fire & Ice Lanterns. The old becomes new: A new variation on the outdoor lantern.
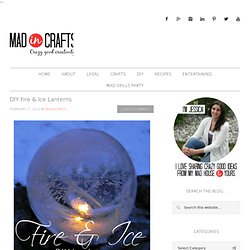
We have had an unusually warm winter in Michigan this year, and while the temps have been nice, I have had to hold off on this project idea until we got a cold snap. We finally got some snow and cold earlier this week, so I was able to try out this fun winter project. It’s a good idea to use free paint chips: Check out the 31 ways paint chips are used in all kinds of projects!!
Some of these you may have seen around blogland others are from Etsy. Polka Dot Cottage: Beginner Button Class – Making and Baking Your First Button. Posted February 7th, 2011 by Lisa Welcome to the Beginner Button Class!

For this first lesson, we will discuss how to prepare polymer clay for use, how to make a 1/2-inch solid-color button, and how to properly bake it. We’ll be making six buttons, two in each of three colors. Supplies + Tools 3 packages of Premo! Wacky Watercolors. Wacky Watercolors Here's a recipe to make your own watercolor paints.

These vivid, non-toxic paints can be used wet or allowed to dry and used like regular watercolor paints. We had great fun making and using them! Materials: 3 Tbs. baking soda 3 Tbs. corn starch 3 Tbs. white vinegar 1-1/2 tsp. light corn syrup food coloring. Seven Flowers. Awesome Pop Up. Punched Paint Chip Cards. I love playing with paint chips.
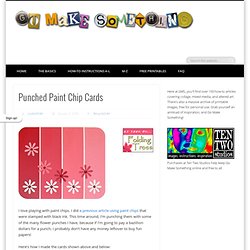
I did a previous article using paint chips that were stamped with black ink. This time around, I’m punching them with some of the many flower punches I have, because if I’m going to pay a bazillion dollars for a punch, I probably don’t have any money leftover to buy fun papers! Here’s how I made the cards shown above and below: I started with one of the large Behr paint chips from Home Depot.
They’re large enough to make a nice-sized card front. I removed the print from the card using a white Staedtler Mars plastic eraser. Punch shapes from each colored section. Fold a piece od cardstock in half to create a card. Apply glue to the back side of the punched paint chip, and press it onto the folded cardstock, applying the edge of the chip along the fold.
Trim around the unfolded sides to remove the extra cardstock. Apply dots of glue to the backs of the punched shapes, and arrange them on the card front. Zipper Bracelet. How to Make a Wire from a Plastic Bottle. Pysanky Eggs.
Christmas.