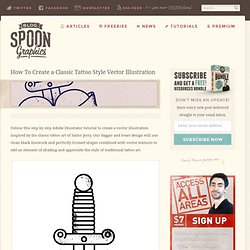

Scripts ai. Illustrator & Vector Tutorials - LearnAI.com. Illustrator Magazine. 50 astuces pour Illustrator ! Creating Simple Icons with Adobe Illustrator, a Beginners Guide. How To Create a Classic Tattoo Style Vector Illustration. Follow this step by step Adobe Illustrator tutorial to create a vector illustration inspired by the classic tattoo art of Sailor Jerry.

Our dagger and heart design will use clean black linework and perfectly formed shapes combined with vector textures to add an element of shading and appreciate the style of traditional tattoo art. A dagger through the heart is a classic tattoo symbol with both religious meanings and associations with betrayal or hurt through love. Amongst other designs this style of tattoo was popular with sailors and is an icon of prominent tattooist Sailor Jerry. The illustration we’ll be creating in this tutorial takes inspiration from these classic tattoo styles but has a much more precise appearance thanks to Illustrators accurate vector tools. Before getting started, have some fun browsing images of vintage or classic sailor tattoos and sketch out a design concept with pencil and paper to gain a feel for the kinds of shapes we’ll need to construct digitially.
Free Vector Texture Pack for Adobe Illustrator. In last week’s vintage logo tutorial we saw how useful vector textures can be to create that aged and weathered appearance, while maintaining a scaleable vector format.

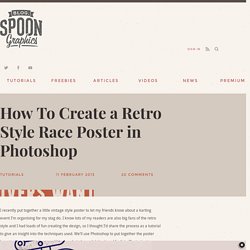
So this week I’ve gone ahead and created a pack of new texture files to give you extra choice when grunging up your vector work. Download these textures along with my vector bumper pack for free! This free vector pack contains 6 scaleable vector texture graphics. The detail and style varies between each graphic, giving you a choice from subtle grain to full on grunge. Each texture graphic is a compound path ready for use with the Pathfinder tool. Copy, paste and scale a texture to cover the whole logo/illustration, then send the texture to the bottom of the stack. Use the Intersect option from the Pathfinder palette to crop the texture to the outline of the logo/illustration. Delete out the unedited texture and replace it with the cropped texture from your clipboard using the Paste in Front comment (CMD+F). How To Create a Retro Style Race Poster in Photoshop. I recently put together a little vintage style poster to let my friends know about a karting event I’m organising for my stag do.

I know lots of my readers are also big fans of the retro style and I had loads of fun creating the design, so I thought I’d share the process as a tutorial to give an insight into the techniques used. We’ll use Photoshop to put together the poster layout with various textures and brushes, but also switch back and forth to Illustrator to create the typographic elements. Here’s the little poster design I put together for my karting event. I initially had no plans of making it public, but I’m pretty proud of how it turned out and I know some of my readers will be interested in how to create the retro style. Before getting started, it’s worth gathering some inspiration from Google images for various retro and vintage race posters to pick out common styles.
We’ll begin at the top and work down, starting with the red banner. Black Hole Design. Tutorials.