
Browse Lessons. Maxscripts - rauquenrol. Home Professional Works Personal Works Rigging MaxScripts R&D About me Links Theses tools are currently not for sale. Maybe soon If you want more informations about these tools, send me an email at : rauquenrol@yahoo.fr SplinePush Modifier A new maxscript modifier created to challenge myself. Create a push deformation along splines, with a lot of controls, and a Curve control to adjust the profile.
When you play the animation with the modifier opened, you can see the Curve Control animated too. The math part was really easy to recreate. Offset Modifier A new modifier for 3dsmax. it's a bit like a ripple modifier, but directly controlled by an animated point. Retopo Wrapper Surface Tool I just created a new option, which allows to draw curves on your mesh to generate the polygons following the curves. Now the most part of these tools are already projected on the surface, you don't need to activate the Wrap Button for the tools I built, only for the classic editable poly options. Snow GUN. Project Setup/Management and Quality Assurance for Small Business. Now you should pay attention to the File > File Properties.
Type in desired file comments and your name so that other artists can see who did the job and come to you to eventually ask stuff. PLUS it makes it easy to find missing files via the MAX File Finder: Utilities panel > Utilities rollout > More button > Utilities dialog >MAX File Finder or Max ROOT. File > Summary Info is a neat feature too! In the Description box you can type in some meaningful info about what´s in the max file and what you did lately. In the Windows Expolorer right click on “Name” and check “Comments”. Project Setup/Management and Quality Assurance for Small Business. Project Setup/Management and Quality Assurance for Small Business by Anselm v.

Seherr - Thoß, Germany This tutorial is dedicated to freelancers and technical directors in smaller companies who aren´t blessed with an alienbrain server and haven't set up Asset Tracking yet. It covers Project Setup with a VERY handy slightly modified script by Ross Marshall (Visit him and give him a big hug at: and quality assurance for a consistent production if you take some steps to heart. High-speed Conversion of Floating Point Images to 8-bit. Copyright © 2002 by Digital Domain and Bill Spitzak.
Feel free to copy or reference these pages in your own documentation, provided you preserve the copyright notice and authorship information. The source code is under the General Public License (GPL), but it is also available under other licensing terms if you desire. Please contact Digital Domain if you wish to use it under a different license. My paper describes a method I have developed at Digital Domain to accurately and quickly convert between "linear floating point" and the more common "sRGB bytes" representations of the images. The method is simple and fast. But it appears that there is still a need to explain exactly what these terms mean, and why this conversion is desirable. Sketches_0265.pdf - My Siggraph sketch on the linear <-> sRGB algorithm. The algorithm. 8 Tips to Increase the Photo-Realism in Your Renders - Easy Techniques to Make Your 3D Renders More Realistic. Photo-realism is one of the ultimate goals for many CG artists, and it's also one of the most difficult to achieve.
Even if you're relatively new to 3D computer graphics however, today's tools and workflow techniques make photo-realism very obtainable. Here are eight techniques to help you get there: 1. Bevel, Bevel, Bevel Forgetting to bevel or chamfer edges is one of the most common errors committed by beginning 3D artists. Using the bevel (or chamfer tool in 3ds Max) is one of the first things you should learn as a modeler. 2. Even though linear workflow has been around for years, it's still a confusing and complicated idea for beginners. The need for linear workflow essentially comes down to the fact that your monitor displays images in a different color space (sRGB) than what is output by your render engine (linear).
There's a lot more to say on linear workflow, and thankfully it's been discussed exhaustively over the past few years. Texturing. 24 Sep 2010 This is the third tutorial in my four part series dealing with character animation.
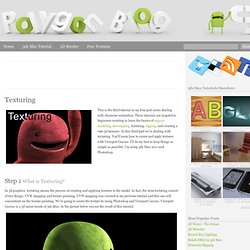
These tutorials are targeted to beginners wanting to learn the basics of organic modeling, unwrapping, texturing, rigging, and creating a cute 3d monster. In this third part we’re dealing with texturing. You’ll learn how to create and apply textures with Viewport Canvas. I’ll do my best to keep things as simple as possible. Step 1 What is Texturing? In 3d graphics, texturing means the process of creating and applying textures to the model. Step 2 Mental Ray Renderer We’re going to render the scene with Mental Ray. Step 3 Prepare the Model for Texturing We continue from the unwrapping tutorial.
Open Material Editor ( ).Select a new (empty) material slot.Click “Get Material” button and select ( doubleclick ) ‘Arch & Design (mi)’ from the list ( ).Assign the new material to the monster ( ). Step 4 Texturing with Viewport Canvas. Thinking Particles - Thinking Particles Tutorials. MintViz - The definitive resource for digital designers. Freebies.
3dsMax. Forums. Renderray.com.