Wrapped Peach Aventurine Ring DIY. Here is my 3rd Episode of the Made by color DIY’s , and today I’ll be making a very cute, easy to make and comfortable ring with a gorgeous pillow Peach Aventurine. What you’ll need: 1. Cut a piece of 18ga round dead soft wire 1 ft (30cm) long. 2. Place a 11x6mm pillow bead in the middle of the wire. 4. 6. (Visited 5,061 times, 119 visits today) I craft with an extreme passion for jewelry, you can find my custom work at Bettina Johnson Jewelry. DIY Hex Nut Diamond Bracelet. I love finding supplies to make jewelry at the hardware store.
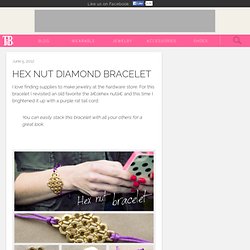
For this bracelet I revisited an old favorite the “hex nut†and this time I brightened it up with a purple rat tail cord. You can easily stack this bracelet with all your others for a great look. Brass hex nutsBrass jump ringsPliers24†of rat tail cordLighter Step 1 Lay out your hex nuts to determine your pattern. Step 2 Using your pliers, open your jump rings to fit around your hex nuts, you will be joining 2 at a time. Step 3 • Cut your rat tail cord in half. • Fold it over and loop it through your end nut. • Take one hex nut and feed your cords from each side through the hex nut. • Tie your ends in knots. • Using your lighter, carefully melt the ends of your cord.
I have to tell you that I was inspired to make this bracelet while I was watching an episode of the Real Housewives of Orange County, when I was at the gym. I actually set out to make earrings with this project. Kate Bullen. I've been living in my apartment since September, and while I love the layout, the size of my room, the porch, my roommate, practically everything-- I've complained since day one that I hate the location with a passion.
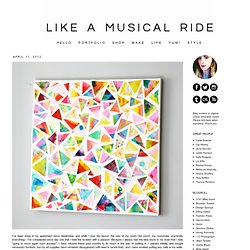
Because I always had the idea stuck in my brain that I was "going to move again soon anyway", I have refused these past months to do much in the way of settling in. I painted initially, and bought necessary furniture, but my art supplies have remained disorganized (still need to tackle that), and I have avoided putting any nails in my walls. Most of my art is still leaning against the far wall of my bedroom, which is sad really because it's all so lovely and should be enjoyed at eye level. Recently it's started sinking in that I might not actually be moving at the end of my lease in August, for a number of reasons I won't delve into. So I started small- I hung a jewelry rack up to display all my necklaces. Droopy Ear Sock Bunny. Sock Bunny {Droopy Ear Version} Sewing TutorialMaterials: Make: 1 1.

Sock (crew length, with folded cuff or with long cuff), 1 2. Buttons (as eye) 3/8″ [10mm], black, 2 3. Embroidery Floss, Pink 4. Ribbon / Lace, Pink, and some embellishments 5. Poly-fill stuffing materialTools: 1. Prepare materials to make sock bunny as listed above. Turn to wrong side and iron the sock flat with foot facing up. Pin the layers and sew with sewing machine or hand. Cut the pattern out from the sock with minimum 1/8″ seam allowance. Turn the sock right side out, face, body, arms. Slip stitch the cut out toe portion along the oval shape, leave a small opening for stuffing. Satin stitch the nose and make a dimple line below it by pulling the embroidery floss to create an indentation on the mouth.
Flip the ears down and make a few stitches to hold it in position. Draw a circle at the bottom of the head. Mark arm position on the side of the bunny. {More photos and story on first page.} Pages: 1 2. Salva un Unicornio. Recordatorios Tarjetas de 14x10.5cm Los recordatorios son tarjetas dobles que sirven como marcos de fotos.

La portada viene decorada con diferentes motivos, y espacio para una foto de 9x13 cm. Look to inspire.