
Bruxelles - Palais de Justice - Bruxelles - waldan - Photos. Bruxelles-bruxelles-palais-justice-big.jpg (Image JPEG, 1232x1642 pixels) - Redimensionnée (53%) [Photoshop] Astuces pour gagner du temps. Avec l’avènement du numérique, Photoshop est devenu l’un des outils les plus utilisé par les photographes amateurs et professionnels.
![[Photoshop] Astuces pour gagner du temps](http://cdn.pearltrees.com/s/pic/th/photoshop-astuces-gagner-temps-14930431)
Néanmoins, beaucoup sont comme moi autodidactes et il n’est pas rare de perdre son temps à des manipulations et des clics de souris inutiles, quand il existe des astuces pour accélérer franchement les choses ! Petit aperçu des principales astuces à connaître pour mieux utiliser Photoshop… Optimiser Photoshop La première étape dans notre quête à la vitesse, passe d’abord par une optimisation des paramètres de fonctionnement de Photoshop. La première chose à voir touche un élément essentiel de son équipement informatique, puisqu’il s’agit du système disque : en effet, Photoshop, tout comme le système d’exploitation, utilise un système de cache (écriture d’informations temporaires sur un disque dur en vue de soulager l’occupation de la mémoire) appelé chez Adobe « scratch disk », et de ce fait, sollicite tout autant le système disque de votre ordinateur. Floating Island on Water. Floating Island on WaterReviewed by Michael Vincent Manalo on May 19Rating: Preview of Final Results Floating Island on Water Photoshop Tutorial Tutorial Details Program: Adobe Photoshop CS2 Version: 9 Difficulty: Medium Estimated Completion Time: 1 to 1.5 hours Resrouces Sea Background Stock II by ArwenArts (Creative Commons License) 36…underwater stock by winkstock (Creative Commons License) The Island 2 by Banana-Workshop (Creative Commons License) Little Island by mindCollision-stock (Royalty Free License) Stormy sky by Michael Vincent Manalo (Creative Commons License) Rons Winter collection brushes by Ron (Royalty Free License) Step 1 – Create the Photoshop document To begin, let’s create a new image file, go to the Menu bar and click on File > New, and then input the following values on their respective fields: Width: 3000 pixels Height: 2247 pixels Resolution: 300 dpi Color Mode: RGB Color; 8bit Background Contents: Transparent Step 2 – Create the town above the sea.

Design an Epic Fantasy Scene with Photoshop. In this tutorial we are going to create a photo manipulation inspired by Valhalla, one of Mariusz Karasiewicz`s works.

He is an amazing artist and his work is absolutly stunning. I want to thank him for allowing me to write this tutorial. Final Result. Creating a Touching Story Scene in Photoshop. I worked on this illustration especially for you with Ciursa Ionut, he is the founder of PSDBURN where he writes Photoshop tutorials.

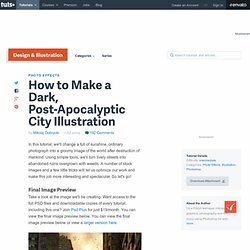
He started working in Photoshop many years ago when he began to utilize this great tool all the time. In this tutorial, you are going to create a story scene using photo manipulation and a lot of color adjustments. Final Image Preview Before you get started, let's take a look at the image you'll be creating. Want access to the full PSD files and downloadable copies of every tutorial, including this one? Also, I would like to take this opportunity to thank the photographers for giving me permission to use their images. How to Make a Dark, Post-Apocalyptic City Illustration. In this tutorial, we'll change a full of sunshine, ordinary photograph into a gloomy image of the world after destruction of mankind.

Using simple tools, we'll turn lively streets into abandoned ruins overgrown with weeds. A number of stock images and a few little tricks will let us optimize our work and make this job more interesting and spectacular. So let's go! Final Image Preview Take a look at the image we'll be creating. Preparation All the photos I've used are taken from the stock.xchng site. How to Create a Flying Land Illustration On Fire. This tutorial is a collaboration with a good friend of mine with Ciursa Ionut.

This tutorial is about creating a fantasy illustration using some dragon images and a few cliffs for creating the land. We also add lava and fiery effects. So, let's get fired-up for this one! Photoshop. Daily inspiration. Beast !! - Photoshop. Stomy household - Photoshop. The End, The Tsunami - Photoshop. How to Create a Nuclear Disaster Landscape. As designers we are often asked to create fictitious landscapes for whatever project we are working on.

Creating an image such as this usually takes a combination of careful image selection and knowledge of Photoshop’s tools and techniques. In today’s tutorial we will demonstrate how to create a nuclear disaster landscape using a dozen or stock photos. Resources The following images and resources were used in this tutorial. They can be seen in the image below.
Step 1 - Adjust the Background First, Open of the Road image. Use a gradient map by going to Layer > Adjustement Layer > Gradient Map to darken this photo a bit. The resulting image should look something like this. Step 2 - Add the Car Now, open the Car Stock Image and copy and paste it into your working document. At this point we also need to adjust the “Car” layer’s Brightness/Contrast. Step 3 - Add a Shadow Under the Car To create a shadow for the car, Duplicate the “Car” layer and place the layer under the “Car” layer. How to Create a Matte Painting Inspired Scene. In this Adobe Photoshop tutorial, we are going to go over a method for composing a beautiful matte painting style scene.

Matte paintings are typically used in movies to create expensive or surreal landscapes and scenes that are stitched together with regular footage. Note that we are not actually making a matte painting that would be suitable to use in a Hollywood film, but rather, composing a scene inspired by these great matte painters and film technicians. Preview Tutorial Resources Here are various resources suggestions for you to use. Reference/Inspiration Images Waterfalls Mosques for the Temple Cities Hills and Mountains Path Way Arches 2 Monk Laos meditation Tree Apple tree 2 Seagull Seagull Flock of Birds.
75+ Fresh Photoshop Tutorials From 2010. Matte painting surreal.