
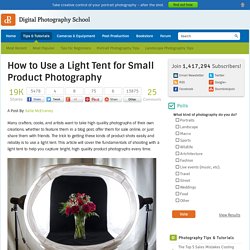
How to Use a Light Tent for Small Product Photography. A Post By: Katie McEnaney Many crafters, cooks, and artists want to take high quality photographs of their own creations, whether to feature them in a blog post, offer them for sale online, or just share them with friends.
Developing an Efficient Photo Production Workflow as a Small Retailer - Remove The Background. Do you consider an eCommerce company to be a production company?
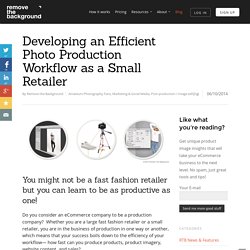
Whether you are a large fast fashion retailer or a small retailer, you are in the business of production in one way or another, which means that your success boils down to the efficiency of your workflow— how fast can you produce products, product imagery, website content, and sales? Organization is important for any type of workflow. Likewise, detailed preparation, a customized workspace, simple processes, archiving and transferring systems, and communication are all very necessary components for streamlining your photo production workflow and achieving maximum productivity.
Product Photography Tutorial: How to Shoot Great Photos on the Cheap. This guest post is by Jeff Delacruz a founding member & photographer at Products On White Photography.
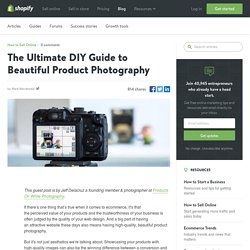
If there’s one thing that’s true when it comes to ecommerce, it's that the perceived value of your products and the trustworthiness of your business is often judged by the quality of your web design. And a big part of having an attractive website these days also means having high-quality, beautiful product photography. But it's not just aesthetics we're talking about. Showcasing your products with high-quality images can also be the winning difference between a conversion and no sale at all. The Benefits of a Raw File Format. Intermediate Raw vs. jpeg is a debate that continues to exist in the digital photography world.
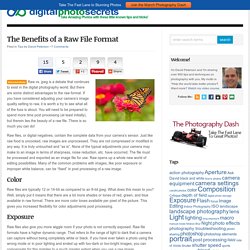
But there are some distinct advantages to the raw format. If you have considered adjusting your camera’s image quality setting to raw, it is worth a try to see what all of the fuss is about. You will need to be prepared to spend more time post processing (at least initially), but therein lies the beauty of a raw file. There is so much you can do! Raw files, or digital negatives, contain the complete data from your camera’s sensor. Color. Post Processing for Photographers. Why Does Sharpening Help? What Does It Do? Today’s digital photography tools have changed the profession in ways that nobody could have imagined.
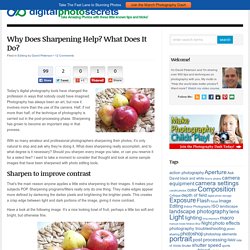
Photography has always been an art, but now it involves more than the use of the camera. Half, if not more than half, of the technique of photography is carried out in the post-processing phase. Sharpening has grown to become an important step in that process. With so many amateur and professional photographers sharpening their photos, it’s only natural to stop and ask why they’re doing it. Is Post-Processing Evil? Artists can be a self-righteous bunch.
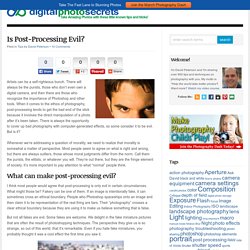
There will always be the purists, those who don’t even own a digital camera, and then there are those who recognize the importance of Photoshop and other tools. When it comes to the ethics of photography, post-processing tends to get the bad end of the stick because it involves the direct manipulation of a photo after it’s been taken. 5 Common Mishaps in Product Photography Lighting. Photos by Lucas Zarebinski We’re going to give it away right up front: lighting is probably the most important element to shooting solid product photography.
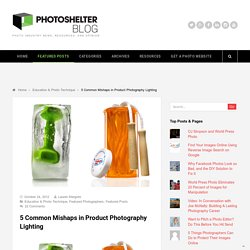
When isn’t it in photography? But because getting the nitty-gritty details is often so important, there’s a lot more involved in planning and setting up your product shots. Product Photography. Product Photography © 2006 KenRockwell.com I get my goodies at Ritz, Amazon, Adorama.
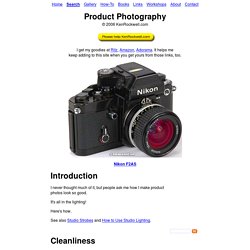
It helps me keep adding to this site when you get yours from those links, too. Nikon F2AS. 3 Lighting Setups For Apparel Photography That Will Make Your Photos Shine - Remove The Background. Place one light source and umbrella at a 45-degree angle to the product so that the lighting on the product is soft and even throughout.
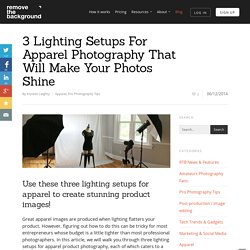
Keep your camera directly in front of your subject and utilize a tripod if you prefer to. Although you don’t have to use a tripod with a mono strobe light, you may find it more efficient and consistent to leave your camera framed and ready to go as you position each new product to be photographed. If you have placed the product too close to the background, you may get some shadowing; if this happens, you can do one of two things: (1) simply move the subject farther away from the backdrop to achieve a clean, white background instead, or (2) select the product in post and place it onto a purely white backdrop of your own making. Next, set your light source’s power to about half. In our case, our strobe had 1 to 5 power settings, so we set the power to 3 in order to allow enough light without overdoing it. How to Use a Light Tent for Small Product Photography. Product Photography Lighting - Everything you need to know.
“What camera should I get?”
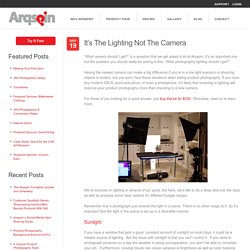
Is a question that we get asked a lot at Arqspin. It’s an important one, but the question you should really be asking is this: “What photography lighting should I get?” Having the newest camera can make a big difference if you’re in a low light scenario or shooting objects in motion, but you won’t face these situations when taking product photography.
If you have any modern DSLR, point-and-shoot, or even a smartphone, it’s likely that investing in lighting will improve your product photography more than investing in a new camera. For those of you looking for a quick answer, just buy this kit for $330. We’ve touched on lighting in several of our posts, but here, we’d like to do a deep dive into the topic as well as propose some clear options for different budget ranges. Photographing Product – Lighting Options. Speedlights Speedlights are small, portable, have fantastic color and they have a really wide range of power outputs which works well for product photography. Speedlights are the bigger flash that is put on top of the camera to give more flash power, however we want to use these in this instance to light our products and to make that work we need to find a way to trigger the speedlights from our camera so that the flash is timed when the camera takes an exposure.
There are three ways to do this. The first is optical triggering. Not all speed lights have the ability to be triggered optically but many do. Aperture, ISO and Shutter speed for product photography. You don’t have to be a professional photographer to take a decent photograph, but a good product image requires more than just aiming and shooting. When you’re photographing items to sell online, you want to produce the best results possible.
A great product photo will make your store look professional and show that you pay close attention to detail. No one wants sloppy presentation, right? Three key factors to take into consideration are aperture, ISO sensitivity and shutter speed. Aperture The aperture is the hole within a lens that determines the amount of light that travels into the camera. If you’re unfamiliar with some of the terms above, just go with an aperture between f/4.5 – f/7.1. To Take Better Product Photographs for Free. Choosing the Right ISO Setting for Product Photography - Remove The Background. ISO, an abbreviation that stands for “International Standards Organization,” is your camera’s sensitivity to light. In film photography, ISO is referred to as “film speed.”
You have probably seen these numbers on film canisters in the past: 200, 400, 800, etc. Those numbers represent different ISO settings—the lower the number, the less sensitive the film will be to light; the higher the number, the more sensitive the film will be to light. However, because the majority of product photography these days is digital, everything in this article will relate to utilizing your digital camera. In digital photography, the ISO setting on your camera controls the light sensitivity of your camera’s image sensor.
Photographing Product – Camera Settings. DSLR in Program Mode. When taking photos on the tripod I don’t want to just snap the shutter, as at these are slower shutter speeds 1/30, 1/40th I might get some camera shake as I press the shutter so I want to put it into drive mode into 2 second self-timer so when I press the shutter button the shot will take 2 seconds after my finger press. This gives sharper photos as it eliminates camera shake. I could also use a longer time like 2 second or a shutter release cable. Ideally use Manual Mode, allowing me to adjust ISO, Aperture & Shutter Speed. Start with ISO 100, Aperture f8 or f11, you should not go higher than f11 because with a C size sensor it would make the image look softer. To recap use the lowest ISO possible, the largest depth of field (f number) I can get away with at this focal length.
Using a point and shoot camera, an old Cannon Powershot. An End-to-End Guide to Light Boxes for Product Photography. Why Should I Use a Light Box? When photographing small to medium products, it is a good idea to use a light box. This will allow you to have complete control over the subject’s background and lighting. A soft background and even diffused lighting will highlight the product beautifully and has been proven to produce more sales and a higher perceived value. Many common light sources are inherently flawed for this type of photography since they tend to produce uneven lighting, unwanted shadows and incorrect white balance.
Your camera’s flash will often overexpose the very front of the subject and slightly underexpose the rest of the image. Bright, direct sunlight is a bit better for photographing a product, since the white color temperature will usually be more natural. Room lighting is perhaps the most problematic of all. 3 Great Ways to Utilize a Light Cube. Product photography: tips for using a light tent for irresistible images. How to Use a Light Tent for Small Product Photography. Products: Light Tents. If you have ever tried to shoot products on your kitchen table you may have found that it doesn’t give you the best possible result. One of the reasons, amongst others is that things in the environment will be reflecting light. The walls, ceiling, table may all be coloured and they will be reflecting whatever color they are back onto your product which is not ideal. Craft is in session. The Simple Guide to Shooting a Perfectly Lit Product Photo.
Twice a month we revisit some of our reader favorite posts from throughout the history of Phototuts+. This tutorial was first published in October, 2009. Product Stands. How To Photograph Your Product to Enhance Your Online Sales in 4 Easy Steps - Digital Photography School. A Step-By-Step Guide to Shooting Your First Product Photograph - Tuts+ Photo & Video Tutorial. Today, we'll be taking a walkthrough simple product shoot. This type of photography is in some demand on stock photography sites and is perfect for showcasing an item in order to sell it on Ebay or Etsy. As reported our recent still life article, once you've mastered this type of photography, it can be personally rewarding and pay very well.
The most basic form of product photography is an object in front of a white or solid colored seamless background. Product Photography Tutorial: How to Shoot Great Photos on the Cheap. 10 Tips for Effective Product Photography for Websites. Ebay Product Photography: Small Indoor Items. We all have stuff lying around. It’s the little things we keep in our houses, the knicknacks, the paddywhacks, and the digital appliances we don’t use anymore. Why not sell them on Ebay, make a little money, and clear up some space? Products: The Basic Setup. Reflections on Product Photography - Digital Photography School. Photographing Reflective Objects - Arqspin. How to Photograph Shiny Reflective Objects: Silver Chrome Metal. What Every Beginner Needs to Know About Product Photography. Adorama. A Primer For Photographing Glass Objects. Photographing Highly-Reflective Products: How to Control Reflections - Remove The Background.
Photographing Product – Reflective Product. 3 Lighting Setups For Apparel Photography That Will Make Your Photos Shine - Remove The Background. Photographing Product – Lighting Options. Product Photography Lighting - Everything you need to know. How to Use a Light Tent for Small Product Photography.