
Topology Guides. Untitled. Getting started with Blender can be a bit daunting.
So many tools and techniques, new terminology...eventually, everyone runs into a problem with mesh topology. What could go wrong? You combine one too many faces or vertices or end up with a wonky-looking mesh. Don't worry, this happens even to professional Blender artists. But here's why clean topology is crucial. What's more, clean topology is essential for animation and game asset creation.
Untitled. Using Blender 2.8 beta hash 91a155833e59 Not really sure that this counts as a bug, but I figured I'd report it anyways: I'm trying to bake a game asset for a PBR workflow, and created a high poly asset using a bunch of procedural materials.
From my high poly, I want to bake out the following textures to my low poly mesh: -color -roughness -normal tangents -metallic Currently, baking out metallic is not supported, so I have to work around it using another slot which is a little annoying but works fine. So a solution here would be: -add a baking option for 'METALLIC' -In the diffuse Bake Type, make 'COLOR' just bake down the base color without metal darkening. Uv - Baking multiple materials into one texture. Untitled. Untitled. Baking Blender materials to texture to make them usable in a game engine. Or… How to take a Blender model you downloaded from the web and make it actually usable in your game in 28 easy steps!
… granted, the second title doesn’t have the same flow to it, does it? Untitled. Untitled. Untitled. Untitled. Untitled. Untitled. Untitled. Untitled. Modeling - What's the simplest way to wrap extruded text around a cylinder? By using our site, you acknowledge that you have read and understand our Cookie Policy, Privacy Policy, and our Terms of Service.
Untitled. Easiest way to make stairs in Blender! UV mapping tutorial in Blender. - chocofur.com. Introduction Building amazing 3D models is just a part of making digital scenes look real.

Models without textures are the same as having black and white picture of a beautiful painting - you may see the shapes and forms, but have no information on the colors. In 3D environment, before you apply texture to the model,, you need to create UV mapping which will define the way of displaying any image file you"d like to view on the actual 3D surface.To quickly give you the basic understanding what's UV mapping all about, try imagining a candy wrapped in a paper. This paper will probably have some kind of label and graphic imprinted. You can imagine how hard would it be to print the graphics on the paper while being wrapped on the candy - what you'd normally do would be "unwrapping" the paper so it;s plain and straight and printing the graphics only then.
Rigg your Avatar (Blender 2.49) Cycles - trying to add an image to the face of an object. Assuming the dimensions of the face match the dimensions of the image (to prevent stretching) and also assuming you're using cycles render, simply With the cube selected, press tab to enter edit modePress "u" and select smart UV project.
Make sure you have the faces selected. (keep settings the same, just click "ok")Head on over to the UV image editorMake sure you're still in edit mode, and you will see the faces unwrapped on the image editor like this: Now add your image by clicking "open" at the bottom left and find your imageRescale the face to fit the image by selecting it (yours will have an image): In the materials tab, click "use nodes" and on the color, click the dot next to the color and select "image texture" Open image and you're done. Here's an example : Here is the material tab: When you click the dot, select image texture: If the UV unwrapping worked out, it should appear in rendered view (note: it will not appear in solid viewport; switch to rendered or texture)
Blender 3D: Noob to Pro/UV Map Basics. In case you're wondering, UV mapping stands for the technique used to "wrap" a 2D image texture onto a 3D mesh.
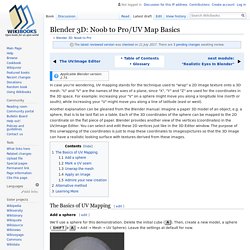
"U" and "V" are the names of the axes of a plane, since "X", "Y" and "Z" are used for the coordinates in the 3D space. For example: increasing your "V" on a sphere might move you along a longitude line (north or south), while increasing your "U" might move you along a line of latitude (east or west). Using Blender for Second Life and Opensim. Blender notes for porting to Second Life and OpenSim Mesh tips Take care to create low polygon meshes (as few vertexes as possible).
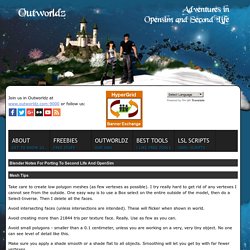
I try really hard to get rid of any vertexes I cannot see from the outside. One easy way is to use a Box select on the entire outside of the model, then do a Select-Inverse. Then I delete all the faces. Getting started with COLLADA - COLLADA Public Wiki. Here's some information to help if you are getting started with COLLADA.
Read the COLLADA FAQ to get a good overview. If you want to know more about the goals, design fundamentals, and detailed information about the 1.4.x features, get a copy of the COLLADA book from AK Peters, or any other bookseller or library. Ignore anything prior to 1.4.x. Older versions of COLLADA are no longer supported, and are not compatible with the official standard release. Blender Beginner Tutorial - Part 3: Edit Mode. Uploading a mesh model - English - SecondLife Community. How to Upload Mesh with Low Land Impact - Mesh - SecondLife Community.
How to Upload Mesh with Low Land Impact - Mesh - SecondLife Community. How to Upload Mesh with Low Land Impact - Mesh - SecondLife Community. The Secrets of Mesh Landimpact – Loki – Digital Mischief Maker. I’m hearing more and more SL creators saying that the Landimpact calculation is borked and that LL should change it.
I don’t agree with this at all, i believe Linden Lab have done a very good job with mesh and its resource calculations and I’m a better 3D modeller because of this. Before i try and explain the secrets to getting your mesh creations low in land impact we need to first understand why the calculations are the way they are. It is my belief that Linden Lab took a much more strict approach to how mesh costs as a way to keep more accurate calculations on the resources an object uses. If your mesh object costs 500 land impact, thats not because LL are being nasty to you, its because your object costs the viewer a high amount of resources to download and display. Modeling - How to 'merge/dissolve' two faces? This site uses cookies to deliver our services and to show you relevant ads and job listings. By using our site, you acknowledge that you have read and understand our Cookie Policy, Privacy Policy, and our Terms of Service.
Your use of Stack Overflow’s Products and Services, including the Stack Overflow Network, is subject to these policies and terms. Blender. Introduction. Selecting Vertices, Edges, and Faces in Blender. By Jason van Gumster In Blender’s Edit mode, the cube changes color, and dots form at each of the cube’s corners. Each dot is a vertex. The line that forms between two vertices is an edge. A face in Blender is a polygon that has been formed by three or more connecting edges. In the past, faces in Blender were limited to only three-sided and four-sided polygons, often referred to as tris (pronounced like tries) and quads.
Generally, you should think of ngons as a “process” tool. For polygon editing, you can use three different types of Edit modes, sometimes called selection modes: Vertex Select, Edge Select, and Face Select. Two visual cues in the Blender interface clue you in to what selection mode you’re using. The Edit mode Select buttons. To the right of the Vertex Select button is a button displaying an icon of a cube with a highlighted edge. Now, you may notice that these buttons are blocked together, kind of like the 3D manipulator buttons. Make Edge/Face. Workflow - Is it possible to paste in edit mode? This site uses cookies to deliver our services and to show you relevant ads and job listings. By using our site, you acknowledge that you have read and understand our Cookie Policy, Privacy Policy, and our Terms of Service. Your use of Stack Overflow’s Products and Services, including the Stack Overflow Network, is subject to these policies and terms.
Show Normals and Edge Length - Blender.org. Blender documentation projects, tutorials, translation, learning & teaching Blender Moderators: jesterKing, stiv safran62. Selecting vertices from different objects at the same time - Support / Basics & Interface - Blender Artists Community. Workflow - Is it possible to paste in edit mode? How do I flip normals on this model? This is probably too many questions at once but my time is short as the semester is coming to an end and I really want to work this issue out before my class time is over. Please humor me. Yesterday I asked how to move the vertices so that they stitch together and got two answers that worked quite well.