

Mograph chain - Spline fully controllable - no Dynamics. Realflow viscous liquids tutorial (Breakdown of Labtests one by FxChannelHouse) Octane render et Cinema 4D R14 : introduction. Tuto Zbrush: Masking, Transpose, Polygroups. Tutorial Cinema 4d, Fish Eye. French Cinema4D - Blueprints. BW Design’s Videos. PZDM. I have released Maxon C4d Sculpting Volume ONE.
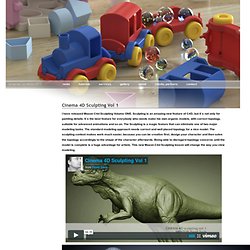
Sculpting is an amazing new feature of C4D, but it´s not only for painting details. It´s the best feature for everybody who needs make his own organic models, with correct topology, suitable for advanced animations and so on. The Sculpting is a magic feature that can eliminate one of two major modeling tasks. QuickTip 47: How to evenly paint Objects on a Surface with Hair. Bret Bays Animation » Creating Custom Character Templates in CINEMA 4D R13. Ever since it’s announcement and release, C4D R13 has both astounded and confounded users.
The videos showcasing the new Character tools have impressed many people, but they are quite complicated an not easy to just pick up. Even though marketing videos have suggested otherwise(I still maintain using the Character Object is easy, but making your own templates is still quite difficult). So I wanted to make a simple introduction to the system for users. In the coming weeks there will be a much more in depth tutorial series on Cineversity where you will created a biped template(based on the Taquito character), but here’s something to help new users try and get into the new system, so let’s begin: To start, download the starting project file.
If you were to go into a new scene file, and choose Character>Character to create a Character Object, if you looked in the template drop down list, you would see a template called “SimpleChar”, but it won’t do anything yet. 1. Réalisation d'un grillage avec C4D. Modeling Cars with HyperNURBS. Modeling cars with HyperNURBS.

R13 Motion Blur, Character Rigging, CMotion. Normal map avec The Gimp. Pour installer The Gimp, glisser son icône dans application. Pour installer le plug in, clic droit sur l'icône de The Gimp puis "Afficher le contenu du paquet" . De là, on place normalmap.exe et glew32.dll dans le répertoire plugin de The GIMP. Sous Mac, le répertoire "Bin" se situe dans le répertoire "Resources", de là on place les fichiers libgtkglext-win32-1.0-0.dll et libgdkglext-win32-1.0-0.dll. Nota : Les répertoires peuvent sensiblement changer selon les systèmes Xp ou Seven. Tutorials - Joan of Arc. Creating a Floating Balloons Cluster in Cinema 4d. D_PolySize Effector : rescales Clones to Polygon Size. 3D knitting concept in cinema4d. Claymation in Cinema 4D. C4D Quick Tut: Camera Tip. HDRI Lighting with Cinema4D and vray.
In this tutorial you can learn how you to set up and light a exterior scene with a HDRI Skydome inside of Cinema4D with vray.
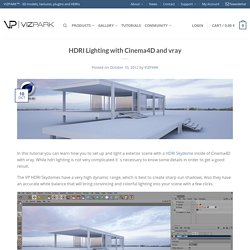
While hdri lighting is not very complicated it´s necessary to know some details in order to get a good result. The VP HDRI Skydomes have a very high dynamic range, which is best to create sharp sun shadows. Also they have an accurate white balance that will bring convincing and colorful lighting into your scene with a few clicks. Basically you just need to follow 3 main steps: First to add an area light, then add the vray tags for domelight and physical camera and third adjust the rendersettings. (1) Add a vray domelight to your scene First you have to add an Area Light to your scene. While the area light is selected, choose VrayLight from the VRayBridge Tags. Within these paramters, select Dome from the drop-down menu Area Type. (2) Load the HDRI and adjust the light settings. Cinema 4d. 10 Cinema 4D Tutorials and Presentations From NAB 2013. Creating Realistic Water Without Particles in Cinema 4D R13. Creating a realistic water effect often requires a huge amount of particles, which can simply be too much to handle.
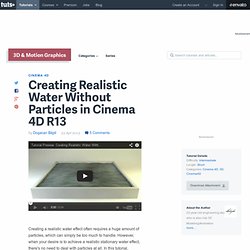
However, when your desire is to achieve a realistic stationary water effect, there's no need to deal with particles at all. In this tutorial, Dogacan Bilgili will explain how to create a convincing, realistic water effect using some of Cinema 4D's simple tools. Resulting in a great looking, animated water surface that's much easier to work with. Scene Assembly Step 1 To start, create a shape as shown below. Model And Animate A Light To Follow A Target In Cinema 4D. Cinema 4D - Quick Tip - Motion Camera Basics. Camera Mapping avec le calibrateur de caméra sur After Effects. Cinema 4D Tutorial - How to Create a Dynamic Spring. Cinema 4D Tutorial – How to Create a Dynamic Spring In this thrilling tutorial we look at creating a dynamic spring that actually shows in the render and works with the dynamics system.
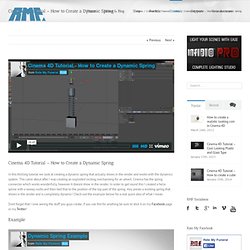
This came about after I was creating an exploded locking mechanising for an advert. Cinema has the spring connector which works wonderfully, however it doesnt show in the render. In order to get round this I created a helix spline with a sweep nurbs and then tied that to the position of the top part of the spring. Tips Rendering. XP Spline - Extrusion controlée et Noeud Image Bitmap. Biped Rigging In C4D. French Tutorials. J’ai fait ce petit tuto pour expliquer comment créer et exporter des “vector displacement map” de Zbrush vers cinema4D.
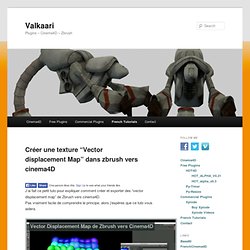
Pas vraiment facile de comprendre le principe, alors j’espères que ce tuto vous aidera. Principes abordés : création d’une texture à partir de l’occlusion ambiente et utilisation du tag “conformer”création de pinceaux personnaliséspeindre plusieurs textures en même temps.paramétrage du matériaux avec les textures Amusez vous bien. Les textures utilisées peuvent être téléchargées sur cgtexture.com. C4D R13 : MoGraph - Particules Tracer. Build A Realtime Aerodynamic Flight Simulator in Cinema 4D. C4D R13 : MoGraph - Sphere Cubique.
Getting A Low Poly Look In Cinema 4D. C4D R13 : MoGraph - Crystal Planet. C4D jelly text effect. French Cinema4D - Blueprints. Layer Browser Overview Part 1. Here is part one of a four part series giving you the rundown on how the Layer Browser works and how you can use it to help your workflow.
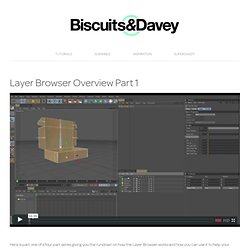
In part one I will cover the View, Render, and Manager columns. NOTE: I made a little mistake when talking about adding an object to a layer. You can actually just left click on the gray circle and add it to a layer or add it to a new layer. That way only those two options show up instead of the entire drop down menu! Also ignore the Command + Click comment, I know it’s Control + Click, just one of those humbling moments. You can download the model and rig I use in the first two tutorials so you can get a feel for using the Layer Browser.Download “The Box” “The Box” by Biscuits and Davey is licensed under a Creative Commons Attribution-NonCommercial-ShareAlike 3.0 Unported License. Melting Objects in Cinema 4d. Cinema 4D Lighting with Shadows. Maxon C4D Lighting. Using the Mix Node in Cinema 4d Xpresso. Modelling a Pin Art Impression Toy. How to create a realistic looking coin in Cinema 4D ‹ Rate My Funeral. BBL Productions - Le podcast Episode 1. Octane Render - Start without wasting time.
4 Wheeler Extended - Craft Animation Tools. Chicago C4D Home. MOGRAPH : Héritages et influences - inheritance effector and weighting falloff. French Cinema4D - Mograph Effecteur Héritage demystifié ... Nissan Skyline GTR R34 - Tutoriel de modélisation d'une voiture - Partie 5: Modélisation de détails Pour la suite nous allons nous attaquer aux petites pièces sur l'avant de la voiture qui permettent de reconnaître un modèle et qui ajoutent ce petit plus :bave: .
Parmis ces pièces figure le grillage central, élément clé dans le caractère et le look d'une voiture. Cette 5ème partie explique en détail comment en réaliser un. - Le grillage Il existe deux méthodes pour réaliser un grillage; soit on a recours à un plan auquel on applique une texture avec un motif quadrillé dans le canal alpha (fichier ou procédural), soit on modélise carrément le grillage en polys. TUTORIELS du site FC4D. Tutorial 007 - Spline Projection. How to Build A Brick Road And Other Texture Ramblings. CINEMA 4D Tutorials > Creating Game Weapons in CINEMA 4D and ZBrush 4 Tutorial. Nissan Skyline GTR R34 - Tutoriel de modélisation d'une voiture - La distance entre axes de roues avant / arrière : 2665mm ! Si vos blueprints sont bien foutus, cette distance devrait être facilement vérifiable sur la vue de profil. Alors, ça colle? Non? Il faut impérativement soigner ses blueprints si l'on veut arriver à un résultat concluant...
Mieux vaut s'en apercevoir au début qu'au milieu de la mod... Cela peu prendre beaucoup de temps, mais il est important d'être patient et de soigner cette partie, elle est décisive dans la qualité du modèle final. Disintegration in Cinema 4D. Explode and Shatter With Cinema 4D And Cloth Dynamics. How To Use The Proximal Shader in Cinema 4D. WIP sculptris -> 3Dcoat -> Zbrush -> C4D -> fun ! [workflow] Tut'Minutes© : Faire des trous dans un disque par GaazMaster. Cinema 4D Tut: Changing C4D Startup Settings. Stereoscopic Rendering in CINEMA 4D R13. Intro to UVs in BodyPaint. Modélisation d'un pas de vis. J'ai cherché pendant des heures à faire un satané pas de vis facilement mais sans succès. Presque rien trouvé sur le net, ou alors des techniques très complexes. ...et croyez le ou non, c'est sur les toilettes :arg: que j'ai eu une idée !!
:idea: je pensais avoir enfin résolu le problème mais je me suis vite rendu compte qu'il fallait quand même ce faire un peu mal au doigts pour finaliser... mais le plus dur à faire est fait en 35 secondes !!!!!!!!!!! Cool...... Bon j'en dis un peu plus, c'est parti pour mon premier didacticiel, hehe : ------------------------------------------------------------------------------------------------------ 1. Pour commencer, il faut tracer la section du pas de vis désiré. Creating Realistic looking Smoke Simulation in Cinema 4d. Cinema4D School - Blueprints : mise en place. Cinema4D School - Cinema4D School. Exploser un texte avec Thrausi. Et ben oui, bien sur… je m’excuse hein… En même si je précise bien qu’il faut avoir un niveau intermédiaire, j’ai beau dire et redire que c’est du rabâcher d’autres tutos, dont la plupart présent sur le blog, mais non… En gros, il faudrait à chaque fois que je fasse des tutos de 2h30 ou j’explique chaque petit bouton, ou j’explique ou tu dois cliquer?

J’explique peut-être mal, mais j’essaie d’avoir une certaine logique : Les premiers tuto du site étaient simple, et j’expliquai tout ; petit à petit, j’évolue, j’augmente le niveau, et forcément je ne reviens pas sur du basique. C’est d’ailleurs pour ça que j’ai passé un nombre incalculable d’heure à enregistrer tout plein de leçon pour les grand débutants… mais bien sur, ils faut prendre la peine à aller fouiller (euh, quand je dis fouiller c’est à un clic dans le menu d’ici…) sur le blog.
Pour résumer, je suis ni ton père, ni ton prof, ni ton formateur privé. Dépliage UV Avec bodypaint – Valkaari. Hair Lighting Tutorial. Tutoriels. Creating Realistic Water and Floating Objects in Cinema 4d. C4D Tut: Replace Missing Textures Quickly. Cinema 4D R13 - CMotion. C4D R13 : Character Animation Tool. TUTO. Greyscalegorilla.com.
Tuto.elephorm.com. Cette formation vidéo vous propose de découvrir les axes complémentaires de la modélisation mécanique et architecturale à travers deux projets complets.

Dans un premier temps, vous modéliserez pas à pas une villa, son architecture intérieure et son environnement. Vous aborderez ensuite l'ensemble des techniques qui vous permettront de construire n'importe quel objet mécanique et de l'animer. FC4D.