
DIY Bracelet: Cross Style Chain Woven Bracelet. DIY & Crafts, Jewelry Tutorials Another DIY bracelet using chain and suede?
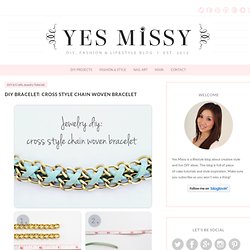
Yes, that’s right this is the 4th one in the series and I still have lots of ideas on how to create new patterns and styles. This DIY bracelet binds to pieces of chain together by doing a variation of the simple shoe lace cross. Materials needed: - About 14 inches / 36 cm chain . I’m using 10×7 mm size chain. - about 21 inches / 54 cm of suede lace.
5 Ways to Turn Zippers into Awesome Arm Candy. UPDATE: By popular demand, Zipper Bracelet Kits ($15) and readymade Zipper Bracelets ($20) are now available in the Brit + Co. shop!

You know we love turning unconventional materials into wearable accessories. Today, we’re tackling zippers! We figured out 5 simple, beautiful ways to create bracelets, cuffs, and bangles out of metal, plastic, and repurposed zippers. DIY Dreamcatcher Jewelry. Fashion is heading in a more natural direction.

Organic clothing is on the up and up, as well as feathers, fur, fringe, crochet, and anything with an earthy feel. To get in touch with your inner flower child, try making and wearing these DIY Dreamcatcher jewelry pieces. You will need: 1 or 2 small metal ringsBlack or colored suede cord, ribbon, leather, or fabric (unless making the earring style, which requires no wrapping)White linen cord (approx 1 yard)FeathersBeadsGluePaperclip Directions (pictures by Burn Out Brite): Begin by taking your suede cord and wrapping it tightly around your metal ring.
Tie the white linen cord as close to the suede knot as possible. Once you’ve gone around the entire ring, make your next loop stitch in the middle of your first white linen cord stitch. Keep moving clockwise, finishing a row and beginning a new one until you reach the very middle of the dreamcatcher. Johnnie of saved by love creations. Hi friends, I'll have the features from this week's Inspiration Board up soon but in the meantime, today's guest is the oh-so creative Johnnie from Saved by Love Creations.
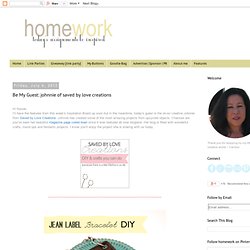
Johnnie has created some of the most amazing projects from upcycled objects. Chances are you've seen her beautiful magazine page coiled bowl since it was featured all over blogland. Her blog is filled with wonderful crafts, round ups and fantastic projects. {DIY} Delicate Stacked Rings. By mskristiina on February 29, 2012 I absolutely love the look of 5+ teeny tiny delicate rings stacked together.
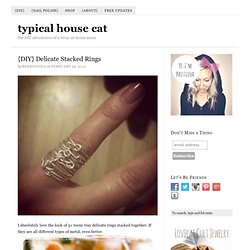
If they are all different types of metal, even better. I’m currently working a set of delicate hammered rings for myself in my metalsmithing class but I was getting impatient and decided to make these quickie rings to satisfy myself in the mean time. My friend gave me one about 5 years ago and I’ve been meaning to make them ever since. They are super easy, inexpensive AND adjustable. You will need: a ring mandrel or since they are adjustable a wooden dowel slightly smaller than your ring size will work just perfecta nylon/rubber jewelry hammereye pins of your color choice, remember to keep the width of your fingers in mind when you select the length of eye pin, they should be slightly longer than the circumference of your finger. Enameled Vintage Keys DIY. When I was a kid my mom used red fingernail polish and painted the first initial of our last name to identify things we had, especially on stuff we took camping or our Tupperware and Corningware dishes.

There was always a big red initial on the back, lest someone got confused that the Corningware dish with potato salad at the potluck or the cooler filled with beer at the picnic was OURS not theirs! She also used fingernail polish to identify keys. It made it easier to know what the keys were for. All keys seem to look the same nowadays. Most of the time I have no idea what some of my keys are for. I have a huge collection of vintage keys and a bottle of nail polish near my computer. The result is fun and cute. DIY — bracelet made from braided beads. I came across this tutorial from ECAB that demonstrates how to make a braided bead necklace and I knew instantly that was going to be my next project.

I have modified the instructions a bit to make a braided bead bracelet. I will show you pictures from my bracelet making process and give brief instructions. Please click the link above to go on over to ECAB for the full tutorial. It is wonderful. Re-Vamp your Friendship Bracelets! No, this tutorial does not have you making any type of designer DIY!
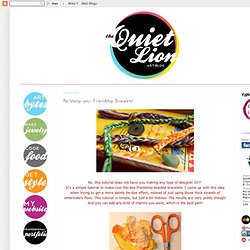
It's a simple tutorial to make cool the-dye friendship braided bracelets. I came up with this idea when trying to get a more dainty tie-dye effect, instead of just using those thick strands of embroidery floss. This tutorial is simple, but just a bit tedious. The results are very pretty though! And you can add any kind of charms you want, which is the best part! Step 1: Gather materials. Step 2: Cut your embroidery floss.
Step 3: Group all of your individual threads into 3 big groups, making sure you get a variant amount of colors in each group.