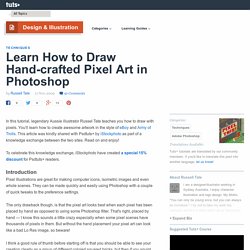

Learn How to Draw Hand-crafted Pixel Art in Photoshop. In this tutorial, legendary Aussie illustrator Russel Tate teaches you how to draw with pixels.

You'll learn how to create awesome artwork in the style of eBoy and Army of Trolls. This article was kindly shared with Psdtuts+ by iStockphoto as part of a knowledge exchange between the two sites. Read on and enjoy! To celebrate this knowledge exchange, iStockphoto have created a special 15% discount for Psdtuts+ readers. Pixel illustrations are great for making computer icons, isometric images and even whole scenes. The only drawback though, is that the pixel art looks best when each pixel has been placed by hand as opposed to using some Photoshop filter. Daily Walks - Post Processing Techniques.
First off, I have to say...

I rarely repeat the exact same method twice. There may be similar steps I use on each photo but not always in the same sequence. For me, the process is one of boundless exploration. As an artist, I find the post-processing as exciting as the actual photo-taking and can spend hours trying different effects, colors, etc. Every week I receive many emails requesting information on how I process my images. Please do not use the low-resolution images for anything other than your own informative use. Items recommended for testing these techniques:
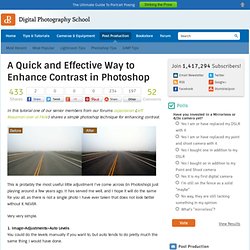
How to Make a Bubble Portrait using Photoshop CS3. A Quick and Effective Way to Enhance Contrast in Photoshop. In this tutorial one of our senior members from our forums Japaslavian (Jeff Masamori over at Flickr) shares a simple photoshop technique for enhancing contrast.

This is probably the most useful little adjustment I’ve come across (in Photoshop) just playing around a few years ago. It has served me well, and I hope it will do the same for you all, as there is not a single photo I have ever taken that does not look better without it. NEVER. Very very simple. 1. 50 Excellent Digital Photography Photoshop Tutorials. Create a Bright Retro Grunge Vector Illustration.
This post was originally published in 2009 The tips and techniques explained may be outdated.

Follow these steps in Adobe Illustrator and Photoshop to create a range of vector shapes and graphics that can be combined into a great looking vector collage illustration. We’ll then finish off the illustration with some subtle touches of depth and detail, giving a polished graphic with hints of a retro-grunge style. The header design here on Blog.SpoonGraphics has received many comments of praise and has been the subject of a good few questions and tutorial requests over the past year. So, I thought it was about time I created something which covers some of the processes of creating a similar graphic style. We’ll be using many of the same techniques I originally used in the website design, combined with some additional steps to create this neu-retro clean-grunge pop culture vector illustration.
Group the individual group of circles and duplicate multiple times.
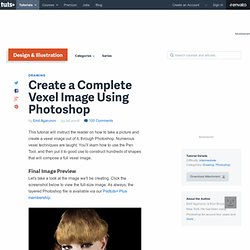
Create a Complete Vexel Image Using Photoshop - Psdtuts+ This tutorial will instruct the reader on how to take a picture and create a vexel image out of it, through Photoshop.

Numerous vexel techniques are taught. You'll learn how to use the Pen Tool, and then put it to good use to construct hundreds of shapes that will compose a full vexel image. Final Image Preview Let's take a look at the image we'll be creating. Click the screenshot below to view the full-size image. Introduction. 35 Beautiful Vintage and Retro Photoshop Tutorials.
Advertisement By Jacob Gube With the recent post on retro and vintage in modern web design1, it’s time to put the theory into practice.

We’ve scoured the Web to find some impressive Photoshop tutorials that can help you achieve an "old-fashioned" look-and-feel in your designs. In this post, we go back to the 1900’s all theway to the 1980’s to showcase a variety of vintage- and retro-inspired designs that involve poster art, collages and graphical elements. Whether you’re into print design or web design, you’ll find something you can use or build upon. You may want to take a look at the following related posts: Making sense of Clarity, Vibrance and Saturation in Lightroom 2.
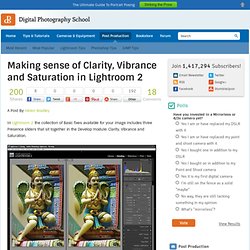
A Post By: Helen Bradley In Lightroom 2 the collection of Basic fixes available for your image includes three Presence sliders that sit together in the Develop module: Clarity, Vibrance and Saturation.

This week I’ll explain the differences between these three adjustments and how they affect your photos. In each of the screenshots below I have set the slider value to 100 – way more than you would use to fix your image but a setting that will show clearly how the fixes work. Step 1 Let’s tackle Saturation first. One of the problems with using the Saturation slider is that it adjusts all the pixels in the image – those where the color is lacking in saturation and those that are already highly saturated. Step 2 The Vibrance slider solves some of the problems that you’ll encounter when trying to boost color saturation because it is more particular about what it adjusts. Tilt-Shift Photography Photoshop Tutorial.
This tutorial will walk you through how to create a tilt-shift image in Photoshop. It has been produced using Photoshop CS2 on a PC. Once you finish your tilt-shift image, make sure you upload your image for everyone to see. You should also check our our gear page to find all of the latest gear you need to create tilt-shift images. Gear PageSubmit Your Images Step 1: Photo Selection.