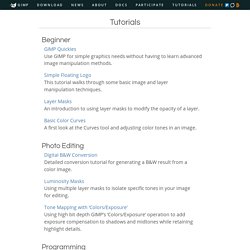

Free Icons for Everything - Noun Project. Beautiful Free Images & Pictures. Type-Finder. Character Design References (characterdesigh) on Pinterest. Photo editor online - Pixlr.com edit image. 0to255. Tutorials. Beginner GIMP Quickies Use GIMP for simple graphics needs without having to learn advanced image manipulation methods.

Simple Floating Logo This tutorial walks through some basic image and layer manipulation techniques. Layer Masks An introduction to using layer masks to modify the opacity of a layer. Basic Color Curves A first look at the Curves tool and adjusting color tones in an image. Photo Editing Digital B&W Conversion Detailed conversion tutorial for generating a B&W result from a color image. Luminosity Masks Using multiple layer masks to isolate specific tones in your image for editing.
Tone Mapping with ‘Colors/Exposure’ Using high bit depth GIMP’s ‘Colors/Exposure’ operation to add exposure compensation to shadows and midtones while retaining highlight details. Programming Basic GIMP Perl Learn how to write simple perl scripts using the gimp-perl module (GNU/Linux users only). Automate Editing Using GIMP Python to automate a workflow. Photoshop Tutorials. Axeraider70 on deviantART.
Street Dance Illustration. Street Dance IllustrationReviewed by Denny Tang on Feb 2Rating: Preview of final results Stock images used in this tutorial These are the stock photos that were used in this Photoshop tutorial.

You can purchase the same stock photos used in this tutorial or use your own photos. All you need is a photo of a skyline, old paper texture, and a dancer showing his best move. Step 1 – Open the city skyline photo Start by opening the photo with the city skyline. Step 2 – Create a photocopy effect with the threshold tool Choose Image > Adjustments > Threshold and adjust the setting to get a clean Use the brush tool to erase the clouds so that the sky is all white.
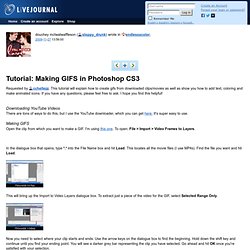
Finally, choose Image > Adjustments > Invert to invert the layer. Step 3 – Create a water reflection Press Ctrl+J or choose Layer > Duplicate to duplicate the layer. First, activate the transform tool by pressing Ctrl+T or choosing Edit > Free Transform. Press delete or choose Edit > Clear to clear the selected. Endlessxcolor: Tutorial: Making GIFS in Photoshop CS3.
Requested by cchellezz.

Smoke Portrait. Smoke PortraitReviewed by Jayan Saputra on Aug 6Rating: Preview of Final Result Smoke Portrait Photoshop Tutorial Before we start, notice that this tutorial was written using Windows OS, so for Mac users simply alter Ctrl with CMD, and Alt with the Opt key.

Tutorial Details Program: Adobe Photoshop CS or newer versionDifficulty: MediumEstimated Completion Time: 1 to 2 hours Resources: Step 1 – Extracting the Model. Proper SLR Camera Lens Cleaning Tutorial. Reduce, Reuse, Diffuse: Make Your Own Flash Diffuser from an Old Film Container. Harsh, unflattering flash got you down? Grab an old roll of film and make it all better. Follow Flickr user natuurplaat’s lead, and turn an old film canister into a flash diffuser! A few strategic cuts make it easy to slip the canister onto your pop-up flash, and voila! Soft, beautiful lighting. Basics of Photography: Your Camera’s Manual Settings. Maybe I misread this, or maybe I'm a pedant, but...

"When you press the shutter button on your camera and take a picture, the aperture blades take a specific amount of time to close. This amount of time is known as your shutter speed" ...is not exactly correct. On my cameras (Nikons) the aperture closes at the same speed (really fast) no matter what your shutter speed—or if you're shooting "wide open" (at the largest aperture the lens supports) the aperture doesn't do anything at all when you trigger the shutter release.
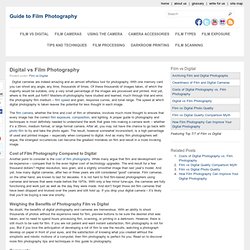
What changes when you adjust the shutter speed is (surprise) the shutter. On my camera, the shutter consists of two curtains, like a stage. How to Paint with Light. Comparing the benefits and features of digital photography and film photography. EmailEmail Digital cameras are indeed amazing and an almost effortless tool for photography.

With one memory card you can shoot any angle, any time, thousands of times. Of these thousands of images taken, of which the majority would be suitable, only a very small percentage of the images are processed and printed. And yet, where is the work put forth? Masters-of-photography have studied and learned, much through trial and error, the photography film medium – film speed and grain, response curves, and tonal range. The film camera, whether the time and cost of film or otherwise, involves much more thought to ensure that every image has the correct film exposure, composition, and lighting.
Cost of Film Photography Compared to Digital Another point to consider is the cost of film photography. Weighing the Benefits of Photography Film vs Digital No doubt, the benefits of digital photography and cameras are tremendous. Comments comments. Digital Photography Tutorials. Learn how to take and edit digital photographs using visual tutorials that emphasize concept over procedure, independent of specific digital camera or lens.

This is a complete listing of all tutorials on this site; click the drop-down links in the top menu to see particular topics. Photography is going through an exciting transition period as many film photographers are beginning to explore the new capabilities of digital cameras. While the fundamentals have remained similar, other aspects are markedly different. Discussing The Ringlight Tutorial. uber cheap in Strobist.com. Sam | www.samuelpotter.com says: UPDATE: There's now 2 ringlights in this tutorial, the first being an on-camera hotshoe ringlight; the second is designed more for wireless triggering(and is twice as big).

Materials: 1. Cardboard you took from the grocery store dumpster 2. Duct Tape 3. Aluminum Foil 4. The Photography Cheat Sheet. How Can I Take Better Photos in Low Light?