
Chantel Hubert
I LOVE LIFE!!<3
Fashion with spaghetti straps dress style 0bd00479 - $198. Online purchases require flexibility and support.

Weddingdress Bee.net understands that and wishes to create a satisfying and enjoyable shopping experience for you.Our policies were created to accommodate customer’s needs and address the specific nature of our merchandise.If you have further inquiries about our Return and Cancellation Policies on this page, please feel free to contact us for customer service assistance. If you change your mind after placing an order, you can cancel the order under some circumstances.
Once the item has been shipped, the order cannot be canceled and would be treated as Returns.The table below contains the time frames for when cancelation are available for different products. Cancelation Process: 1. Return Policy Your satisfaction is of the utmost importance to us. Shop Daily Chic - Be Boutique Chic Every Day! Lily Boutique., Women Cloths Online, Teen Clothing Or Apparel Chicago, Womens Clothings, Women Fashion Clothing, Trendy Juniors Clothes, Prom Dresses Or Evening Gowns, Celebrity Clothing Styles, Chicago. Short Sweetheart Dark Navy Chiffon Bridesmaid Dresses - weddingdresses100.com. Please take note that we have no inventory of most of the dresses.

All dresses are made in our factory according to the size from buyer and usually take about 7 days for making. It is important to provide the correct size to fit yourself, you may leave the message of the size/color you needed as well as with your requirements when checkout. Learn more about our policy of the custom made dress. Dress could be made with different colors, you can select the color you like from the color chart. We will confirm the Size/Color/Styles/Any requirements with you via email before Making. If you can't get the correct size from the standard size chart, please click here to submit your detailed size measurement after checkout.
Please take note that colors may vary slightly from the pictures due to the nature of printing and other media used to show items. Custom order is welcomed. Weddingdresses100 wants customers to be happy. You should provide us the Authorization of the shipping goods. June 2008. Hoki plastic sandals, which you may recognize as those worn by grandpas (with socks) have been resurrected by a Tel Aviv company who bought the 50 year-old molds to save these slippers from extinction.

The new modern version is created with recycled plastic and comes in a variety of fun colors. Strapless High Low Dress, High Low Strapless Prom Dress. * Products showing with a general "in stock" banner have some size and color combinations ready to ship immediately.
Sizes and color availability may be limited due to seasonality. Please select any size and color to display the exact product availability. If the size and color that you are looking for are not listed in the drop down boxes, this item is not currently available with those options. Please see the different availability statuses below. In Stock Ready To Ship! Iphone case iphone 4 case iphone 4s case by iPhoneCasesFancylucy. Fascination in gold iPhone Case by Sylvia Cook Photography. Hair.
Giant S’mores Stuffed Chocolate Chip Cookies. I swear I wasn’t going to do this.
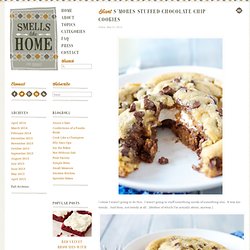
I wasn’t going to stuff something inside of something else. It was too trendy. And then, not trendy at all. (Neither of which I’m actually about, anyway.) But I succumbed to the pressure of a college kid who just finished finals. S’mores stuffed into thick and chewy chocolate chip cookies. But alas, perfection. So there. Giant S’mores Stuffed Chocolate Chip Cookies I made my own graham crackers for these s'mores stuffed cookies, but you can certainly use store-bought crackers if you're pressed for time or you know, not crazy like me. Ingredients 2 cups plus 2 tbsp all-purpose flour½ tsp baking soda½ tsp salt12 tbsp unsalted butter, melted and cooled until warm1 cup brown sugar, packed½ cup granulated sugar1 large egg plus 1 egg yolk2 tsp vanilla extract1 ½ cups semi-sweet chocolate chips.
25 Handmade Gifts Under $5. If your gift list is long and your budget is small here are some great Handmade Gifts that you can make.
Keep in mind that handmade items are not just beautiful but special… I love to give them and I love to receive them. In my opinion they are the best! DIY Braided T-Shirt Bracelets. Flax & twine: Day 3: Sparkle Headbands - a diy headband tutorial. Theses headbands I want to keep for myself.

Really, I can’t decide which I like better the beads or the rhinestones. I know Allie won’t want to take them off. Who doesn’t love the idea of diamonds glittering in your hair? The technique for the floss wrapping I used in the wands in my costume course on Craftsy. But, I just adore the added bling. Simply Vintagegirl Blog & Blog Archive & Tutorial: How to Make... - StumbleUpon. 29 May 2010 These elegant fabric flowers are very simple to make . . . and only take a few basic supplies.
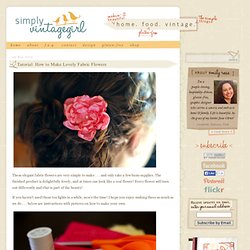
The finished product is delightfully lovely, and at times can look like a real flower! Every flower will turn out differently and that is part of the beauty! Decorative Paper Lanterns. Home Facials - Get Natural Skincare Ideas at WomansDay.com - StumbleUpon. Facials are a great way to keep your skin glowing, but they can be pricey.

We asked Louisa Macan-Graves, author of Hollywood Beauty Secrets: Remedies to the Rescue, and Elda Argenti, owner of the Plantogen skincare line, for their favorite make-at-home face masks crafted from common household ingredients. For All Skin Types Brighten: Cut a slice of ripe papaya and remove the seeds and pulp (save the pulp for a snack later—it’s great for digestion). Rub the inside of the papaya peel on your cleansed face, focusing on lines around the mouth and eyes, crow’s feet, thinning temples, neck and hands. Let it dry for 15 to 20 minutes, then rinse with tepid water. How to Make Cherry Blossom Lights - StumbleUpon. Crayon Hearts - Martha Stewart Crafts - StumbleUpon. Makeup Savvy: Dazzle Dust Nail Tutorial - StumbleUpon. I've been wanting to try out paint splattered nails for ages now, however it seems like alot of hard work and also kind of messy!
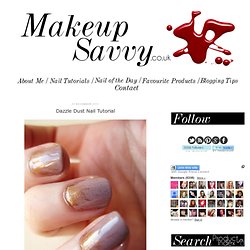
So me being supposedly 'savvy' and all I came up with a probably just as messy idea...but slightly more fun and prettier. Also it looks alot more delicate than having a paint splattered effect and alot less nail arty and more wearable. Now like I say... it is kind of messy so you will need at least one face wipe/baby wipe and something to do it on like the back of a magazine. Also your nail polish of choice and a pigment or dazzle dust! I used a Barry M Dazzle Dust in Brass (100) £4.50 and the nail polish is by Beauty UK in Smokey Lilac £1.79. 1) Firstly you need to give your nails one coat of nail polish. 2) Once dry you can apply the second coat. 4) You can either place the pigment on every finger all in one go or do one nail at a time. 5) Then you basically blow the pigment in the direction of the nail. Handmade Tissue Paper Flowers and Pompom Garland.
You'd think after making hundreds of these for my wedding, I'd be completely sick of them. But I can't help it, I love them so much! I'm a little sad that I didn't save a bouquet of paper flowers from my wedding, but I never thought I'd want to see them again. So I made some for home, only this time as a garland... ...And as bedroom decor... ...And maybe I couldn't resist making just a few little blossoms...
Want to make some? Materials: Tissue paper Heavy-duty scissors Floral wire. Diy {bird nest necklace} I have been seeing a lot of bird nest jewelry around lately. They are beautiful and I love the trend so I thought I would try making my own. These turned out to be really easy to make and require just a few simple supplies. This necklace would make a lovely Mother's day gift, which just happens to be coming up this weekend! What you'll need: - Jewelry wire (I prefer using a 24 gage because it is easier to manipulate but the 20 gage can work well too with the help of some round nose pliers) - pearls or glass beads - necklace chain - jump ring and a clasp Select the beads you want, string them onto your wire and arrange them as you'd like. then simply wrap the wire around the beads.