
Templates.jpg picture by HelloSandwich - Photobucket. Most favorited all-time - page 5. 20 Awesome Do It Yourself Projects. Thursday, June 14, 2012 4:30 am, Posted by Chris Groves | Internet 20 Awesome Do It Yourself Projects Topics: At Home Project Ideas , Creative DIY Home Projects , Do It Yourself Projects for 2012 , Fun How To Projects , What to Do with Extra Stuff Are you bored and have a bunch of extra little items hanging around here and there?
Well we were in the same boat so we decided to round up 20 different awesome at home projects you can do. Time - page 4. DIY Chan Luu Bracelet « My goal this holiday season was to really try my best to make some homemade gifts.

So far I’m doing pretty well with my wreath, some burlap covered candles, some personalized coasters and this past weekend I gave a try at some jewelry. You may have noticed how wrap bracelets are everywhere lately. Chan Luu bracelets are extremely popular these days. They come in singles and also in wraps. I love love the look of these bracelets. I did the top bracelet by simply following this tutorial. 1. 2.Bring your needle up under the right cord through the center and pull the thread through. 3. 4.
Painted rug. I know that there are many of you moms out there who own one of these foam play mats.
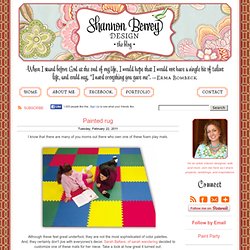
Although these feel great underfoot, they are not the most sophisticated of color palettes. And, they certainly don't jive with everyones's decor. Sarah Baltare, of sarah.wandering decided to customize one of these mats for her niece. Take a look at how great it turned out: On the smooth side of the mat, she applied 2 coats of primer and then 2 coats of the base color. Abbey, at Aesthetic Outburst, saw the post and was inspired to paint her own mat for her sons room. And look at the rug that Kim from Art and Cupcake painted for her kitchen: Honeysuckle Pink Chalkboard.
Bookbinding Tutorial by =JamesDarrow on deviantART. Tissue Rose Piñata {DIY Feature} And Chickabug Giveaway Winner. I was blown away when I first saw the gorgeous tissue rose piñata from the Cornish Fairies Party by Nicole of Tradewind Tiaras.
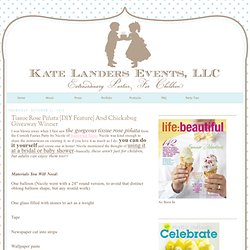
Nicole was kind enough to share the instructions on creating it, so if you love it as much as I do, you can do it yourself and create one at home! Nicole mentioned the thought of using it at a bridal or baby shower--basically, these aren't just for children, but adults can enjoy them too!!! Materials You Will Need: One balloon (Nicole went with a 24" round version, to avoid that distinct oblong balloon shape, but any would work)One glass filled with stones to act as a weightTapeNewspaper cut into stripsWallpaper paste Tissue paper {Step One} Making a papier mache pinata is simple, but does take several days (including drying time). 1) Tape your balloon, knot side down, to the glass filled with rocks. 2) Dip strips of newspaper in the wallpaper paste, wiping off any excess. 3) Allow each layer to dry before adding another layer of newspaper.
{Step 2} {Step 3} Transfer Images Using Freezer Paper. It was purely by accident that I figured out this method of transferring a printed image.
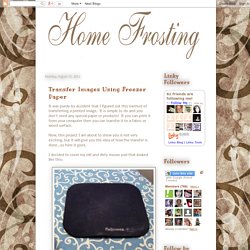
It is simple to do and you don't need any special paper or products! If you can print it from your computer then you can transfer it to a fabric or wood surface. Now, this project I am about to show you is not very exciting, but it will give you the idea of how the transfer is done...so here it goes. I decided to cover my old and dirty mouse pad that looked like this: I used canvas and cut a piece a bit larger that than the mouse pad. Then I cut a piece of "Heat n Bond" the same size as the canvas and, following the instructions, adhered it to the back of my fabric. I then centered the mouse pad onto the back of the canvas and, again, using my iron, adhered the canvas to the top of the mouse pad.
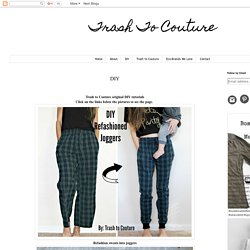
I cut a piece of macramae jute and secured it to the edge of the pad using hot glue. So, now you know how I covered the mouse pad...onto how to do the transfer. Trim the excess freezer paper using sissors. Most gawked all-time. Tutorials Gallery. First Fall 2012. Tutorials Gallery. DIY. Trash to Couture original DIY tutorials Click on the links below the pictures to see the page.
DIY: framed jewelry displays. 5 Ways to Turn Zippers into Awesome Arm Candy. UPDATE: By popular demand, Zipper Bracelet Kits ($15) and readymade Zipper Bracelets ($20) are now available in the Brit + Co. shop!

You know we love turning unconventional materials into wearable accessories. Today, we’re tackling zippers! We figured out 5 simple, beautiful ways to create bracelets, cuffs, and bangles out of metal, plastic, and repurposed zippers. Materials: - zippers - E-6000 quick hold contact adhesive - velcro or snap buttons - leather crimps + clasps - Tools: needle nose pliers, sharp scissors.