
Électronique en amateur: Robot à base de moteurs pas à pas (Arduino) Pour le roboticien amateur, la plate-forme robotique la plus répandue est constituée de deux (ou quatre) moteurs à courant continu.
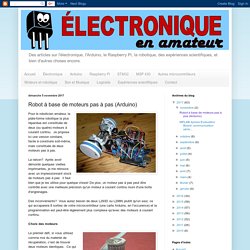
Je propose ici une version similaire, facile à construire soit-même, mais constituée de deux moteurs pas à pas. La raison? Après avoir démonté quelques vieilles imprimantes, je me retrouve avec un impressionnant stock de moteurs pas à pas: il faut bien que je les utilise pour quelque chose! De plus, un moteur pas à pas peut être contrôlé avec une meilleure précision qu'un moteur à courant continu muni d'une boîte d'engrenages. Des inconvénients? Choix des moteurs Le premier défi, si vous utilisez comme moi du matériel de récupération, c'est de trouver deux moteurs identiques. Store.laughingsquid. Meet Cherokey 4WD, a versatile mobile platform compatible with most microcontrollers, and the heart and soul of your robotic vehicle.

By assembling the included hardware and tuning the software, you will construct a rapid, rugged, outdoor-friendly truck controlled by an iOS app on your phone. Learn to install sensors on the robot to trigger specific movements and actions, and take your newfound Arduino expertise onto limitless future projects. Enjoy high-quality micro-speed motorsDrive your truck on rough terrain w/ its durable & solid aluminum bodyExpand upon the highly versatile modular designEasily control w/ your iOS deviceWrite your own code to take advantage of its ultrasonic sensor, BLE-ready microcontroller, IR sensor & LEDsStart your project immediately without the need for an additional motor driver or wireless shieldUse for educational purposes, robot competitions, home automation protyping or research projects.
Projects. Modifier des servos MG995 pour une rotation continue. Afin de motoriser un véhicule télécommandé je vais utiliser des servos modifiés pour autoriser une rotation continue.
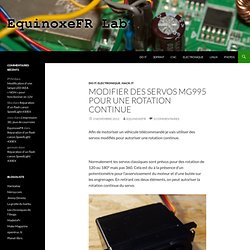
Normalement les servos classiques sont prévus pour des rotation de 120 ou 180° mais pas 360. Cela est du à la présence d’un potentiomètre pour l’asservissement du moteur et d’une butée sur les engrenages. En retirant ces deux éléments, on peut autoriser la rotation continue du servo. La victime On démonte l’arrière du servo en retirant les 4 vis. Funduino UNO Robotics Kit Guide – FoxyTronics Learning. How to Make Your First Arduino Robot – FoxyTronics Learning. Note: A tutorial for the newer version of our Arduino robotics kit is available here: Funduino UNO Robotics Kit Guide All right, now that we've finished building our robot, it's time to make it actually do something!
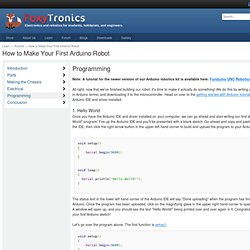
We do this by writing a program (or "sketch", in Arduino terms) and downloading it to the microcontroller. Head on over to the getting started with Arduino tutorial to learn how to get the Arduino IDE and driver installed. 1. Hello World Once you have the Arduino IDE and driver installed on your computer, we can go ahead and start writing our first sketch, the classic "Hello World" program! Void setup(){ Serial.begin(9600);} void loop(){ Serial.println("Hello World! ") Building a Simple Arduino Robot. Step #1: Making the Chassis Place the battery pack face down and orient it so that its cable is facing you.Take two pieces of double sided tape and adhere them on the long sides of each servo.
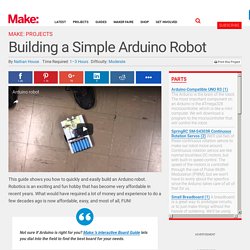
Ensure servo alignment at the bottom. Robot programmable AREXX Arduino AAR-04 - Vente Robot programmable AREXX Arduino AAR-04 sur conrad.fr. Obstacle Avoiding Robot. Robot. Overview The Arduino Robot is the first official Arduino on wheels.
The robot has two processors, one on each of its two boards. The Motor Board controls the motors, and the Control Board reads sensors and decides how to operate. The new Arduino Robot is now in the store! The new Arduino Robot is now in the store!
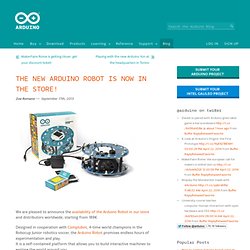
Zoe Romano — September 17th, 2013 We are pleased to announce the availability of the Arduino Robot in our store and distributors worldwide, starting from 189€. Designed in cooperation with Complubot, 4-time world champions in the Robocup Junior robotics soccer, the Arduino Robot promises endless hours of experimentation and play. It is a self-contained platform that allows you to build interactive machines to explore the world around you. You can use straight out of the box, modify its software, or add your own hardware on top of it. To further explore the Arduino Robot, check out the documentation to getting started with it and a collection of examples and tutorials that will quickly show its great features.
The Arduino Robot is the result of a collective effort from an international team looking to make science and electronics fun to learn. Check it out in the Arduino Store >> (This product is available with UK Plug, US Plug and IT Plug) Robot [EU Plug] [A000078] - €189.00. The Arduino Robot is the first official Arduino on wheels. The robot has two processors, one on each of its two boards. The Motor Board controls the motors, and the Control Board reads sensors and decides how to operate. Each of the boards is a full Arduino board programmable using the Arduino IDE. Both Motor and Control boards are microcontroller boards based on the ATmega32u4 (datasheet). Seed Spreading Robot. Last summer it was brought to my attention that you could buy nearly everything you needed for automated lawn care but a seed spreading robot.
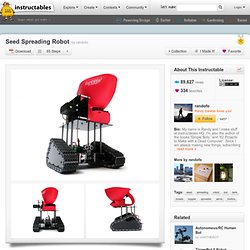
This intrigued me. For starters, why on Earth would anyone make lawn care robots in the first place? There are countless reasons this seems like a bad idea. Secondly, a seed spreading robot sounded like a bizarre robotic cross between Wall-E, and Johnny Appleseed. The idea clearly had potential. So, when asked if I wanted to actually take on the challenge of building one, I obviously responded with a definitive yes.
Albeit I only later saw a video of it in action, it is my understanding that it performed about as well as you would expect an experimental DIY seed spreading robot to perform on its initial run; in short, not very. Nonetheless, I think the structural design of the robot is solid. Robot Arduino Scratch S4A.