
DIY envelope clutch - StumbleUpon. (vintage romper, river island feather headband) I’ve been wanting an oversized clutch for a while now, especially since I laid eyes on that Celine clutch shot by Tommy Ton for style.com.

Its minimalism is so beautiful. Then, I saw the Clare Vivier La Pochette on ofakind.com and instantly knew what my next DIY would be. I couldn’t decide what color fabric to choose, so... why not make 2? The steps are pretty simple and I probably could’ve made 10!! V and Co how to: jersey knit bracelet - StumbleUpon. I don't know what it is about this time of year that makes me just want to have my bare feet in the sand, be watching the sun setting into the ocean, and breathing in the warm salty air of the beach...as i get older, more and more i find myself missing that place i used to go to almost every.single.day. as a teen.
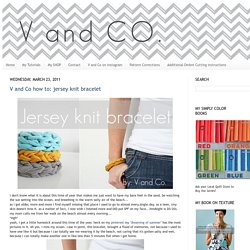
(my skin doesn't miss it. as a matter of fact, i now wish i listened more and DID put SPF on my face...hindsight is 20/20). my mom calls me from her walk on the beach almost every morning... *sigh*yeah, i get a little homesick around this time of the year. heck on my pinterest my "dreaming of summer" has the most pictures in it. ah yes. i miss my ocean. case in point. this bracelet, brought a flood of memories, not because i used to have one like it but because i can totally see me wearing it by the beach, not caring that it's gotten salty and wet, because i can totally make another one in like less than 5 minutes flat when i get home. *sigh* okay... *cut off excess tails! Do-it-Yourself DIY String Wedding Lanterns Yarn Chandeliers - StumbleUpon.
Jessica of Wednesday Inc shows us how to make those gorgeous twine chandeliers from the inspiration shoot she shared with us this morning.

Using balloons, glue and twine, you can also make these lanterns for your wedding – and then bring it home and use it as your very own mid century lampshade. What you will need are: balloons, glue, yarn, tray for glue, corn starch 1/2 cup of Corn starch, 1/4 cup of Warm water, clear fast drying spray paint, hanging lamp cord or fishing line (depending on your desired final product), and a lighting kit if you’re looking for a fully functional lantern. Jessica recommends using a sharpie to mark on the inflated balloon how much room you need to leave for the lighting cord.
She also recommends coating the balloon with vaseline prior to wrapping the yarn coated with glue so it doesn’t stick on the balloon once it’s dry. You can see all the details on Jessica’s blog. Are you getting excited to try to do this at home as much I am? Instructions: Make It and Love It - StumbleUpon.
Have you ever done any glass etching?
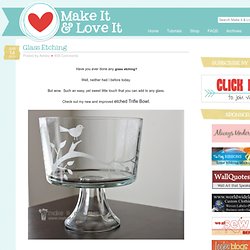
Well, neither had I before today. But wow. Such an easy, yet sweet little touch that you can add to any glass. Check out my new and improved etched Trifle Bowl. The perfect bowl for desserts of all kinds…..and even a great place for fresh fruit on the counter. Glass etching is also a great way to stamp your name on your pyrex dishes, to make sure they come back to you. And how about adding a little extra detail, just because…… (Edited to Add: The font used here is called Smiley Monster and I downloaded the font for free here.) Sweet in every way. Are you wanting to make your own? (This technique permanently etches your glass. First, you’ll need a piece of vinyl with an adhesive back, like the vinyl you buy for vinyl wall decor.
Then peel away the shapes, leaving the negative space all in one piece. The Silhouette code for the bird/branch is: bird_on_branch_C00044_23067 01/18/2010 Then peel the vinyl backing away. See how there are air bubbles? Good luck! Craftgawker - StumbleUpon. Decorative Paper Lanterns - Martha Stewart Crafts - StumbleUpon.
How to make a recycling money wallet. This photo manual will show you step by step how to create your own recycling wallet.
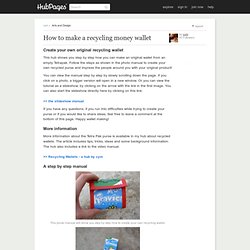
Collect an empty milk or juice container. The easiest is to use a brick shaped package. Try to find a package of the model Tetra Brik by the company Tetra Pak. These are the most common packages and the best to create a recycling wallet. Open the edges on the top of the package. The edges are usually glued to the side and should open easily. Also open the edges on the bottom of the package. The edges should open easily. It doesn't matter if the packages is slightly damaged when you open the corners. If you are using a package of the model Combibloc you will have to cut out the bottom, which is a little more complicated.