
Pleated Tote. Hello!

I hope you all had a wunnerful weekend. I had an incredible weekend (more about it in my next post) and then I got knocked over sideways by food poisoning. Hey ho. Here it finally is, the pleaty bag tute that I promised you just before we moved house (wow did that all really happen? It seems like an age ago!) **NB: the pattern is a simple landscape rectangle - measurements are in the tutorial** Ohh boy! Please pop your U-Handbag tute/kit/pattern bags in here - I love checking 'em out :) Click on the pics to enlarge. Dya like my birdy hook? Side view. The pleats look great and they add heaps of volume to the bag (so you can add heaps o' shoppin'). To see pics of another Pleats Sake Tote that I made, look here. I do hope you enjoy the tute folks!
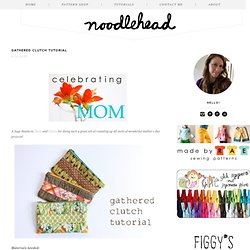
Gathered Clutch. A huge thanks to Dana and Disney for doing such a great job of rounding up all sorts of wonderful mother's day projects!

Materials needed: 1/4 yard each of three coordinating fabrics (you'll definitely have scraps leftover)8" zipper (you can always purchase a longer zipper and shorten it, just follow the directions on the packagescraps of medium weight fusible interfacingCutting the pieces: For the main exterior, cut two pieces, one 5.5" tall by 9" wide, and one 5.5" tall by 13" wide (this will be the gathered front) Pieces of medium weight fusible interfacing for exterior pieces of clutch: (2) 5.5" tall by 9" wide For the front band, cut one piece 4" tall by 9" wide. Seriously, the most time consuming part for me is always picking out my fabrics and cutting them, the rest goes together pretty easy, so let's go! Take the front band piece and fold it in half the long way (right sides together) and sew together using a 1/2" seam allowance. Grab the 13" wide main exterior piece. Button Shrink-A-Dinks.
This tutorial is an old one of mine that’s too good not to share again.

Since posting the first time, I’ve had lots of questions about these buttons which will hopefully be answered in this revised post. Equipment Some handy notes: 1. The buttons. Single hole, hole punch (like this one here). 2. 3. Okay.. lets get started! Tracing tips: You can use either coloured pencils or permanent pens. Words must be writted backwards in order to be readable.
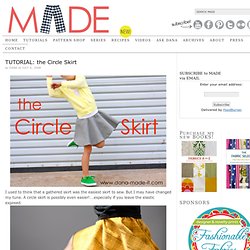
Shrinking the buttons: To shrink the buttons, you can use an oven or a heat gun (the kind used for embellishing). After the buttons have twisted and twirled, and are LYING FLAT, it’s time to take them out. Note: If the skrinking is taking too long, you may need to turn your oven up. Here’s a short little stop-motion to make sure you’ve got the gist of how easy this is! Shrink Paper {here} Circle Punch {here} Hole punch {here} Pens {here} Update: I’ve made a video to show how to shrink the buttons using a craft embellishment heat gun. Kimanh. Circle Skirt. I used to think that a gathered skirt was the easiest skirt to sew.

But I may have changed my tune. A circle skirt is possibly even easier! ….especially if you leave the elastic exposed. If you’ve ever made a poodle skirt before, it’s the same concept. Your fabric is cut in a circle, like a donut. Once you’ve created your pattern, you can whip up 4 skirts in an hour! Okay, let’s get started.
What you need (for a little girl’s skirt): * about 1 yard of fabric* appx 3/4 yard of 2-inch wide elastic FABRICS to use:* Rayon* Polyester Charmuese* Simple Cotton* Thin Corduroy* Lightweight WoolMany fabrics will work for this project. ELASTIC:Wide elastic from fabric stores typically comes 2 inches or 3 inches wide; white or black in color. If you’d like to add a colorful twist to your skirt, check out our easy Tutorial for Dyeing Elastic HERE. Measure around your waist. PATTERN:This requires a bit of geometry but don’t worry, we’ll break it down for you.