
Lacto Preparation. This week in the Flog: Making Lactobacillus SerumPhotos to go with the recipe!
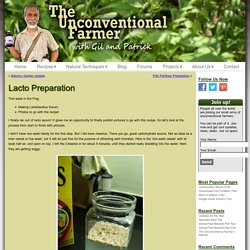
I finally ran out of lacto serum! It gives me an opportunity to finally publish pictures to go with this recipe. So let’s look at the process from start to finish with pictures. I didn’t have rice wash handy for the first step. Cheerios getting soggy in water, releasing carbohydrates I strained out the cheerios, and loosely secured some mesh netting over the top so that large critters like cockroaches can’t get in. The carb wash sits for 6 days to become sour with microbes Now the vessel sits in a shady area of the garden for 6 days. Wash is strained until it only takes up roughly 1/10th volume of vessel. Now we add the milk – just regular old UHT processed milk, nothing special. The milk is added and the jar is capped (not sealed though). Jar goes back to the shady corner of the garden. Lactobacillus cultur – curds floating on top of whey Straining off the Lactic Acid Bacteria (LAB)
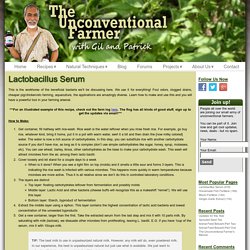
Homemade Raspberry Soda. Lactobacillus Serum. This is the workhorse of the beneficial bacteria we’ll be discussing here.
We use it for everything! Foul odors, clogged drains, cheaper pig/chicken/etc farming, aquaculture, the applications are amazingly diverse. Learn how to make and use this and you will have a powerful tool in your farming arsenal. ***For an illustrated example of this recipe, check out the farm log here. The flog has all kinds of good stuff, sign up to get the updates via email! How to Make: Get container, fill halfway with rice-wash. TIP: The best milk to use in unpasteurized natural milk. You want to keep this stage anaerobic as much as possible.
NOTE: Microbes like L. bacilli are more active in warmer temperatures. The water below(whey+lacto) is the good stuff. NOTE: Remember the curds, or byproduct of milk fermentation by L. bacilli, are great food. To preserve at room temperature, add an equal part sugar/molasses to the serum. Example Recipe: How to make your own EM-1™ inoculant and Bokashi. Rice water EM Aloha thumbs and friends.
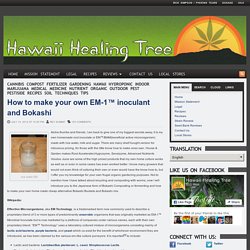
I am back to give one of my biggest secrets away, it is my own homemade root inoculate or EM™/BAM(beneficial active microorganism) made with rice water, milk and sugar. There are many shelf bought version for ridiculous pricing, for those with the little know how to make ones own. House & Garden makes Root Accelerator,Hygrozyme, Sensizyme, Advanced Nutrients Voodoo Juice are some of the high priced products that my own home culture works as well as or even in some cases has even worked better. I know many growers that would not even think of culturing their own or even would have the know how to, but I offer you my knowledge for your own frugal organic gardening purposes.
Wikipedia: The concept of ‘Friendly Microorganisms’ was developed by Japanese horticulturist Teruo Higa, from the University of the Ryukyus in Okinawa Prefecture|Okinawa, Japan. This is a recipe I learned from a friend along time ago. EM/BAM: this a trade secret! 1/4 cup rice. Make Your Own EM (Lacto Bacillius) - Organic Growing. Lacto Bacillius Culture Ok, so I don't know if we can technically call it EM, but you get where I'm going with this.
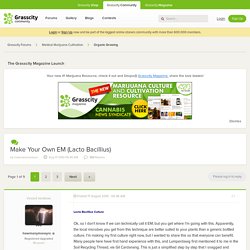
Apparently, the local microbes you get from this technique are better suited to your plants than a generic bottled culture. I'm making my first culture right now, but I wanted to share this so that everyone can benefit. Many people here have first hand experience with this, and Lumperdawg first mentioned it to me in the Soil Recycling Thread, via Gil Cardanang. This is just a simplified step by step that I snagged and decided to post here for the greater good. -------------Materials needed----------------rice (brown or white)---jar with lid( i use 1 quart mason wide mouth jar)---milk (any kind, but raw works best)---strainer( i use a metal one from the grocery store really cheap)---molasses(optional)--- a 1 gallon container (optional....depending on if you want/need to make a lot ) follow these easy instructions below. 2.Allow air gap at least 50-75% of the container.
Stoppers & Airlocks - Fermentation Equipment - Brewing Equipment.