
Img84o.jpg (JPEG Image, 710x639 pixels) More Fun With Ornaments. » Pretty. Quirky. Look Alike Capiz Shell Christmas Garland. Mini chalkboards, birds’ nests, feathery birds, mercury glass, pinecones, chandelier crystals, twine, burlap, starfish, sand dollars, capiz shells, book-page-wrapped balls, and ribbon.
That is what my Christmas tree is made of! How could one go wrong if she took every single trend of 2010 and threw it on her tree? She couldn’t! I absolutely love how my tree turned out, and this week I’ll show you how I did it without spending anything. For the last eleven years, I have had a traditional red and gold theme going on. The crowning jewel of my tree is this gorgeous garland that I moaned, whined, and cried about on facebook and twitter all weekend long. If you are absolutely insane and want to make one of these beauties for yourself, all you need is the following: Wax paperCircle punchWhite threadGlue gun. Lolly Chessie's Famous CP Christmas Trees - Crate Paper. Hey Everyone!
My name is Lolly Chessie and I'm thrilled to be sharing my first tutorial here on the Crate Paper blog! One of the projects I did for CP this past Summer CHA was two little trees! I thought it would be fun to share how I made them with you all! What you need: Two paper mache tree shapes. Lets Get Started! Start by either cutting the petal shape using the Sizzix - "Flowers, Beauty Bloom" die (found HERE) or if you have SCAL and a Cricut you can use this .svg file found HERE (1 sheet for the larger petals) and HERE (1 sheet for the medium and smaller petals).
Just a note: If you use the Sizzix die, your petals will be all the same size and that's totally ok! Paint the bottom of your tree shapes with the green paint! You will want to split the pile of "Mittens" and "Candy" papers into two groups as you will be using both sides of these papers! Wrap each shape around a round pen or sharpie marker to curl the edges!
Ribbon Candy Ornaments. I remember trying to eat ribbon candy at Christmastime when I was a kid.
It was always a little too big for my mouth and didn’t really taste that great. But I ate it anyway, because it was one of those things that was only available this time of the year, which made it special. As the years passed, I got over the need to actually eat the stuff, but I still think it’s pretty. When my kids were small, we found kits to make ribbon candy ornaments from actual ribbon, thread and beads. This is my take on those, using wire instead of thread. To make these you’ll need: Ten inches of 20 gauge craft wire, ten 8-millimeter beads (give or take a few millimeters), and two pieces of 1 1/2” wide and 17 1/2” long grosgrain ribbon. Melt the ends of the ribbon carefully with a lighter so they won’t fray.
Using needle-nose pliers, make a hook using 1” from one end of the wire. If you have trouble pushing the wire through, you can use a large needle to make a pilot hole. Thread on another bead. Twig Tree. Now you’ll probably think I’m exaggerating, but I had the best day of my entire life a couple of weeks ago.
I FOUND SOME STICKS! Not just *any* sticks! I found 2 bundles of perfectly straight sticks out behind the kitchen store I shop at. In their garbage pile, covered in muck and discarded coffee cups. Since the area is also near a bar it’s entirely possible there was a bit of urine and vomit around them. So being the kind and non-stealing kind of person I am, I asked the owner of the kitchen store if I could have their garbage.
I was not only given the sticks, the entire store did a bit of a dance that involved complicated footwork, while they sang a song about not having to go to the dump. PAPER TOWEL ROLL STARS {day 8} PINE CONE XMAS TREES {day 2} Christmas. I love decorating for the holidays.
Paintbrush Ornaments. I recently created these paintbrush ornaments for a friend who loves to paint!
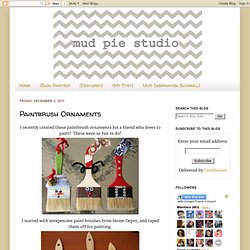
These were so fun to do! I started with inexpensive paint brushes from Home Depot, and taped them off for painting. I chose these colors for the handles and applied with a foam brush: After this dried, I covered the wooden handles and taped off the brush areas and spray painted the metal section using Rust-oleum spray paints: After the base coats were all applied, I painted on the snowman face and then finished by hot gluing embellishments from my craft stash. Finally, I added coordinating ribbon to the handles so they can easily hang on the tree. Christmas Display Ideas. This photo originally appeared in FamilyFun Magazine Total Time weekend projects Ages all-ages Let the sun shine in through a few of these glittery window clings.
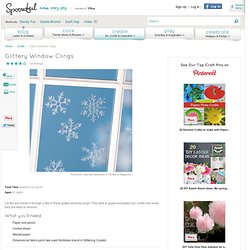
They stick to glass and plastic but, unlike real snow, they are easy to remove! What you'll need Paper and pencil Cookie sheet Waxed paper Dimensional fabric paint (we used Scribbles brand in Glittering Crystal) How to make it Draw a snowflake template (small, compact designs work best), or download ours here.