
Mug_coaster_cozy_pattern. Japanese pattern-reading tutorial: Lesson 3a crochet. So, everyone have their yarn and hooks ready?
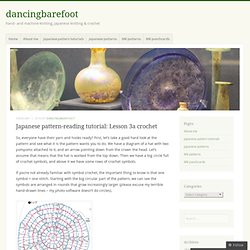
First, let’s take a good hard look at the pattern and see what it is the pattern wants you to do. We have a diagram of a hat with two pompoms attached to it, and an arrow pointing down from the crown the head. Let’s assume that means that the hat is worked from the top down. Then we have a big circle full of crochet symbols, and above it we have some rows of crochet symbols. If you’re not already familiar with symbol crochet, the important thing to know is that one symbol = one stitch. The わ symbol (pronounced wa) in the middle means that you’re supposed to do a magic loop, but really any method you know for creating a round in crochet will work. Ok, one more thing before I get into the actual crochet symbols themselves: how to identify the stitch repeat. If you want to make it larger or smaller, just add/remove one or more stitch repeats.
OK, so let’s get down to nuts & bolts now: international crochet symbols. Like this: Like Loading... How To Amigurumi. I heard friends and readers asking me how to do amigurumi, including patterns, materials, tools & tips etc…. you will find all the answers in this post: How-To Amigurumi!!!
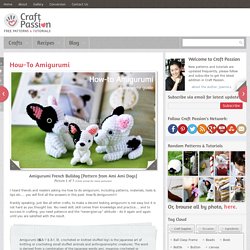
Frankly speaking, just like all other crafts, to make a decent looking amigurumi is not easy but it is not hard as you thought too. You need skill, skill comes from knowledge and practice…. and to success in crafting, you need patience and the “never-give-up” attitude – do it again and again until you are satisfied with the result. Amigurumi (編みぐるみ? , lit. crocheted or knitted stuffed toy) is the Japanese art of knitting or crocheting small stuffed animals and anthropomorphic creatures.
The word is derived from a combination of the Japanese words ami, meaning crocheted or knitted, and nuigurumi, meaning stuffed doll. {CLICK HERE to get the introduction on How-To Amigurumi.} Pages: 1 2 Print / Download PDF. Tiny Amigurumi Cats ? Roses n Lilies. I made these as gifts for some friends.
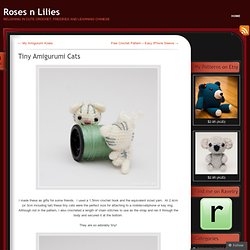
I used a 1.5mm crochet hook and the equivalent sized yarn. At 2.4cm (or 3cm including tail) these tiny cats were the perfect size for attaching to a mobile/cellphone or key ring. Although not in the pattern, I also crocheted a length of chain stitches to use as the strap and ran it through the body and secured it at the bottom. They are so adorably tiny! The pattern I used was from “Amigurumi Cats and Friends”. Just a Note: If you are new to Amigurumi, there’s a great guide here. And finally, here’s a photo of the cover of the book for your reference. Happy Crocheting! Like this: Like Loading... The Party Artisan. 02 January 2013 Happy New Year!!
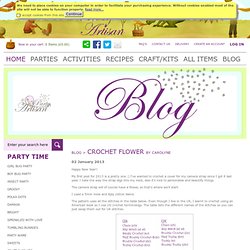
My first post for 2013 is a pretty one :) I've wanted to crochet a cover for my camera strap since I got it last year. I hate the way the strap digs into my neck, also it's nice to personalise and beautify things. The camera strap will of course have a flower, so that's where we'll start. I used a 5mm hook and 8ply cotton blend. The pattern uses all the stitches in the table below. Ch 29 Row 1: Sc in 2nd ch from hook and in all the chains along to the end.
Now you are going to create the petals. Small petals: Ch 2, 4 hdc in the 1st sc, sl st in next sc, 5 hdc in next sc Medium petals: *sl st in next sc, 5 dc in next sc* - repeat 4 more times to give 5 medium petals. In the photo below I had only completed 2 medium petals when the picture was taken - just in case you thought my numbers were off :) Large petals: *sl st in next sc, 4 trc and 1 dc in next sc* - repeat 6 more times to give you 7 large petals, end with a sl st in last sc.
Carolyne xxx.