Scrapbooking, Crafts and Kids Crafts, Arts and Crafts, Easy Paper Crafts and Cards. Craft Projects. Dollar Store Crafts. Craft Website. Paper crafts: mini grad cards It’s that time of year again – graduation season.
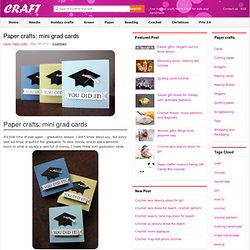
I don’t know about you, but every year we know of quite a few graduates. To save money, and to add a personal touch to what is usually a card full of money, I made these mini graduation cards. Here is what you will need to make these cute little cards: 3×6 pieces of card stockblack and white card stockembroidery threadglue dotsbradsa template for your grad hats – I made mine by drawing a diamond for one piece. 1. 2. 3-6. 7. In my original card plan, there was no sentiment (which is why the stamping materials are not pictured in the supplies list). Craft Website #2. 12 Fall Kids Crafts. Top 100 Tutorials of 2010. Crafty. Crafty Moods. If you know me by now, you know that I am obsessed with making any and everything into either a garden planter or a candle holder.
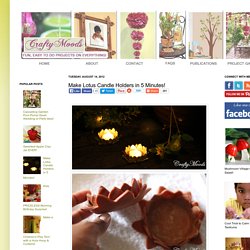
I do not know where this infatuation came from but it's fun. I enjoy it. I love flickering candle lights and cozy gardens. There is something so magical about them both, especially on a summer night. Here is just another one of my ideas that suprisingly came out great! Things you will need: Super Sculpey or any baking clay Cubcake panFlower cookie cutter about 3.5 or 3.75 inches inches in diameter (I stretched mine out)Rolling pinCooking spray Find a flower cookie cutter big enough to cover the size of the cupcake pan's bottom. Use cooking spray to lightly coat the bottom of your cupcake pan. Anyway, this is my cookie cutter (never used it for cookies) it is big enough to cover the bottom of the cupcake pan and more. Place one layer over the cupcake pan's bottom and paste to the sides gently. Crafty Crafty: Your guide to all things crafty, including knitting, crochet, sewing and customisation.
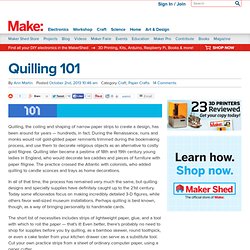
Arts and Crafts Guide. Living - Craft - How to Make Instructables. Craft DIY Projects, Patterns, How-tos, Fashion, Recipes @ Craftzine.com - Felting, Sewing, Knitting, Crocheting, Home & More. Quilling, the coiling and shaping of narrow paper strips to create a design, has been around for years — hundreds, in fact.
During the Renaissance, nuns and monks would roll gold-gilded paper remnants trimmed during the bookmaking process, and use them to decorate religious objects as an alternative to costly gold filigree. Quilling later became a pastime of 18th and 19th century young ladies in England, who would decorate tea caddies and pieces of furniture with paper filigree.
The practice crossed the Atlantic with colonists, who added quilling to candle sconces and trays as home decorations. In all of that time, the process has remained very much the same, but quilling designs and specialty supplies have definitely caught up to the 21st century. Today some aficionados focus on making incredibly detailed 3-D figures, while others favor wall-sized museum installations. Many arts and crafts stores sell basic tools and packages of multicolor paper strips. Materials Directions Ann Martin. 30 Fun DIY Crafts To Keep You and the Family Busy During the Holidays. Crafts To Do. After seeing several projects floating around on Pinterest I decided to try the sharpie method for customizing a pair of his + her mugs (this set is super cute + this one is particularly beautiful).
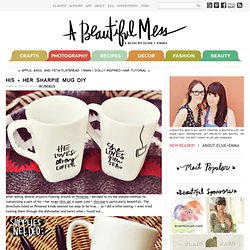
The directions listed on Pinterest kinda seemed too easy to be true... so I did a little testing. I even tried running them through the dishwasher and here's what I found out... Here's the method: All you need is a sharpie (any color) and a porcelain dish that you want to permanently alter. You can even use super cheap mugs from the dollar store to create gifts or party favors. Just draw on the surface of your mug and bake it for 30 minutes at 350 degrees. After I made my dishes I tried scrubbing them with a kitchen sponge and soap. Anyway... that was my fun little weekend project. EDITED TO ADD: Although many people (including me) have had success with this DIY project we have received many comments from readers who said the marker washed off.
Instead!