Workshop Gardening Instructables. How To Make Your Own Book Planters for Succulents. I am a firm believer that it doesn't take much to add a little charm to your home or office.
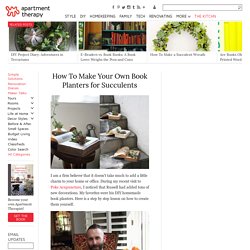
During my recent visit to Poke Acupuncture, I noticed that Russell had added tons of new decorations. My favorites were his DIY homemade book planters. Here is a step by step lesson on how to create them yourself. Russell talks with us about his inspiration behind creating these fun book planters:I first saw these in my favorite geniusly-designed clothing store, TheWarehouse in Echo Park.
They fulifill two of my great loves: oldbooks and negligently caring for plants that are difficult to kill,thus making me feel like I have a green thumb (when in fact I have thekiss of death wtih plants). Some may cry "sacrilege! " Supplies: 1 Vintage book.2-3 small succulents. Instructions: 1. 2. The hole does not need to be clean or pretty because the only pagethat will be visible is the top page, so dont worry if it tears badly,or seems jagged. 3. 4. 5. 6. 7. 8.
Thanks for the lesson, Russell! Toddler Art: Marble Painting with Shaving Cream. Sweet Girl and I have discovered the neatest way to make marbled paintings!
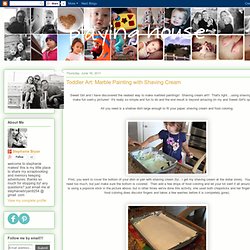
Shaving cream art!! That's right....using shaving cream to make fun swirl-y pictures! It's really so simple and fun to do and the end result is beyond amazing (in my and Sweet Girl's opinions!!) All you need is a shallow dish large enough to fit your paper, shaving cream and food coloring. First, you want to cover the bottom of your dish or pan with shaving cream (fyi...I get my shaving cream at the dollar store).
Next, lay your piece of paper on top of the shaving cream and push down gently to make sure the shaving cream is covering all areas of the paper. Then lift out your paper and let it dry for about 10 minutes. Here's a couple close ups of the incredible marbling! Tea staining. Think that staining wood means stinky lacquers, rubber gloves, and long drying times?
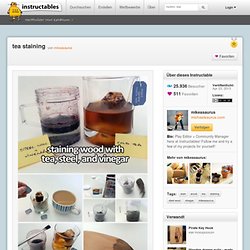
Think again! I'll show you how to stain wood to look weathered and old, with nothing more than household items, and with results achieved in a fraction of the time. Naturally aged wood has a great faded look that occurs from oxidization; this is usually achieved by leaving the wood outside, exposed to the elements until it has a faded, aged patina.
Depending on the type of wood and weather conditions this can take weeks, even months. Luckily there is a simple method to achieve almost the same results and it can be done in a few days, instead of weeks. This classic woodworking trick uses three common household ingredients: vinegar, steel wool, and tea. The process is easy: Rhino Slider: The Most Affordable And Versatile Slider Ever. Build a Motorized Barn Door Tracker... Mostly hand tools were used with the exception of a mitre saw to get the ends for the hinge mount nice and square.
I also used a drill press for drilling the holes for the sliding motor rails so that they are parallel to each other, as well as the hole for the drive rod to ensure it was nicely perpendicular. Parts A decent hinge with very little play, I went with a solid brass 63mm one seeing as the plank width was 69mm. The main part of the tracker, 500mm pine 22m X 69mm. The camera mount, approx 300mm of 22mm X 44mm meranti (a hard wood, well harder than pine anyway) A brass 1/4" 20 modified machine screw for mounting the camera. Map Coasters (aka Coast-To-Coasters) This is a fun little project that doesn't require a lot of materials or tools.
The end result is a neat coaster that will give any room more character and a nice vintage look. What you need: -Old map or atlas -Coaster(s) -Glue -Scissors or knife -Pencil or pen -Casting resin Let's get started! Schritt 1: Trace and cut your map The first thing you need to do is to get the coaster(s) you have chosen and lay it/them flat on your map. Schritt 2: Mix and apply casting resin Now, just mix up your casting resin as per it's instructions and pour it over your map/coaster.
Party. Single Wheeled Bike Trailer. Tired of bumbling along single track trails with two tires on your trailer fighting for the track?
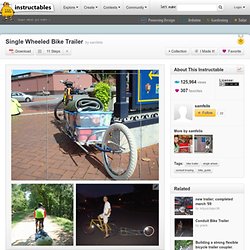
Too full of pride to plunk down the dough for a store-bought one? Never again. With this instructable, you'll be the envy of the trail. I built this trailer to use on my recent ride down the C&O Canal Towpath. The trail is 184.5 miles and runs along (you guessed it!) That's when I decided I could do better. I wasn't sure how to go about building it and thought of a couple different ways to do so. Excluding tools, this can be made for less than $20.