
Take Photos Through These Raspberry Pi Powered Binoculars. Arduino-Based DIY Electric Skateboard. This tutorial is a comprehensive how-to on building your very own DIY electric skateboard.
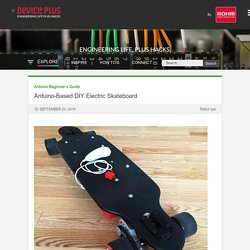
The electric skateboard I’ll show you how to make is a cool and fun method of transportation that is both easy to build and fun to ride! The skateboard is based on a few off-the shelf electronic and electrical components and is designed around the Arduino microcontroller, which means its functionality can be extended beyond the scope of this project. To learn some basics about the Arduino microcontroller before you start, check out this tutorial! In this guide, I hope to show you how to build and program your very own DIY electric skateboard at a fairly low cost, and will discuss some ways I plan to extend and improve the skateboard’s features in future iterations. Hardware. DeathGrip: Robot Claw Gauntlet - 2. Lead Screw:I used an 8mm lead screw which has a 2mm pitch.
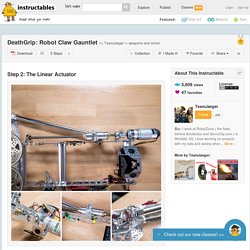
Since it is a 4 start lead screw (there are four concurrent threads) the lead screw nut will have 8mm of linear travel for every 1 rotation of the shaft. I connected the 8mm lead screw to the motor's 6mm d-shaft via an 8mm clamping hub and a 6mm d-hub. Off-the-shelf both are tapped, simply drilling out the threads on one allowed me to bolt them together; the result of which is a very strong hold on both with no set screws to worry about. Circuit Playground Yoyo. 3D Printed NeoPixel Yoyo This project is a derivative of Morgan Stewart's Circuit Playground Yoyo (Watch her demo it on Adafruit's Show & Tell).
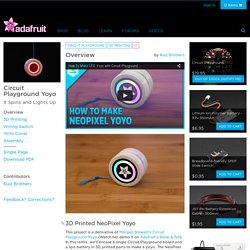
In this remix, we'll encase a single Circuit Playground board and a lipo battery in 3D printed parts to make a yoyo. The NeoPixel LEDs can shine through the cover, making cool glowy effects. Most of the yoyo parts are 3D printed, and no hardware (machine screws, hex nuts, etc) are required. They feature threads that allow the pieces to be twisted together. History of the Yo-Yo. Making Adabot: Part 2. Either solder the LED matrix into place on the backpack, or add some machine pin headers so that you can swap out the matrix as you like.
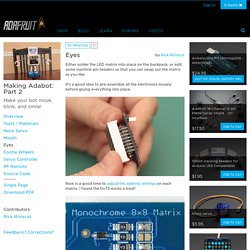
It's a good idea to pre-assemble all the electronics loosely before gluing everything into place. Now is a good time to adjust the address settings on each matrix. Bluetooth-Controlled NeoPixel Goggles. This is not a full project, but rather a follow-up, an add-on to a previous guide.
Our goal is to show how our smartphone app can remote-control even the tiniest of microcontroller projects. To do that, we’ll build upon our popular Kaleodoscope Eyes NeoPixel goggles project, adding the Bluefruit LE UART Friend board to the mix. Change colors to suit your mood…from your smartphone! To be frank, this is not a very practical extension…there’s very little code space left on the Trinket microcontroller for additional modes…but it demonstrates the core idea that adding basic Bluetooth controls no longer requires the most advanced microcontroller or lots of code.
Make Your Own Self Balancing Hoverboard. SudoGlove – Hardware Control Using Hand Gestures. Update 5/19/10 – I have uploaded the final report, code, schematics, laser-cutting files, and sound effects!
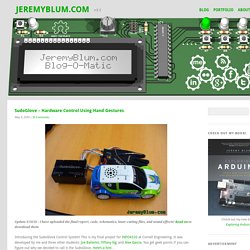
Read on to download them. Introducing the SudoGlove Control System! This is my final project for INFO4320 at Cornell Engineering. It was developed by me and three other students: Joe Ballerini, Tiffany Ng, and Alex Garcia. You get geek points if you can figure out why we decided to call it the SudoGlove. SudoGlove aims to bridge the gap between the user and traditional physical hardware devices. As an investigation into this idea, the goal of this project is to capture simple hand gestures from the SudoGlove and use that input to wirelessly control a modified RC car. DIY Prosthetic Hand & Forearm (Voice Controlled) Parts: (Cost will be about ~120 dollars)Arduino UnoEasyVR Shield 5 x Servo Motors (either a HK15298 or an MG995 variant - anything with these size specs will work) 14 x 2.5mm (or 3mm) bolts (20mm long) 1 x 8mm bolt (55mm long) 1 x 8mm bolt (80mm long) 1 x 8mm bolt (60mm long) 1 x 9V Batteries and Connector 6 - 7.4V Battery and Charger (this drives the 5 servos, so be sure it has high current output ~2-3 Amps.
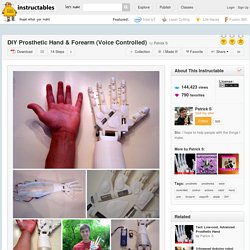
I used this) Wire Fishing Line (any will do, but for more strength buy Spiderwire or Spectra fiber fishing wire so it won't strech) Breadboard Tools: 3D Printer Drill Super Glue (I used 'krazy glue' because I printed in PLA, for ABS use acetone) Soldering Iron Screw Driver Sandpaper. Polar Plotter on Arduino and MakerBeams by roxen. The project A polar plotter is a plotter with a rotating, extendable arm.
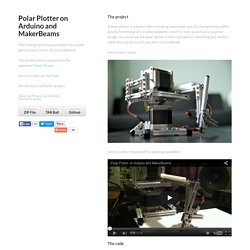
Its characteristics differ greatly from those of a traditional plotter, which in most areas have a superior design. You could say the polar plotter is more portable or something, but mainly I made this one because it was more of a challenge. Here's how it looks: Construct a Giant LED Video Screen. Arduino powered cocktail machine. Robin Baumgarten's game experiments. Arduino Project 7: Build a Retro Gamebox. Our Retro Gamebox is built into a see-through container.
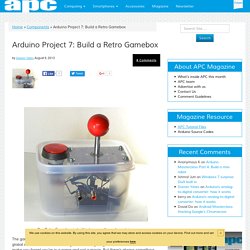
The games market may well dwarf the music and movie industries combined in global revenue and new-release games offer lighting effects and texture detail that make you forget you’re in a game and not a movie. But there’s always something that tugs us back to retro gaming – the blocky graphics corny 8-bit sound and those golden memories. Our Arduino microcontroller doesn’t come with a video output although we showed you in the TV Weather Channel Station Project how you could hook it up to the composite video input of your TV and display your own TV weather channel. So for this project we’re combining all this knowledge and putting together our very own retro arcade games console we’re calling the Retro Gamebox.
What you need Apart from the Arduino Uno board the main components you’ll need are the arcade-grade joystick and fire pushbutton. Games How it works How the arcade joystick works How the fire button works Video/audio output. How To Create An Interactive Music Player For Events - 4. Ray Gun Blaster. Sci-fi Inspired Alien Ray Gun - Pew Pew!
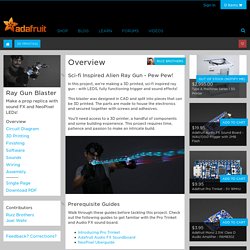
In this project, we're making a 3D printed, sci-fi inspired ray gun - with LEDS, fully functioning trigger and sound effects! This blaster was designed in CAD and split into pieces that can be 3D printed. The parts are made to house the electronics and secured together with screws and adhesives. You'll need access to a 3D printer, a handful of components and some building experience. This project requires time, patience and passion to make an intricate build.
Prerequisite Guides Walk through these guides before tackling this project. Plotter from old CDROMs - HomoFaciens. <<< CNC v2.0 V-Plotter >>> The video about the plotter Mechanics Figure 1: The battery powered WLAN plotter shown here is composed of parts from two old optical drives, four H bridges, a servo and a Raspberry Pi.
Figure 2: From the optical drives we need the mechanisms used to move the laser unit. Secret-Knock Gumball Machine. One of the best things about exhibiting at Maker Faire is giving attendees a challenge. For the 2010 Maker Faire Bay Area, I decided to combine a past project of mine, a door lock that opens only when you give a secret knock, with a standard crowd pleaser: candy. The result was this Secret-Knock Gumball Machine, which tempted and tested the crowds at Maker Faire to guess the right rhythm and receive a treat. Since the knock was not terribly secret (I happily handed out hints), it distributed hundreds of gumballs over the event’s two days. The “secret” knock defaults to the famous “Shave and a Haircut” rhythm, but you can program custom knocks by simply pressing a button and knocking a new pattern.
The machine only listens for the rhythm, not the tempo, so the correct knock will dispense a treat whether you perform it fast or slow. DIY Robotic Hand Controlled by a Glove and Arduino. Build Your Own Pebble: The DIY Smartwatch - Make: Time required: 20–40Cost: $75–$125 My Open-Source SmartWatch combines readily available breakout boards, careful soldering, and a 3D-printed frame to make a one-of-a-kind timepiece that displays notifications from your smartphone and is easily customizable in function and appearance. The watch design is straightforward, consisting of four major sections: a battery charging circuit, vibrating motor for silent alerts, programmable Arduino-compatible core with power regulation and Bluetooth LE, and an OLED display with pushbuttons. Geek Mom Projects. Shirt with a detachable LED Matrix panel. You can see the letter “P” and the beginning of the letter “O” for “PONG”.
After completing the Programmable LED Sweatshirt project with the Arduino LilyPad. Judd Treat Machine - NYC CNC Machining, Fabrication & Prototype Instructional Videos. Touch Pi: Portable Raspberry Pi by adafruit. UPDATE Now works with Raspberry Pi 2. Making a musical light show with the Raspberry Pi. Lobsterbot - a simple LM386 based robot.
Lessons from Rebuilding Illumitune. Skill Level: Intermediate. Retro Gaming Arcade Console with Raspberry Pi (RetroPie) Build a Raspberry Pi-Powered Laptop Inside a Lunch Box. Paperduino 2.0 with Circuit Scribe - Paper Arduino. Our Paperduino design is based on the open source design for the Arduino Pro Mini. We used EAGLE PCB to design the board. Download a schematicThe Arduino Pro Mini board schematic can be found on the Arduino website.Our final Paperduino 2.0 EAGLE files can be found here. Adapting the board for paper In order to make the schematic paper-friendly, we replaced the blocks of pin headers with our own custom round pad. Table Made From Pallets. Trinket / Gemma Space Invader Pendant. Pac Man is my spirit animal.
Okay, not really. But as a child of the 80’s, video arcade games were a huge cultural phenomenon of my formative years. Radio Controlled Cable Dolly for Small Format Cameras. A cable dolly, even a powered one, is quite a simple thing to assemble. Getting all of the little things right, designing and tweaking it to work well is the complex part.
You'll probably run into all kinds of problems such as undesirable swinging, not enough wire tension, and insufficient contact between the drive wheel and the line. Don't be discouraged, you can iron these out. Controlling Arduino car via Leap Motion. Servo Controlled Marble Maze. SpokePOV.