Aggressive Digital Pir Sensor Am312/ Pir Sensor Digital As312 - Buy Pir Sensor Am312,Pir Sensor Digital,Digital Pir Sensor As312 Product on Alibaba.com. Features of aggressive digital pir sensor AM312/ pir sensor digital AS312: 1.Window sizes:4*3mm. 2.High level electrical performance. -low EMI sensitivity -Unique responsivity. 3.Reduced cost and space requirements when compared to analog circuitry. 4.TO-5 Metal can. aggressive digital pir sensor AM312/ pir sensor digital AS312 Dimension: PIR Sensor AS312_Senba Sensing Technology Co,.Ltd. HC-SR505 Mini PIR Module Review. – Unusual Electronics. AS312 (AM312) Mini PIR module review – Unusual Electronics. Issue with HC-SR505 sensor - Arduino Stack Exchange.
I had the same problem of the sensor giving random 1/0 values. I then looked at the circuit closer. The PINs are badly marked which doesn't tell great detail, PIN-1 is marked with "+", however the word "OUT" is sitting between PINs 2 and 3. If you connect + to the +5V, and then the middle PIN into the GND and then OUT into your Arduino (say PIN-10 of your Arduino), then you will notice ups and downs that does not correspond to any movements, (i.e. telling you "Bad Sensor")... however: Part-1 of the solution: Swapping PINs 2 and 3 of the sensor (i.e. + goes into +5V of Arduino, Ground is PIN-3 of the sensor, and Middle is what you should be reading (i.e. PIN-10 of Arduino)) then this should start to work, but we're not finished yet, you would still get bad results... Part-2 of the solution: If you are reading from PIN-10 of Arduino, then on your setup() function would usually be like this: setup() { pinMode(10, INPUT); } This is NOT enough for that sensor!...
Regards Heider. MATERIELCapteurOnOffIRDetecteurMouvementSparkfunFiche. MATERIEL - ON/OFF - Infra-Rouge – Créé le 03/03/2011. Présentation Description Il s'agit d'un détecteur de mouvement simple d'emploi. Mettre sous tension et attendre 1 à 2 secondes pour que le capteur réalise un instantané de la pièce. Documentations utiles : Comment çà marche ? Tout corps chaud, et donc le corps humain émet un rayonnement infra-rouge qui est détecté par le capteur. Brochage Le brochage est classique avec un connecteur sur fil intégré avec : fil rouge pour l'alimentation entre 5 et 12V. fil marron pour la masse (0V) fil noir pour la sortie numérique, à collecteur ouvert (nécessitera un rappel au plus sur la broche numérique utilisée, comme pour un BP) Si quelque chose se déplace dans la pièce après cette période, la broche de sortie passera au niveau BAS. Caractéristiques techniques Ce capteur fonctionne bien entre 5 et 12V. Fonctionnement Principe fonctionnement Mettre sous tension et attendre 1 à 2 secondes pour que le capteur réalise un instantané de la pièce.
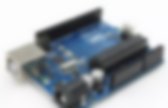
Test Procédure : Tuto – Lire un capteur infrarouge avec Arduino. Bonjour à tous, J’ai reçu quelques capteurs intéressants, dont un capteur infrarouge (permettant par exemple de détecter une source de chaleur), on va donc reprendre un tuto avec ce capteur et un arduino (et un bonus en deuxième partie de tutoriel). Le matériel Pour ce tutoriel il nous faudra : Un arduino (ici un Uno)Un capteur HC SR-5013 filsUne led 5mm Et c’est tout. Le principe Un capteur infrarouge permet de détecter un mouvement dans son champ de vision en se basant sur l’infrarouge. Lors d’un mouvement, la variation des deux moitiés vont varier, et on va donc capter cette variation positive. Principe de fonctionnement Le capteur Le capteur lui même ressemble à ça : Le capteur Et l’intérieur fonctionne de la manière suivante : Les spécifications techniques sont les suivantes : Le montage Au vu des éléments nécessaires, vous allez voir, c’est plutôt simple !
Branchement du PIR sur l’arduino Uno On branche donc : Mais attention : D’un PIR à l’autre, les branchements sont inversés ! Le code.