
Autumn leaf bouquet. I don’t know what it’s like in your neighborhood, but when I step outside here in Oakland, I sense it right away: Fall is in the air!

I’m lucky enough to have a few turning trees on my street, so I don’t miss out entirely on the brilliant autumn colors I remember from growing up in NH. Speaking of brilliant autumn colors, I’m thrilled to share this stunning maple leaf rose bouquet DIY from a fellow Kate — clay, fiber and paper artist Kate Hust. Kate first learned how to make these a few years ago from a retired art teacher in her community, and now they’ve become an annual tradition when fall rolls around. Her instructor taught her to wrap the leaves really tight, so they looked like rose buds, but Kate has modified the technique a bit to suit her own tastes: She likes to find the really big leaves and make them with large open “petals.”
Rolled Flower Gift Toppers. Here is a quick and easy way to add a little charm to your gift packages.
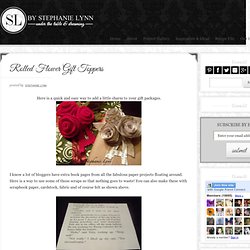
I know a lot of bloggers have extra book pages from all the fabulous paper projects floating around. Here is a way to use some of those scraps so that nothing goes to waste! You can also make these with scrapbook paper, cardstock, fabric and of course felt as shown above. Paper+ typography on the Behance Network. DIY Moleskine Scrapbook. Erica and I never leave home without a Moleskine notebook (we still like to take notes the old fashioned way with a notebook and pen)!

So when our friend Karen (of Lulu Loves Caleb) showed us her fabric embellished Moleskine Cahier Notebook, we jumped at the opportunity to have her show us how she did it. You’ll need a sewing machine, a kraft brown Moleskin Cahier Notebook of any size, a piece of fabric, a glue stick and a pair of scissors. Start by cutting down your fabric to a size that is small enough to fit on your notebook. We cut a 2.5″ x 5″ rectangle for the pocket sized book and 3″ x 8″ rectangle for the larger book. Glue your fabric to the front cover of your notebook. DIY Crepe Paper Flowers. I recently spotted a sensational bouquet of paper flowers inside my favorite (and the ultimate) boutique for creative inspiration, Castles In The Air.
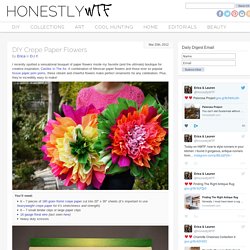
A combination of Mexican paper flowers and those ever so popular tissue paper pom poms, these vibrant and cheerful flowers make perfect ornaments for any celebration. Plus, they’re incredibly easy to make! You’ll need:6 – 7 pieces of 180 gram florist crepe paper cut into 20″ x 30″ sheets (it’s important to use heavyweight crepe paper for it’s stretchiness and strength)6 – 7 small binder clips or large paper clips16 gauge floral wire (last seen here)heavy duty scissors First, lay out the sheets of crepe paper and fold each one into an accordion.
The folds should measure about 2-3 inches thick and should be creased along the natural, horizontal lines of the crepe paper. Keep each bundle bound together by a small binder clip or large paper clip. With scissors, trim the ends into rounded and pointy shapes. Unbind each bundle. EKDuncan - My Fanciful Muse. A Look at Paper Quilling. March is an exciting month: it’s one step closer to spring, it brings longer days with Daylight Savings, and it begins an active season of new books reaching publication.
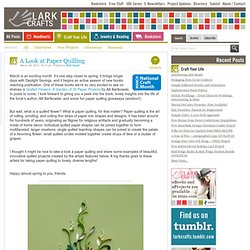
One of these books we’re so very excited to see on shelves is Quilled Flowers: A Garden of 35 Paper Projects by Alli Bartkowski. In posts to come, I look forward to giving you a peek into the book, lovely insights into the life of the book’s author, Alli Bartkowski, and some fun paper quilling giveaways (woohoo!). But wait, what is a quilled flower? What is paper quilling, for that matter? Paper quilling is the art of rolling, scrolling, and coiling thin strips of paper into shapes and designs.
Cupcake Flower Lights. May 24 By Steph Hung May flowers have arrived!
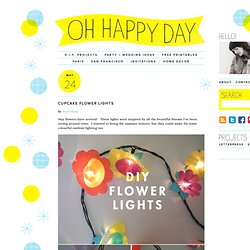
These lights were inspired by all the beautiful blooms I’ve been seeing around town. I wanted to bring the summer indoors, but they could make for some colourful outdoor lighting too: Shape Book Tute « Cheeky Magpie. I’ve had an overwhelming response to this project and everyone wants a tutorial, so here you go.
First off, gather your supplies: - book for dismembering, paperbacks are great. D.I.Y. Repurposd Paperback Apple Sculpture. {images from Cheeky Magpie and Fresh Tea} Before taking off for the weekend, I want to leave you all with this fabulous Repurposed Paperback Apple Sculpture tutorial from Cheeky Magpie (originally found via Fresh Tea on flickr).
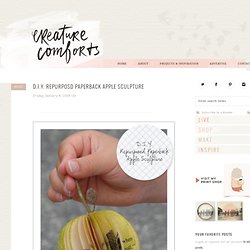
Maybe you will give it a try over the weekend?! You don’t have to make an apple, you could create a pear, peach, or try something freehand and originally you. Have fun! For full instructions click here. DIY Faux Snow Cone Party Garland & Gift Embellishment. As soon as the snow cone shack in our neighborhood opens up, we know that Summer is officially here!

The bright candy colors and the sparkle of glittery ice makes the eyes light up of both young and young-at-heart! What better way to capture the essence of summertime fun and bring it indoors, than with this sweet DIY Faux Snow Cone Garland and Gift Embellishment. Bonus: these ones won’t melt everywhere! Follow below for the simple steps. Lindaalbrecht. "Ceramic" Paper Roses. These rolled roses originally started out as plain red cardstock.
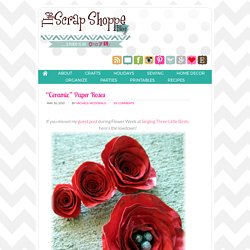
Now they have an almost ceramic look to them. Let me show you how I made them! 1. Sugared Letters Tutorial. I am always on the lookout to create tutorials for Swirlydoos. Prima Flowers Vinetta - Sunshine (6 pcs) - Prima Marketing - 555665 - Melissa Samuels LLC - The Art of Scrapbooking - Create, Dream and Inspire Everyday With Our Huge Selection of Scrapbooking and Card Making Supplies. Tissue Paper & Paper Flowers Tutorial. I debated sharing this tutorial for a couple-o-reasons. Reason 1. Wednesday - Blog - DIY Streamer Flowers. In the spirit of all the DIY projects we have going on to prepare for our everee Wednesday fun-shoot with ee photography later this month, I wanted to share one of my favorite projects yet!!!
Streamer Flowers. Let me just preface this post with saying as much as I wish I could take credit for how brilliant this project is, I certainly was inspired by Olivia Kanaley of A Field Journal as seen on The Bride's Cafe. If you're willing to put in a little time and effort, seeing as it's not incredibly easy, you will find that the reward is completely worth the effort! Paper Flower Tutorial. I have been asked many times to show how to make this very simple flower tutorial, I actually saw a similar-ish one being made a few years ago, when I attended a small local crafts event and when I came home, got straight to making my own version (so that I wouldn't forget) I adjusted it here and there adding my own tweaks to it.
I've been making them ever since for projects (for example recently here) and workshops and now finally, Ive put it in writing (and pictures) and alas my paper flower tutorial is born!! I have witten step by step notes and taken lots of pictures to match, in the hope that it fully explains and covers it, but email me if you have any probs. or need me to explain further. You can also click on the picture to enlarge it. So here goes..... 1. 2. 3. 4. 5. Fold a heart page marker. I hope you’ll whip up some heart page markers to share with those around you. It’s simply too easy not to make. Here’s how: Use a square piece of paper. Fold in half. Crease.