
Tutoria Upgrade- Making Your Own Labels the Smarter, Faster Way! I had a very small amount of time to make a very large batch of labels and needed to make the process more efficient.

I cannot believe I didn't think of doing it this way before. Instead of cutting my ribbon or twill tape, I just ironed 5-6 onto the ribbon at a time. SO much faster! It keeps them way more organized for storage and cuts down on the amount of ribbon wasted. I've included the (extremely popular) original tutorial beneath for convenience, but with fewer steps, since I'm getting smarter. Materials: Iron on Transfer Paper (I just used the t shirt kind) Printer Scissors Iron Ribbon, twill tape or whatever you like best. 1.) 2.) 3.) Isn't that sooo much easier? Projects – Bottle cutting. There are lots of ways to do this particular trick.

You may have seen bottles “cut” using a bucket of ice water, a string soaked in fuel and set alight, a hot narrow gauge resistive wire, or some combination of the above. I’ve tried all of these ways, at one point or another, with varying degrees of success, and I’m reporting here the method that gives most consistent results for me. But if you’re interested in trying some other way, by all means experiment. Bendy Straw Shrimp Tutorial. Hello Class!
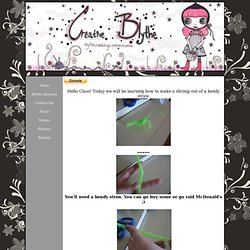
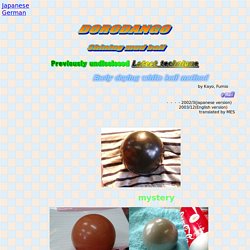
Today we will be learning how to make a shrimp out of a bendy straw. You'll need a bendy straw. You can go buy some or go raid McDonald's ;) Cut straight up the straw. You need to cut the straw so there are three pieces. Fold the skinniest piece Start out with the folded piece on top and take one of the other pieces and wrap it under the folded piece Pull the wrapped piece over and through Pull tight. Turn it around(If the bendy side is facing left turn it to the right) and do the same with the other piece. Turn back to the other side piece and pull it up. Dorodango. Japanese German by Kayo, Fumio ・・・・2002/3(Japanese version) 2003/12(English version) translated by MES.
Welcome to Wrapped Rocks Jewelry - Kool Aid dyes. * Wear rubber gloves.

DIY Sweat-sacoche diy-laptop-sweat – the Trendy Girl. DIY Shibori. Today marks HonestlyWTF’s four year anniversary.

Four years! To celebrate, we’re revisiting the very first tutorial we ever featured on the site: shibori tie dye. Lauren and I first discovered shibori after discovering an old photo on the web. The idea of recreating an ancient Japanese dyeing technique inspired us to spend an entire weekend experimenting with our favorite deep blue, indigo. After dyeing just about every white article of clothing in sight, our blue stained fingers excitedly uploaded the tutorial – we couldn’t wait to share it with our 30 readers. DIY Gold Painted Jeans. Chloé’s Fall 2010 gold embroidered, part mariachi-part cowboy denim pants were our inspiration for this week’s DIY.

Such elaborate embroidering is beyond our skill set, so we figured stenciling a beautiful pattern using gold fabric paint would be a more feasible interpretation. Who knew paper doilies made the perfect stencil? Lightly spray the doilies with the adhesive and press down firmly on the jeans. We overlapped the doilies and stopped at three but there really isn’t a right or wrong way to creating your own pattern. Gently dab paint into the negative spaces of the doily, making sure not to overload the paintbrush. (top image here and here, rest of images by Honestly…WTF)
DIY Bleach Tie Dye. Last summer, we were obsessed with shibori indigo tie dying.

No, really . . . we just about dyed anything white in sight. So when Free People asked us to include a DIY in their guest blogger series, we knew a new tie dye project was absolutely in order. And as the weather is beginning to warm up, what better time than now to start experimenting with reverse tie dye using bleach! Black tees and tops: watch out! To make a grid-like pattern, fold the shirt like an accordion and bind it between two pieces of wood or other flat shaped objects. Honestly DIY. DIY Découpage Floral Bag. When H&M asked us to DIY a boho-inspired item for their summer issue, découpage was the first thing that came to mind.
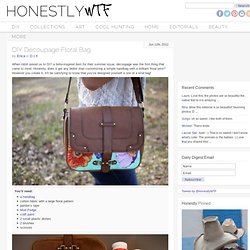
Honestly, does it get any better than customizing a simple handbag with a brilliant floral print? However you create it, it’ll be satisfying to know that you’ve designed yourself a one of a kind bag! You’ll need:a handbagcotton fabric with a large floral patternpainter’s tapeMod Podgecraft paint2 small plastic dishes2 brushesscissors Start by taping off the edges and hardware of the handbag. Squeeze a dollop of colored craft paint into a small disposable container. Allow the first layer to dry completely. While the paint dries, carefully cut out a handful of flowers from the fabric. Arrange them onto the painted section of the bag. Remove the painter’s tape when the Mod Podge has dried clear and your floral handbag is complete!