
Top 10 awesome pockets (and a few tutorials) - Behind the Hedgerow. Maybe it’s because I’m a mom and I have to make things functional as well as beautiful, but I can hardly sew a garment now that doesn’t have a pocket.
It’s the first thing the kids look for when they try something on and it’s the first thing to drive me crazy if it’s missing. (I once *naively* bought a winter coat with no pockets!! Who would design such an evil garment of clothing?!). Part 3: Adding Structure to a Tote Bag – The Daily Sew. Up to this point the tote bag is flat.

I do own a few totes that are flat and they’re fine, they just don’t hold much. This tote bag is meant to hold your lunch, your kindle, your small purse, a bottle of water, and of course, your sewing kit (just kidding). In order to hold that much we got to add some structure; a bottom and some sides. Take the side seam and lay it open and flat so it is center with fabric on both sides of it and the bottom of the bag under it. Line up the side seam to lay on top of the bottom seam, if you have a center bottom seam.
When you “open up” the side seam and lay it on top of the center of the bottom (seam or crease) a point will form and your bag forms a triangle on this side. Lay your ruler across the mark you just made and perpendicular to the side seam. For any flat bag, even one you already own, his technique will add some dimension. This is how sewing on the right side will look. So, back to the beginning. Stitch across on the right side. La Sewista!: Tutorials. The tutorial list on La Sewista just seems to be growing and growing and much deserving of some organization!
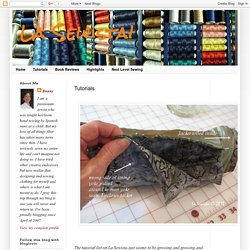
I've established these categories to hopefully make the tutes easier to find.Hem treatmentsBindings and PipingsOther good sewing stuff including tailoring, care of fabrics and moreHeirloom TechniquesOrganizationFittingMore Sewing Odds and Ends These tutorials are what has worked for me. I don't claim to be an expert. On the blog I show how I accomplish various sewing tasks and if they have worked out well enough I will put them in the "Tutorial" page to share. In my opinion there are two cardinal rules to all sewing. Some techniques have been learned from sewists far more skilled than I but in those cases credit has been clearly given and I thank these individuals for there generosity in teaching us all how to sew a bit better and easier.
Hem Treatments The Kenneth King HemBunny's Sheer HemFaux Piped HemBaby HemsMadeira Hems Bindings and Pipings Other great sewing "stuff" Fitting. Learn how to make continuous bias tape. I’ve had some questions about how to create the continuous bias tape for the piping I mentioned in my last post.
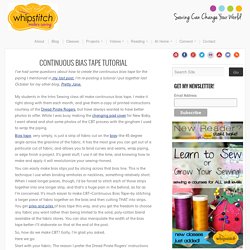
I’m re-posting a tutorial I put together last October for my other blog, Pretty Jane. My students in the Intro Sewing class all make continuous bias tape. I make it right along with them each month, and give them a copy of printed instructions courtesy of the Dread Pirate Rogers, but have always wanted to have better photos to offer. While I was busy making the changing pad cover for New Baby, I went ahead and shot some photos of the CBT process with the gingham I used to wrap the piping. You can easily make bias stips just by slicing across that bias line. So, how do we make CBT? Start with your fabric. Cut off a length of your fabric. Trim off the selvedges of your fabric. The Dread Pirate Rodgers Continous Bias Page. Explanation, directions and picturesby Shelley Rodgers, Walnut Creek, CA Email: pirate_sr@hotmail.com A PDF file of this entire webpage is here.
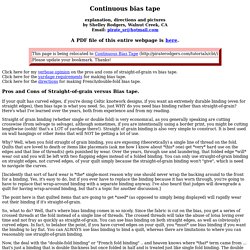
Click here for my verbose opinion on the pros and cons of straight-of-grain vs bias tape. Click here for the yardage requirements for making bias tape. Click here for the directions for making French/double-fold bias tape. Pros and Cons of Straight-of-grain versus Bias tape. If your quilt has curved edges, if you're doing Celtic knotwork designs, if you want an extremely durable binding (even for straight edges), then bias tape is what you need. Straight of grain binding (whether single or double fold) is very economical, as you generally speaking are cutting crosswise (from selvage to selvage), although sometimes, if you are intentionally using a border print, you might be cutting lengthwise (oohh! Why? [Incidently that sort of hard wear is *the* single-most reason why one should never wrap the backing around to the front for a binding. 1. 2. 3. How to Trace Sewing Patterns. I distinctly recall my first purchase of a Burda World of Fashion magazine (which by the way, is now BurdaStyle magazine).

I remember falling absolutely, insanely in love with a dress (that I have yet to make) on the front cover of the magazine and purchasing it up real quick like. I got the magazine home and started flipping through the endless pages of photos of all the patterns in the mag and thinking, “Gosh, this is amazing! All these patterns in one magazine.”
Maxi dress. Sewing supplies. Bubble skirt. Peasant dress.