

Follow the Trend With Colorblocked Nails! Why not try it out on your nails instead?
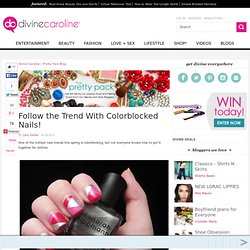
You can keep it simple within the same color family or go bold and crazy—whatever suits your mood! Step 1: Get Your Supplies Together To start, make sure you have all of your supplies handy. For this manicure, you will need three different nail polishes (make sure that at least two of them are thick enough that they can cover the base color), Scotch tape, and a fast-dry topcoat like Seche Vite.
For this manicure, I used two colors from the new Minnie Mouse Collection by OPI, If You Moust You Moust and The Color of Minnie, along with my favorite silver nail polish, Stardust by Deborah Lippmann. Step 2: Paint a Base Color Start with your favorite basecoat and paint your nails the base color. Step 3: Start Taping Next, pull off a small piece of Scotch tape (you won’t need more than an inch at a time) and put it against your hand and pull it off several times until most of the stickiness is gone.
A Twist on the Ombre or Gradation Manicure. Tips:*Have your nails prepped with base coat applied before beginning.
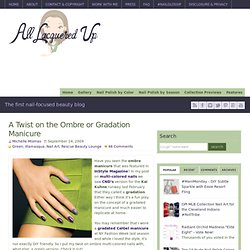
*Apply the polish as soon as it is mixed. Exposure to air will cause it to thicken quickly and dry shortly after. *Mix the lightest color first and apply immediately before moving on. *Clean your brush with remover between colors to avoid streaks from previously mixed polishes. *Regarding my formulas below, I remove the brush from the bottle without wiping it against the sides and the amount that drips off equals one drop. Note: Because this is a demo I only mixed colors for my middle and ring fingers and left my thumb out. Ring finger mix: Start with 7 drops of Milf and add 1 drop of Orbis Non Suficit. Middle finger mix: Use an equal amount of both lacquers. 4 drops each of Milf and Orbis Non Suficit. The Finished Result! Newsprint Manicure. I’ve never been one that has had long, beautiful, natural nails.
Before children I would indulge in acrylic nails, but since children I haven’t even done that. I found that it was too easy to accidentally scratch the children during normal daily activities such as changing diapers and dressing them, so for the last seven years or so, I’ve had to deal with ugly, brittle nails. But recently, there have been a turn of events and some how some way, my nails are miraculously growing strong and healthy! I’m not sure what has happened to promote this change, but I’m absolutely loving it and not complainin’ one bit!
While stumbling one evening, I found this tutorial for a unique Newsprint Manicure and I knew I had to give it a try. Before you get to paintin’, you should cut your newspaper strips so they are ready as soon as your nails dry. Let your nails dry completely. Once you’ve done all your nails, apply a top coat to seal and add a nice shine! So, what do you think? It's easy to share! Mermaid Nails. Share this image Share It Pin It For our trip to Costa Rica, I wanted fun nails that had an almost tropical vibe.
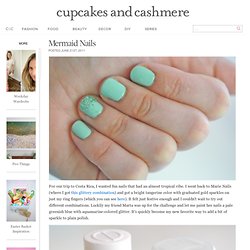
I went back to Marie Nails (where I got this glittery combination) and got a bright tangerine color with graduated gold sparkles on just my ring fingers (which you can see here). It felt just festive enough and I couldn't wait to try out different combinations. Share this image {Essie's Mint Candy Apple & Martha Stewart's Aquamarine Glitter} {Paint two coats of the nail polish} {Add top coat along the bottom half of the nail} Share this image {Dip a separate brush into top coat and then into the glitter} {Apply glitter to the bottom half of your nail} Pedicure Tips - The Do-it-Yourself Pedicure. My nails!!!! :) 949 440 137 723 555 848 1103 1539 955 147 320 171 790 587 852 825 798 421 1009 233 207 642 411 663 404 433 407 1497 280 354 319 894 129 119 728 166 157 463 63 582 286 462 349 139 2078 1629.
Get Yo’ Nails Did. Okay, so we’re only three weeks in to this whole thing and I’m already showing you a tame look after I totally promised some of you that I’d do a newsprint nail tutorial this week.
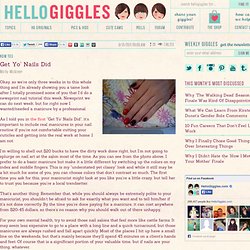
Newsprint we can do next week, but for right now I wanted/needed a manicure by a professional. As I told you in the first “Get Yo’ Nails Did”, it’s important to include real manicures in your nail routine if you’re not comfortable cutting your cuticles and getting into the real work at home. I am not. I’m willing to shell out $20 bucks to have the dirty work done right, but I’m not going to splurge on nail art at the salon most of the time. As you can see from the photo above, I prefer to do a basic manicure but make it a little different by switching up the colors on my index and middle fingers. That’s another thing: Remember that, while you should always be extremely polite to your manicurist, you shouldn’t be afraid to ask for exactly what you want and to tell him/her if it’s not done correctly.