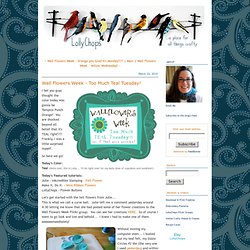

Wall Flowers. I bet you guys thought the color today was gonna be Tampico Punch Orange!

You are shocked beyond all belief that it's TEAL right!?!? Frankly, I was a little surprised myself. So here we go! Today's Color: Teal (Hello teal, this is Lolly... I'll be right over for my daily dose of cupcakes and sunshine!) Today's Featured tutorials:Julie - Inkcredible Stamping - Felt FlowerMake It. Let's get started with the felt flowers from Julie...This is what we call a curve ball. Without moving my computer even... If you don't have a Sizzix or this particular die... the size of the circles you need are as follows: 2 inch, 1.5 inch and a 1 inch. 5 of each one. As my finishing center, I cut a 1 inch circle, beaded around the outside of it and glued two buttons (one on top of the other)... and KABOOM! Helloooo Dolly! SighI love it.Just make one flower. So for the next tutorial we are going to do quick and easy wire ribbon flowers!
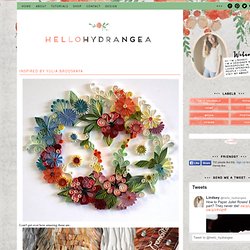
You roll up the gathered side and sew as you go... There ya have it! P.S. What to do with plastic animals. Quiling. I can't get over how amazing these are.

I wouldn't be surprised if Yulia invented quilling. She is a 28 year old artist from Moscow who creates beautiful designs from vertical pieces of thin paper and her website is full of inspiration in color, line, shadow and technique. You don't have to be a fellow quiller to wish you were like this great lady. Even though her pieces would be amazing if they were drawn, it was the fact that they are 3d that caught my attention. I imagine one of her expert pieces would take hours, which I do not have... When my husband and I were engaged, I bought wooden letters to spell out 'save the date' and covered them with different patterned paper. (I couldn't resist showing our cute picture) The letters were already covered (I know, I didn't post a diy... I picked out 4 colors of paper that went with the colors in the pattern and had them cut into 1/2" strips. In hindsight, I would choose a letter that had a meaning.
I only have an h. Tutorial: Quilled Monogram Letter. If you haven't checked out the work of Yulia Brodskaya, which I first saw on Cake Wrecks, click this link NOW.

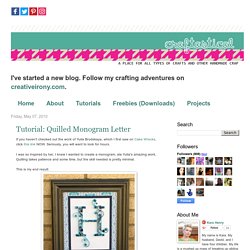
Seriously, you will want to look for hours. I was so inspired by her, I knew I wanted to create a monogram, ala Yulia's amazing work. Quilling takes patience and some time, but the skill needed is pretty minimal. This is my end result: I'm thrilled with it. Ok, supplies needed: Frame Colored Paper (I used scrapbook paper because it's what I had on hand, but quilling actually works much better with non-textured paper) Print Out of Outline of Letter Craft Knife Mod Podge Scrapbook Paper Backing Medium Painter's Brush Step One: Print out an outline for your monogram. Step Two: Pick a color to go around your letter and cut out 1/4" strips of paper.
Step Three: Start measuring and folding your paper, using your print out as a guide. It's important to be completely accurate. Oh yeah, another tip. Once you've got the outline done, it will look something like this: Mine a bit more done: 5min - Arts and Crafts. Craftzine: DIY craft projects.
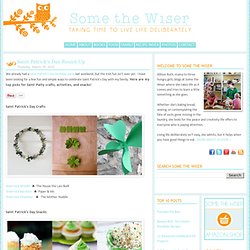
Quick bleach stencil. Saint Patrick's Day Crafts. We already had a Saint Patrick's Day birthday party last weekend, but the Irish fun isn't over yet.

I have been looking for a few fun and simple ways to celebrate Saint Patrick's Day with my family. Here are my top picks for Saint Patty crafts, activities, and snacks! Saint Patrick's Day Crafts Shamrock Wreath ♣ The House the Lars BuiltShamrock Barrette ♣ Paper & InkShamrock Pinwheel ♣ The Mother Huddle Saint Patrick's Day Snacks Key Lime Pie Cream ♣ Chocolate-Covered KatieMint Lime Cupcakes ♣ Some the WiserParty Popcorn ♣ My Baking Addiction, via She Wears Many Hats.