
Simple Bow Tie Top. I'm so happy about how this turned out.

This is one of those projects that's been on my to do list forever and now that I finally got it done, I wish I had done it a long time ago. This is such a simple project. One of the easiest I've ever made. Don't have much sewing experience? Give this a go, I promise it's a piece of cake and any mistakes made are hardly noticeable because of the gather. Materials: 5/6 + yard knit & 1/3 yard silk, cotton, etc. My knit is 60" wide and my dusty pink silk (faux) is 45" wide. Your fabric doesn't have to be exactly as wide as mine, just keep in mind that if you buy a fabric that is less wide you may need to purchase more to compensate.
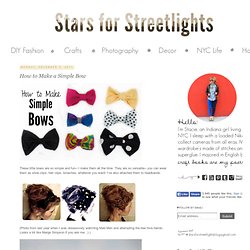
Cut two large squares to the dimensions of 30" x 30" If you bought 5/6 yd of 60" fabric all you have to do is cut along the fold line. **Edit- 30" length gives you a long top. Make a casing at the top of each square. Sew down with a zig zag stitch (so it can stretch). Start working on your sash. Cut off extra fabric. How to Make a Simple Bow. These little bows are so simple and fun-- I make them all the time.

They are so versatile-- you can wear them as shoe clips, hair clips, broaches, whatever you want! I've also attached them to headbands. (Photo from last year when I was obsessively watching Mad Men and attempting the bee hive hairdo. Looks a bit like Marge Simpson if you ask me. ;) ) How to Make Simple Bows: Step 1: First you need to cut a rectangle of fabric with a little sliver of fabric to set off to the side. Step 2: Next you need to fold the fabric onto itself, lengthwise. Step 3: Now fold the fabric in the other way to to middle. Step 4: Stitch those bad boys together. Step 5: With a curling iron, straightener, or iron, press the sides of the little sliver of fabric together.
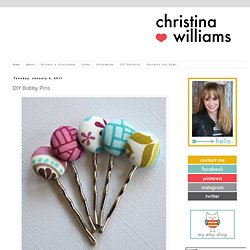
Step 6: All done! DIY Bobby Pins. This year, I'd really like to stay on top of birthday gifts.

It seems like I'm always making a last-minute run to the toy store on the way to the birthday party. Not this year. I'm going to stay ahead of the game by making birthday gifts ahead of time so they're ready to go well before the party arrives. I've given these bobby pins to several of my friends' daughters and they're always a hit. I've seen these selling online for as much as $2.50 each. Step 2: Cut circles of fabric to fit the button form. Step 3: Cover the buttons according to package directions. Step 4: Using needle-nose pliers, gently remove the shanks from the buttons. Step 5: Use a small amount of glue to to adhere the buttons to the bobby pins. (Tip: The glue expands as it dries, so take it easy on the glue.)
Hair Pin. Yet another DIY!

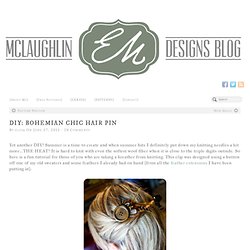
Summer is a time to create and when summer hits I definitely put down my knitting needles a bit more…THE HEAT! It is hard to knit with even the softest wool fiber when it is close to the triple digits outside. So here is a fun tutorial for those of you who are taking a breather from knitting. This clip was designed using a button off one of my old sweaters and some feathers I already had on hand (from all the feather extensions I have been putting in).
If you purchased feathers for feather extensions and you have some left this is a great project to use them up on. Headband. I have seen so many great tutorials about fusing plastic bags together, and making a tote bag out of recycled plastic is way up there on my massively long crafting to-do list.

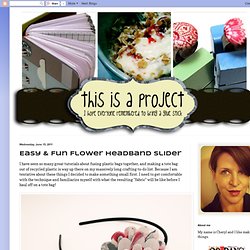
Because I am tentative about these things I decided to make something small first. I need to get comfortable with the technique and familiarize myself with what the resulting "fabric" will be like before I haul off on a tote bag! So I made a little flower, which turned into a headband slider, which I really like. It's soft and flexible and up close you can't tell at all that it is from a grocery bag. In person the pattern looks abstract. I followed this tutorial to fuse the bags together, then I used a couple of different Sizzix dies to punch the flowers.