
Make a Set of Cam Clamps. Make a Set of Cam Clamps Photos by Carl Duguay Illustrations by Len Churchill The traditional clamp for luthiers, cam clamps are ideal for holding things in place, particularly where you don’t need to apply a lot of clamping pressure. I find they are much quicker to adjust than bar or fast-acting clamps. They are very effective when gluing up narrow stock, mouldings, edge trim, and small parts, and they excel at holding jigs and fixtures in place. I also like that their padded jaws don’t mar stock. Drilling Fixture – If you’re making more than one cam clamp, a drilling fixture is strongly recommended, as it speeds production and increases accuracy. Cut the end slots I cut the slots on the back end of the jaws on the table saw, using a 1/8" blade to match the thickness of the aluminum bar stock.
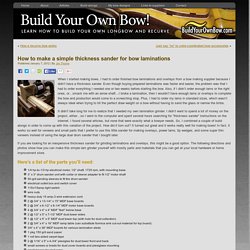
Safe Sawing – A simple piece of plywood, with two stop blocks fixed to its face that capture the jaw, is all that’s needed. Related Articles Make a Set of Cam Clamps Related Articles. How to make a simple thickness sander for bow laminations. When I started making bows, I had to order finished bow laminations and overlays from a bow making supplier because I didn’t have a thickness sander.
Even though buying prepared laminations was faster and easier, the problem was that I had to order everything I needed one or two weeks before starting the bow. Also, if I didn’t order enough lams or the right ones, or…smack me with an arrow shaft…I broke a lamination, then I wouldn’t have enough lams or overlays to complete the bow and production would come to a screeching stop. Plus, I had to order my lams in standard sizes, which wasn’t always ideal when trying to hit the perfect draw weight on a bow without having to sand the glass or narrow the limbs. Pantorouter Plans. REGRUESADORA CASERA. Rob Cosman's Hinge Box. Como hacer sargentos de madera. How to make wooden bar clamps. Hand Cut Dovetails, a different approach! How to make Inlay Dovetails.
Wooden Bar Clamps. Shop-made clamps that deliver versatility and performance. Parts of an end screw vise. PWM Shop Blog – Popular Woodworking Magazine. Inventor and engineer Burton “Burt” Weinstein died on August 9, we learned in a press release from General Tools & Instruments.
He was a long-time consultant for the company, to whom he sold his business, Simp’l Products, in 2006, with plans to retire. But retirement didn’t work for Burt, so he remained a consultant for … Read more The post Inventor Burton ‘Burt’ Weinstein, 87 appeared first on Popular Woodworking Magazine. In the October 2013 issue of Popular Woodworking Magazine, you’ll find my Woodworking Essentials article, “The Mighty Compass.” In the article I show a bunch of things you can do with a compass to create polygons and divide lines and angles. The post Compass Layout Tricks from October 2013 Issue appeared first on Popular Woodworking Magazine. Throughout the years I’ve been here at Popular Woodworking Magazine, there are only two woodworking questions that find their way into my inbox on a regular basis.
Most people start a new job and have only one first week. Wood Tools. Dovetail joints on the bandsaw. When you read a lot of "fine woodworking" style magazines, sometimes it seems woodworking is all about the hand cut dovetails.
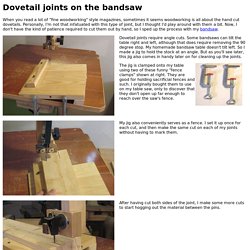
Personally, I'm not that infatuated with this type of joint, but I thought I'd play around with them a bit. Now, I don't have the kind of patience required to cut them out by hand, so I sped up the process with my bandsaw. Dovetail joints require angle cuts. Some bandsaws can tilt the table right and left, although that does require removing the 90 degree stop. My homemade bandsaw table doesn't tilt left. The jig is clamped onto my table using two of these funny "fence clamps" shown at right. My jig also conveniently serves as a fence. After having cut both sides of the joint, I make some more cuts to start hogging out the material between the pins. I make a turn as tight as the blade allows to start cutting out the material between the fingers.
I have to work from both sides. Here's my pins cut. Now to transfer my marks onto the mating pieces. Checking the fit. Laboutiquedelluthier. PWM Shop Blog – Popular Woodworking Magazine.