

Wall-E Art. How to Marbleize Paper and Cards - Introduction - MarthaStewart.com. Immediately after removing the paper, place it in a pan, and pour water over it.
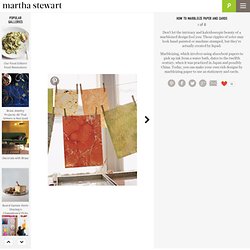
Hang paper to dry, marbleized side up. Do not touch the paper until it is dry (typically within 2 hours, depending on humidity levels). Decide whether to keep or discard your solution (it can be used several times). To change paint colors, lay strips of newsprint across the solution's surface, then remove; repeat with clean strips until the solution is clear. You can store the solution in an airtight jar for about a week. Picture Frame Calendar. Happy Monday evening!
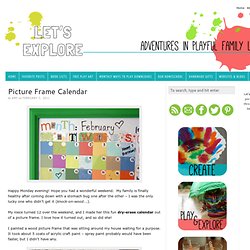
Hope you had a wonderful weekend. My family is finally healthy after coming down with a stomach bug one after the other – I was the only lucky one who didn’t get it (knock-on-wood….). My niece turned 12 over the weekend, and I made her this fun dry-erase calendar out of a picture frame. I love how it turned out, and so did she! I painted a wood picture frame that was sitting around my house waiting for a purpose. I covered the cardboard picture frame back with white easel paper. When it was finished, I just popped it into the frame and tied on a pack of dry erase markers (clickable – no lids!)
How to Make a Snowstorm. November 25th, 2013 Email 355 users recommend Say goodbye to hand-cut snowflakes taped to windows.
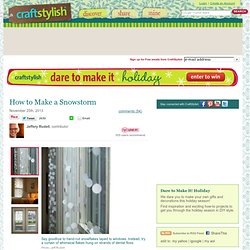
Instead, try a curtain of whimsical flakes hung on strands of dental floss. Jeff Rudell A guestroom plays host to a man-made snowstorm. Hung like beaded curtains in front of windows, these snowflakes make a subtle, modern, and whimsical addition to any seasonal room décor. Photo: Jeff Rudell A friend of mine visiting from the tropics wanted, more than anything, to see snow. So, in contrast to my chandelier post, I offer a low-skill, high-impact project sure to surprise your guests (and your family) and help put you in the spirit of the season (regardless of whether the weather is cooperating with you or not).
View 4 member project galleries posted in: Stay connected with CraftStylish We dare you to make your own gifts and decorations this holiday season! Tie-dye Tissue Paper. This is a great way to make your own gift wrapping paper.
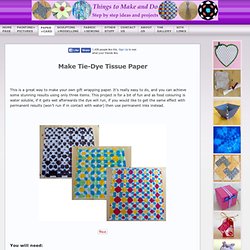
It’s really easy to do, and you can achieve some stunning results using only three items. This project is for a bit of fun and as food colouring is water soluble, if it gets wet afterwards the dye will run, if you would like to get the same effect with permanent results (won’t run if in contact with water) then use permanent inks instead. You will need: White tissue paper Food colourings or permanent inks Small dishes (yoghurt pots are ideal) Rubber band What to do 1. 2. 3. 4. 5. 6. 7.
Back to the Paper and Card projects menu... Tutorial: Lace Hearts. Happy Monday!
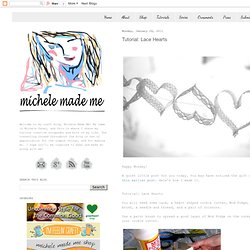
A quiet little post for you today. You may have noticed the gift ornament in this earlier post. Here's how I made it. Tutorial: Lace Hearts You will need some lace, a heart shaped cookie cutter, Mod Podge, a paint brush, a needle and thread, and a pair of scissors. Use a paint brush to spread a good layer of Mod Podge on the outer side of your cookie cutter. Cover the mod-podged cookie cutter with lace as follows. Slather on a few more coats of Mod Podge.
And that, as they say, was that! Note: I think fabric stiffener would be a good alternative to Mod Podge to stiffen the lace and make these hearts. Have yourself a heart-shaped Monday, and I will see you again soon! Project doily: star decorations « the happy home. Tutorial: How to Make a Pomander Flower Ball.