
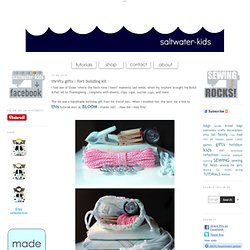
Mozilla Firefox Start Page. The "Times" They Are A-Changing: How to Make a Basket from a Newspaper. May 3rd, 2012 Email 1339 users recommend. {Teacher Appreciation} Day 1…Note Holder. How to Recycle Yarn from a Thrift-Store Sweater. October 4th, 2008 Email 62 users recommend When you're done ripping, you'll have hundreds of yards of brand-new yarn for knitting!

Tiny Polaroid Magnets. Hi there!
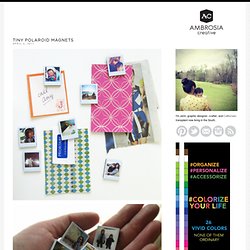
It’s felt like forever since I’ve last blogged, and has felt like an eternity since I’ve done anything crafty and nifty. Since my morning sickness has gone into full speed (yes, we’re expecting our third this fall!) I haven’t felt like myself. But nothing like inspiration to wake one out of a reverie — or nightmare, in my constantly sick state. I came across these DIY Pantone chip magnets on How About Orange and wanted to do something similar. How to make puffy paint from One Crafty Mumma.
The craftiest mum out there, Melissa, from One Crafty Mumma is sharing her amazing recipe for puffy paint!
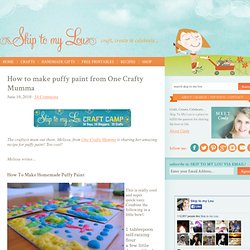
Too cool! Melissa writes… How To Make Homemade Puffy Paint This is really cool and super quick/easy. Combine the following in a little bowl: 1 tablespoon self-raising floura few little drops of food colouring1 tablespoon salt. Sewing tutorial. I had one of those "where the heck have I been" moments last week, when my nephew brought his Build-A-Fort kit to Thanksgiving - complete with sheets, clips, rope, suction cups, and more.
How to make gift bags from newspaper. When I bought something at a store recently, the clerk handed me my purchase in a bag made from a newspaper.
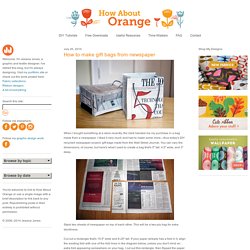
I liked it very much and had to make some more—thus today's DIY recycled newspaper project: gift bags made from the Wall Street Journal. You can vary the dimensions, of course, but here's what I used to create a bag that's 5" tall, 4.5" wide, and 3" deep. Stack two sheets of newspaper on top of each other. This will be a two-ply bag for extra sturdiness. Cut out a rectangle that's 15.5" wide and 8.25" tall. Wacky Watercolors. Wacky Watercolors Here's a recipe to make your own watercolor paints.

These vivid, non-toxic paints can be used wet or allowed to dry and used like regular watercolor paints. We had great fun making and using them! Materials: 3 Tbs. baking soda 3 Tbs. corn starch 3 Tbs. white vinegar 1-1/2 tsp. light corn syrup food coloring Steps: 1. 2. 3. 4. Tips: Use paste food coloring if you want especially vivid colors and lots of color choices. Take the opportunity to teach little ones about color mixing. The Cute Side of the Force. Art, Featured — By BB Admin on July 28, 2011 12:00 am A short time ago on a website not so far away… It is a period of creative chaos.
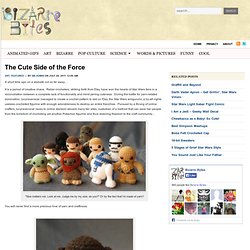
Rebel crocheters, striking forth from Etsy, have won the hearts of Star Wars fans in a reconciliation between a complete lack of functionality and mind-jarring cuteness. During the battle for yarn-related domination, lucyravenscar managed to create a crochet pattern to sell on Etsy, the Star Wars amigurumi, a by-all-rights useless crocheted figurine with enough adorableness to destroy an entire franchise. Pursued by a throng of online crafters, lucyravenscar races to online stardom aboard many fan sites, custodian of a method that can save her people from the boredom of crocheting yet another Pokemon figurine and thus restoring freedom to the craft community… "Size matters not.
You will never find a more precious hive of yarn and craftiness. "The more you tighten your grip, Internet, the more craft ideas will slip through your fingers. " Kool-Aid Dyed Playsilks – Tried and True. A couple months ago I came upon a tutorial on The Artful Parent for Kool-Aid Dyed Playsilks.
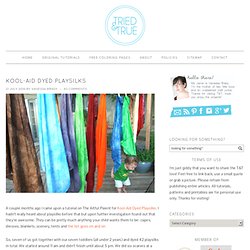
I hadn’t really heard about playsilks before that but upon further investigation found out that they’re awesome. They can be pretty much anything your child wants them to be: capes, dresses, blankets, scenery, tents and the list goes on and on. So, seven of us got together with our seven toddlers (all under 2 years) and dyed 42 playsilks in total. We started around 11 am and didn’t finish until about 5 pm. We did six scarves at a time, with the other mothers pitching in to watch the child of whoever was working on their playsilks. After we did the first batch of Kool-Aid packets, some of the mothers decided to get a bit creative with color combination and as a result we ended up with 14 different color at the end of the day.
Edit: Here are a few answers to some of the more popular questions posted in the comments. Camping Recipes - Camping never tasted so good! 2012 March « Craft Nectar. Just in time — this year’s April Fool’s prank I dunno about you but between the Supreme Court ruling on health care reform, tax season and the debate on copyright issues all over Facebook and the blogosphere, I’m in need of a little levity.

If you’re somewhat new to this blog, you may not realize that April Fool’s Day to our daughter ranks right […] Modern Quilts Illustrated Issue #2 ships next week We’re very excited about Issue #2 around here. We’re calling it “the Possibilities Issue” because their are lots of tips for customizing cutting (working with 1/4 yard cuts versus fat quarter), making alternate sizes, using several techniques and changing some elements in the quilts shown. Copyright infringement and being reasonable Many of you may have read about the dispute between Kate Spain and our publisher C&T. Repeat: Round One Tiny Dwellings And the winners are… Father’s Day project for Holidash. My latest project is up over at Holidash!

This time for Father’s Day, it’s a car kit full of useful things for your dad (or your favorite father) to keep in his glovebox. I’ve included things like a flashlight, pen, sunscreen, digital tire gauge, tissues, bandages, and disinfecting wipes. TUTORIALS.