
Brother Sewing Machine Parts, Brother Sewing Parts, Brother Serger Parts - Sewing Parts Online. Rust Dyeing Fabric. Article and photos by Maggie Howe My mom and I own a small herb farm in central Iowa.

We purchased it years ago. As with many older farms, it came with outbuildings full of old junk, and an ancient, abandoned garbage burning pile. We’ve spent years gradually cleaning up the farm, and over the years unearthed many rusty objects such as frying pans, weathervanes, and what seems like endless buckets of nails, wire, tools and bolts. I used to view these rusty items as a nuisance, but now that I’ve discovered the fun art and craft of rust dyeing, I enjoy finding these rusty “treasures.” What Is Rust Dyeing? I’ve dyed: Cotton quilting fabric Silk scarves and shawls Flannel fabric for sewing I’ve even dyed silk ties and shirts to give as gifts – all using rusty nails, bolts, sprockets, hinges, wire and other rusty objects found our two-acre farm. What Is Rust … and What Will Rust? Rust will permanently dye a variety of fabrics, and can even dye other materials such as leather and paper. Batik Instructions.
About Batik Batik is a “resist” process for making designs on fabric.

The artist uses wax to prevent dye from penetrating the cloth, leaving “blank” areas in the dyed fabric. The process, wax resist then dye, can be repeated over and over to create complex multicolored designs. Batik is especially unique due to the way certain wax blends will “crackle” during handling, allowing lines of color to come through on resisted areas.
Batik can be done with many types of dye & wax on cotton, silk and other natural fabrics. Batik masters employ a process of repeated waxing and tub dyeing to achieve their final result. Basic Wax and Tub Dye Method (Dyeing something a solid color is also known as Tub Dyeing. This method uses repeated layers of wax and dye applied to the fabric, yielding an overlapping color design. Step 1: Pre-wash your fabric to remove any impurities that might interfere with dyeing. Step 5: Start applying your wax with tools of your choice... Boil the wax out. Iron the wax out. DIY Shift Dress - Martha Stewart Crafts - StumbleUpon.
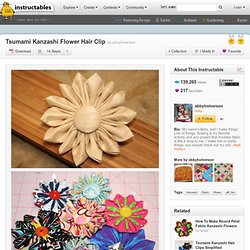
Learn how to screenprint your own t-shirts - StumbleUpon. Tsumami Kanzashi Flower Hair Clip. I have recently discovered these beautiful folded flowers, and I absolutely cannot stop making them.

Tsumami Kanzashi are traditional Japanese folded flowers, made from small squares of silk, that are typically worn by women as hair ornaments in traditional hairstyles. They seem really complicated and intricate, and they can certainly be that if you really want; but it completely doesn't need to be! I love to make them out of cotton prints that are fun and bright, in addition to scraps of silk and other light fabrics. These can be used in countless applications.
In this tutorial, I'm making one attached to a hair clip, but you could add them onto headbands, combs, brooches, necklaces... the list could go on. There are a few tutorials out there on the internet, but to find a good variety in petal shapes can certainly be difficult, you just have to keep looking, and just grab a square of fabric and just test stuff out.
Sewing Buttons to Knitted Garments Tutorial « « Fluffyland Craft & Sewing BlogFluffyland Craft & Sewing Blog. I’ve got a tiny, simple tutorial for you today.

I know the experienced seamstresses among you will say to yourselves, really? That’s tutorial-worthy? , and my reply is, sure. Because I’ve got a soft spot for you newbies out there. I was walking around Target yesterday, buying up clearance boys’ flannel shirts to which I’ll add a few darts and wear proudly. Suddenly I was hit with a revelation: what is it like to buy clothes when you can’t sew? So here’s a simple tutorial: how to stitch buttons to knitted garments. First, pick out a rather large needle. Pick out the spot where you want your button to go, and insert the needle between the knit loops of yarn. Pass your needle through your button, then go back into the knitted garment a few loops away from where you were before.
Now take your tail and your “active” length of thread and tie them in a reef knot or two. See?