
How to Install a Paver Patio. How to Lay the Foundation for a Patio or Walkway. Making a Mosquito Trap. To keep mosquitoes from ruining a picnic or camping trip, it is nice to have an enticing trap to lure them away from you.
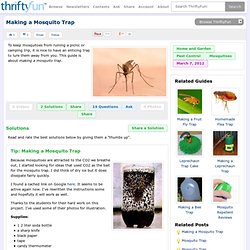
This guide is about making a mosquito trap. Solutions Read and rate the best solutions below by giving them a "thumbs up". Tip: Making a Mosquito Trap Because mosquitoes are attracted to the CO2 we breathe out, I started looking for ideas that used CO2 as the bait for the mosquito trap. I found a cached link on Google here. Thanks to the students for their hard work on this project. Supplies: 1 2 liter soda bottle a sharp knife black paper tape candy thermometer.
Headphone Wrapping. Garbage Can Rain Barrel. Mama With a Dash of DIY Drama: No-Sew Window Treatments (Tutorial) Good Ideas!! / Coat old toilet paper / paper towel rolls in peanut butter, roll in birdseed, and slip onto a tree branch to make easy little bird feeders! Label Decal Transfer Tutorial.
Some of you may remember, a little while back I posted a tutorial for DIY waterslide decals.

Among other things, I mentioned how awesome they are for creating custom embellishments without the need for any fancy-pants equipment. Yep, waterslide decal paper is a truly fab product, though as great as it is, there is one drawback – although it’s somewhat tough it’s not especially durable. So, whilst it’s perfect for ornamental purposes, it’s not ideal for more practical applications…until now that is! Magic decal coating paper is a product designed to be used in conjunction with standard decal paper to make the finished transfers super durable – yes, even dishwasher resistant! If you’re already familiar with magic decal coating paper then please excuse my tardy excitement, though for everyone else who is just getting to the party now too, feel free to start throwing the streamers! 1 Image to transfer. Use anything you like. 2 Printer. You can use either a laser or an inkjet printer. 6 Scissors.
Ceiling Storage Bins. WD-40: Uses. Recycled creamer bottles. How to Build Window Seat From Wall Cabinets. Determine the measurements of the window-seat area, and select cabinets of an appropriate size from a kitchen-supply store or home-improvement center.
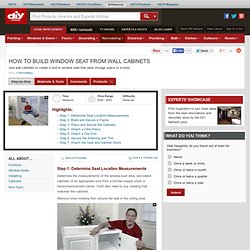
You'll also need to buy molding that matches the cabinets. Remove shoe molding from around the wall in the sitting area. Build a wooden frame pedestal from 2" by 4" lumber (Image 1). (For added height, use 2" by 6" lumber for the frame.) The frame should be the same width as the window-seat area but 2" or 3" less than the depth of the window seats to create a recess underneath the front section.
Lay the frame flat inside the seat area, and secure it to the wall with screws (Image 2). Remove the doors from the cabinets for easier handling. Using a bit narrower than the screws, drill pilot holes in the side frames of each cabinet, and secure them with wood screws. Center the cabinets between the two side walls (Image 2). Drill pilot holes through the bottom of the cabinets and into the base pedestal. Measure the area for the toe kick.