
Temperature Sensor + Arduino « DanielAndrade.net. Hello people, it’s been a while since I have posted projects on this website.
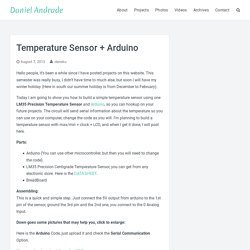
This semester was really busy, I didn’t have time to much else, but soon I will have my winter holiday (Here in south our summer holiday is from December to February). Today I am going to show you how to build a simple temperature sensor using one LM35 Precision Temperature Sensor and Arduino, so you can hookup on your future projects. The circuit will send serial information about the temperature so you can use on your computer, change the code as you will. I’m planning to build a temperature sensor with max/min + clock + LCD, and when I get it done, I will post here. Parts: Arduino (You can use other microcontroller, but then you will need to change the code).LM35 Precision Centigrade Temperature Sensor, you can get from any electronic store. Assembling: This is a quick and simple step. Down goes some pictures that may help you, click to enlarge: Humidity and Temperature Sensor. The Humidity and Temperature Sensor is an Arduino-compatible sensor board that carries an SHT21 digital humidity and temperature sensor from Sensirion.
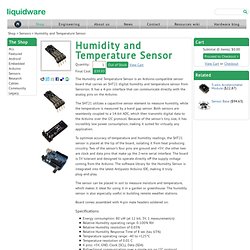
It has a 4-pin interface that can communicate directly with the analog pins on the Arduino. The SHT21 utilizes a capacitive sensor element to measure humidity, while the temperature is measured by a band gap sensor. Both sensors are seamlessly coupled to a 14-bit ADC, which then transmits digital data to the Arduino over the I2C protocol. Because of the sensor’s tiny size, it has incredibly low power consumption, making it suited for virtually any application. To optimize accuracy of temperature and humidity readings, the SHT21 sensor is placed at the tip of the board, isolating it from heat producing circuitry. The sensor can be placed in soil to measure moisture and temperature, which makes it ideal for using it in a garden or greenhouse. Board comes assembled with 4-pin male headers soldered on.
Specifications Applications. Open source garden automation project. The Brain The brain is where all the other modules come together.
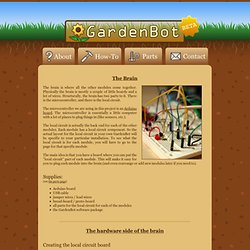
Physically the brain is mostly a couple of little boards and a lot of wires. Structurally, the brain has two parts to it. There is the microcontroller, and there is the local circuit. The microcontroller we are using in this project is an Arduino board. The local circuit is actually the back end for each of the other modules. The main idea is that you have a board where you can put the "local circuit" part of each module. Supplies: (see the parts page)Arduino boardUSB cablejumper wires / lead wiresbread-board / proto-boardall parts for the local circuit for each of the modulesthe GardenBot software package The hardware side of the brain Creating the local circuit board Here you will be creating a circuit board where you can mount the local circuit portion of each of the other modules.
Let's take a look at a potential setup with an Arduino board and a couple of breadboards. Isolated power supply option Moving to a proto-board. Blog » Blog Archive » GardenBot Is Monitoring Your Garden. GardenBot Is Monitoring Your Garden Davide Gomba — October 21st, 2010 Very interesting bottom-up product (but it’s not really a product, it’s more of an experience of nature-lovers and DIYers) do look after your garden: GardenBot is a garden monitoring system.

This means that you put sensors in your garden, and GardenBot will show you charts of the conditions in your garden — so you can see the world the way your plants see it. I did… er, I mean hi. Amazing story. via [gardenbot] Plantduino Greenhouse. UPDATE 7/9/11: The AC power fed relay has been replaced with a DC battery fed relay system as shown in step 10.

UPDATE: We have been selected as finalists in the microcontroller contest! Thank you for voting and rating. Thank you also for all the feedback on the safety of out relay system. We hope the new instructions are clear. We will be continually updating as we make progress on the new design. Hello Everyone! My name is Clover and I am in love with vascular plants and robots. This summer I wanted to combine my two loves of plant science and engineering. I have constructed an automated watering and temperature system. This is my first project using an Arduino so I am using wonderful articles from MAKE and Instructables as very helpful templates. Greenhouse. Humidity and Temperature Sensor.